


Doc XCAM190
NiteDevil Traditional Wide Dynamic
Email:
Last Revised: 03/011/2010
It is recommended that when you are first setting up the cameras that you use a short BNC-BNC cable to link the camera
directly to the monitor and to set it up at the same time. This allows you to both understand the camera and get the very
best out of this great product, as you will be able to adjust the camera whilst looking at the monitor screen. Obviously
whilst you are setting up the camera, it does need to be powered!
This camera has an RS485 terminal connection on the rear of the camera to allow the camera menu to be updated using
an RS485 keyboard or using the PTZ option in a DVR. You will need to use the direction keys, Zoom and Focus
controls to edit the menu. Alternatively you can change the menu settings using the menu control buttons on the rear of
the camera.
Precautions
Do not install the camera in extreme temperature conditions. Only use the camera where temperatures are between –20
degrees centigrade and +50 degrees centigrade.
Never install the camera in damp or humid conditions. This can affect image quality.
This camera requires stable lighting conditions to operate effectively.
Do not touch the front lens of the camera. Fingerprints can stain the lens glass.
The camera must not be placed directly facing the sun or strong light. This may damage the camera CCD.
Never expose the camera to rain or liquids. These will corrode the camera electronics.
Do not subject the camera to vibration as it may cause camera malfunctions.
Only use this camera in a housing if used externally.
FUNCTION MENU STRUCTURE
LENS
DC
MANUAL
EXPOSURE
SHUTTER
SENSE-UP
BRIGHTNESS
BLC / HSBLC
AGC
D-WDR
WHITE BAL
AWB
INDOOR
AWC- SET
OUTDOOR
MANUAL
ATW
DAY NIGHT
COLOUR
AUTO
EXT
B/W
3 DNR
ON
OFF
SPECIAL
CAM TITLE
PRIVACY
D-EFFECT
SYNC
RS485
LANGUAGE
MOTION
ADJUST
SHARPNESS
BLUE
RED
RESET
FACTORY
EXIT
Menu Settings
1. LENS
DC
2. EXPOSURE
3. WHITE BAL
AWB
4. DAY NIGHT
AUTO
5. 3DNR
ON
6. SPECIAL
7. ADJUST
8. RESET
9. EXIT
To display the OSD menu press the SET button.
Menu closes when no operation.
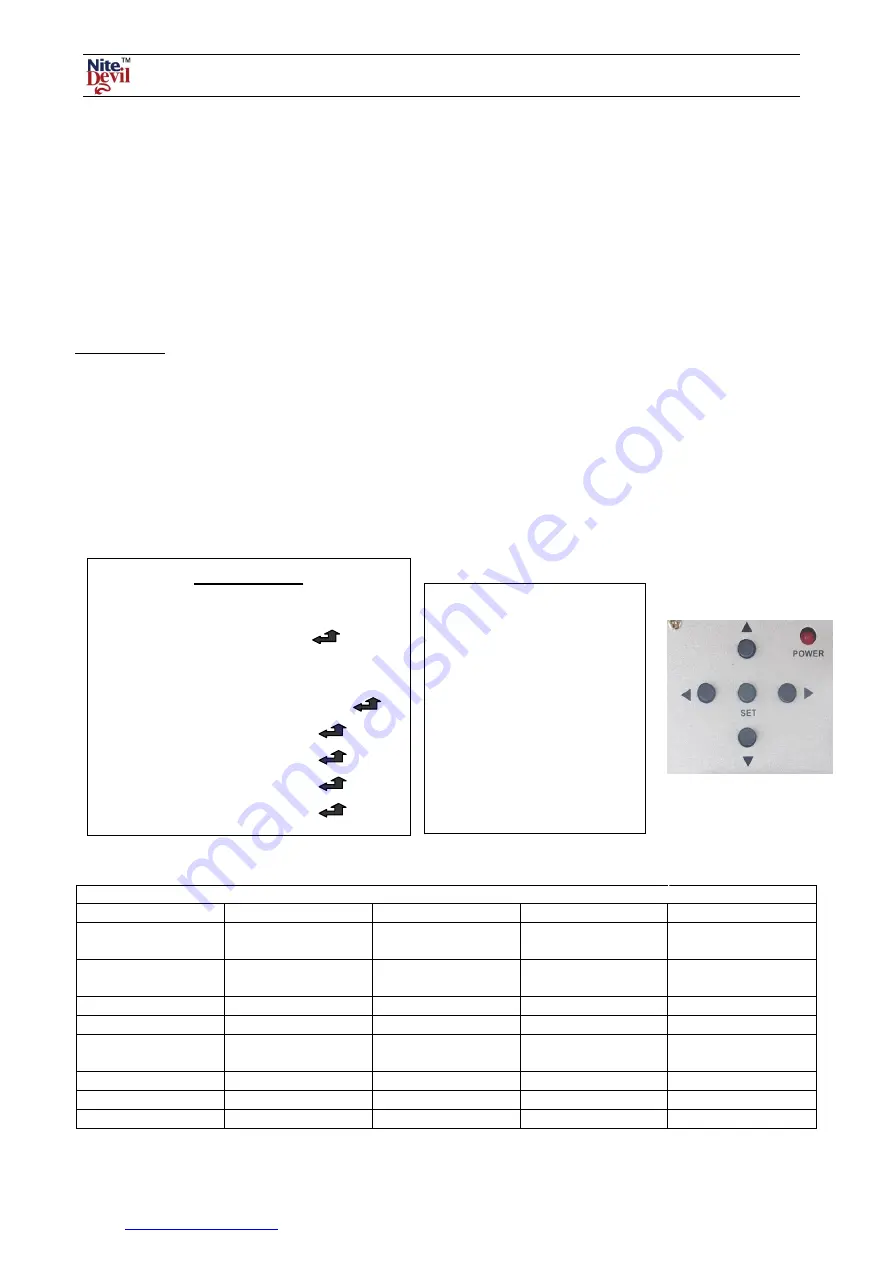
SET BUTTON
: Displays menu
on the screen. Press button down
to confirm status or after
changing a selected item.
UP/ DOWN BUTTON:
Used
to move cursor up and down to
select a menu item.
LEFT & RIGHT BUTTONS:
Moves cursor left and right or
change the value of a selected
item.


