nitedevil CAM190 Скачать руководство пользователя страница 10

  www.nitedevil.com

                          Doc XCAM190


NiteDevil Traditional Wide Dynamic

Email:

[email protected]

Last Revised: 03/011/2010

Note if using the Alien DVR then by selecting the PTZ option and clicking on ZOOM+ this will display the menu.
Use the up and down arrow keys to locate an option and use the right arrow key or ZOOM+ to select option.

SPECIAL

1.  CAM TITLE

OFF / ON

2.  D-EFFECT

3.  RS485

4.  MOTION

OFF

5.  PRIVACY

OFF

6.  SYNC

INT

7.  LANGUAGE

ENGLISH

8.  RETURN

MOTION

This option allows motion detection to be set

and to display MOTION DETECTION on the monitor.
An output on the camera allows a closed contact to be made
by using the M/D OUT and ground.

MOTION

AREA SELECT

AREA 1 ~ 4

AREA DISPLAY

ON / OFF

LEFT / RIGHT

__________  51

WIDTH

______ ____  42

TOP / BOTTOM

__________  38

HEIGHT

________ __  30

SENSITIVITY

_________ _  34

MOTION VIEW

OFF / ON

RETURN

END

MOTION

Motion can be detected in 1 – 4 areas. You can
select 1-4 areas in SENSITIVITY setting. To see
the MOTION DETECTION message displayed on
the monitor, MOTION VIEW must be set.

AREA SELECT    1 ~ 4

Select the area required.

AREA DISPLAY  ON / OFF

Determines whether to use the motion area selected in SENSITIVITY.

LEFT/RIGHT

Determines the vertical axis for area.

WIDTH

Adjusts the selected vertical area.

TOP/BOTTOM

Determines the horizontal axis for area.

HEIGHT

Adjusts the selected horizontal area.

SENSITIVITY

You can select up to 4 areas. The higher the sensitivity the smaller the change to initiate

                                motion detection.

MOTION VIEW

If you set this option to ON you can select an area colour and display MOTION

                                DETECTION on the monitor.

RETURN

Return to SPECIAL menu.

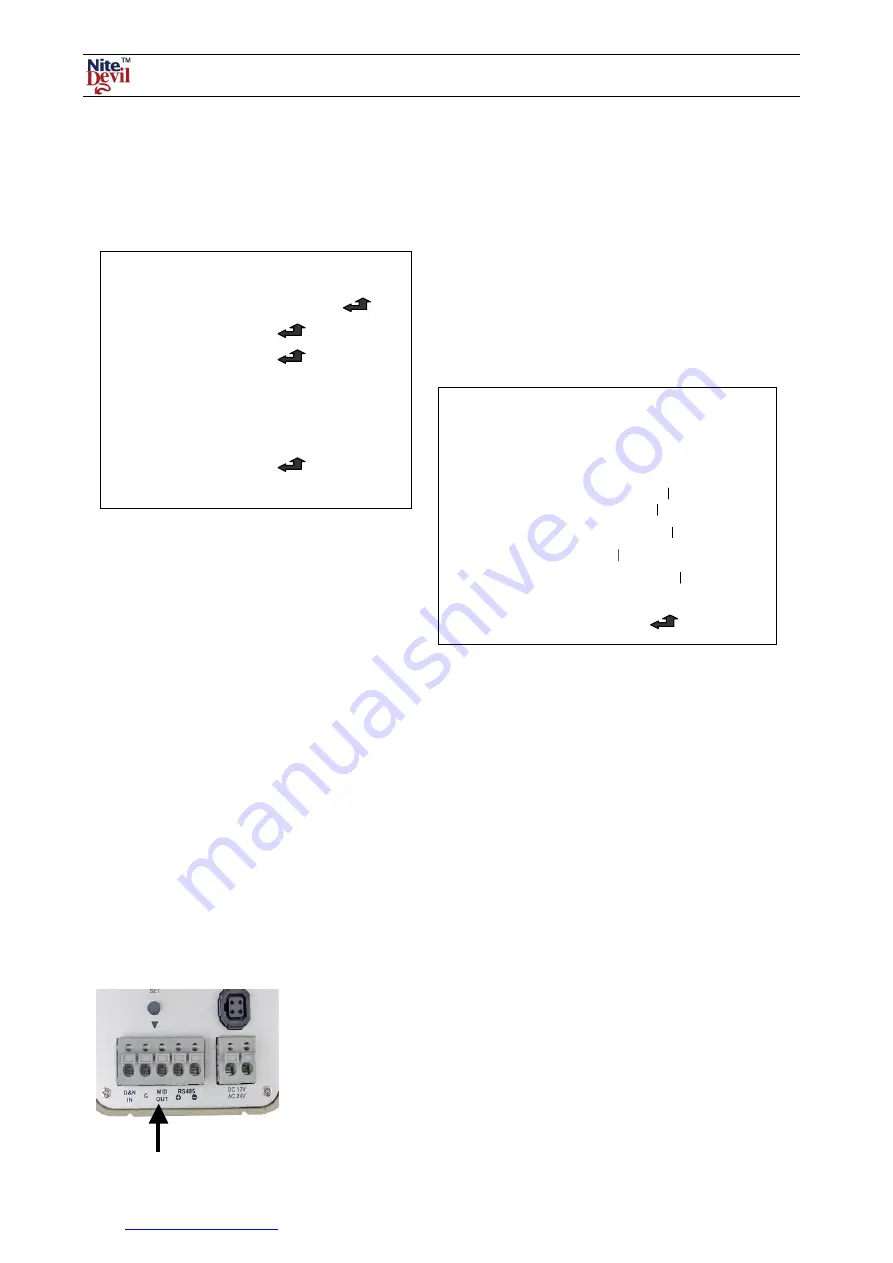
Use the M/D (Motion Detection) and G (Ground)
connection if you wish to use the motion alarm switch.

Содержание CAM190

Страница 1: ...ty The earthing arrangement of an intruder type alarm PSU may give rise to problematic earth loops and poor voltage regulation can give poor noisy image quality We offer no technical support or warran...

Страница 2: ...ttached to the camera It is important that this connector is wired correctly If you bought the lens from SystemQ and it s a direct drive lens this will be pre wired and you can simply plug the lens in...

Страница 3: ...the camera or you may damage one or the other device A C mount lens fitted on a CS mount camera may protrude too far into the camera and cause irreparable damage Setting Up an Auto Iris Direct Drive...

Страница 4: ...the camera in damp or humid conditions This can affect image quality This camera requires stable lighting conditions to operate effectively Do not touch the front lens of the camera Fingerprints can s...

Страница 5: ...a SENSE UP OFF AUTO x2 x4 x8 x16 x32 x64 x128 x256 When it is dark the camera automatically detects the light level and tries to compensate by maintaining a clear picture OFF The option is deactivated...

Страница 6: ...there is a bright light e g headlights on a car using the HSBLC menu may compensate for this condition so allowing you to view a car number plate that would otherwise be obliterated by the light level...

Страница 7: ...F when the AGC mode in the EXPOSURE menu is set to OFF When adjusting the noise reduction level in this mode the higher the setting the more the noise level will be reduced but the more likely ghostin...

Страница 8: ...o title is displayed on the monitor even if one is entered Move up and down buttons to select CAM TITLE and switch it ON Then press the SET button and move to the required character using the directio...

Страница 9: ...nu The RS485 option allows you to control these menu settings by connecting a CAT5 matched pair to the RS485 connections on the back of the camera and the other end of the cable to an RS485 keyboard c...

Страница 10: ..._________ 38 HEIGHT __________ 30 SENSITIVITY __________ 34 MOTION VIEW OFF ON RETURN END MOTION Motion can be detected in 1 4 areas You can select 1 4 areas in SENSITIVITY setting To see the MOTION D...

Страница 11: ...8 Select the area required AREA DISPLAY ON OFF Determines whether to use the area selected in AREA SELECT LEFT RIGHT Determines the vertical axis for area WIDTH Adjusts the selected vertical area TOP...

Страница 12: ...e the blue and red colour SHARPNESS This sets the sharpness by moving the direction keys to right or left Parameter ranges from 0 31 BLUE This sets the overall blue hue Parameter ranges from 0 100 RED...

Страница 13: ...al Zoom On Off 0x 32x Motion Detection On Off 4 zone selectable external closed contact Privacy Masking On Off 8 zone selectable 3DNR Digital Noise Reduction On Off Selectable Sens up Frame Integratio...

Отзывы: