background image

ACCESSORIES

Remote Cord MC-4
The Remote Cord MC-4 serves two purposes: it can be used
singly as a remote cord or in combination with other MC-4 cords
for simu Itaneous operation of multiple motor-driven cameras.
One end of the MC-4 features a plug for connection into the
camera's remote control socket while the other end has plus and
minus banana-type plugs.
For remote control operation, you can attach the banana plugs
to a triggering circuit of your own design. The cable can be
extended to any length, provided that circuit resistance does not
exceed 1 kQ. For longdistance operation, however, you will find
that Modulite orfadio control systems are more convenient.
For simultaneous operation, you can connect two or more mo-
tor-driven cameras in parallel using a circuit containing two or
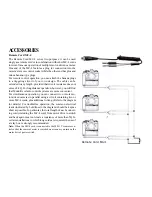
more MC-4 cords, plus additional wiring. (Refer to the diagram
for details.) For troublefree operation, the common electrical
leads (indicated by bold lines in the diagram) should be kept as
short as possible. In particular, the total length of each connect-
ing cord (including the MC-4 cord) from motor drive to switch
and back again must not create a resistance of more than 5Q. In
certain installations in which long cords are required, the use of
a relay box is strongly recommended.

Note: When the MC-4 cord is connected to the MD-1 2's remote con-
trol socket, the camera's meter is switched on as soon as you turn on the
motor drive's power switch.

Remote Cord MC-4

Содержание MD-12

Страница 1: ...Nikon Motor Drive MD 12 INSTRUCTION MANUAL ...

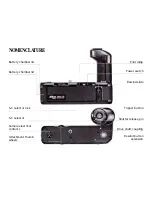
Страница 2: ...ber lid Battery chamber lid S C selector lock S C selector Camera electrical contacts Attachment thumb wheels Pilot lamp Power switch Rewind slide Tripper button Shutter release pin Drive shaft coupling Rewind button extension ...

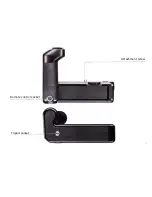
Страница 3: ...Attachment screw Remote control socket Tripod socket ...

Страница 4: ...r the Nikon FM and FE compact cameras the MD 12 was in fact a major feature in their design concept Consequently the only significant dif ference between operating these cameras with the motor drive attached as opposed to without it is that their operation is made considerably easier So rather than regarding your Motor Drive MD 12 unit as a special accessory for use only on rare occasions you shou...

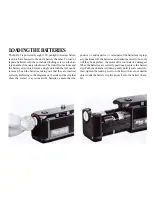
Страница 5: ...re inserted correctly Referring to the diagrams on the sides of the clip that show the correct vay to insert the batteries ensure that the positive and negative terminals of the batteries are prop erly positioned If the batteries are loaded incorrectly not only will they be depleted the motor drive could also be damaged When the batteries are correctly positioned replace the battery clip Push the ...

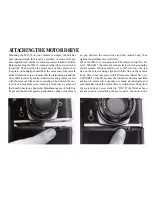
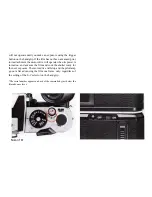
Страница 6: ... clockwise by means of the thumb wheels on either side Simultaneous use of both fore finger and thumb will speed up attachment Make sure there is no gap between the motor drive and the camera body then tighten the attachment screw firmly When the MD 12 is mounted on an FM camera Serial No be low 3 000 000 the camera s mode selector switch around the shutter release button should be set to M motor ...

Страница 7: ...will operate when its power is turned on and advance the film and cock the shutter ready for the next exposure The motor drive will stop and the pilot lamp go out after advancing the film one frame only regardless of the setting of the S C selector on the handgrip The serial number appears on back of the camera body just below the film advance lever Nikon FM ...

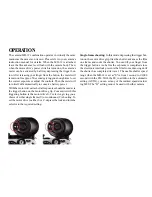
Страница 8: ...igger button on the motor drive grip Concentric with this triggering button is the motor drive S C selector giving you a choice of either single frame S or continuous C shooting To set the motor drive to either S or C depress the lock and turn the selector to the required setting Single frame shooting In this mode depressing the trigger but ton on the motor drive grip fires the shutter advances th...

Страница 9: ...e The usable shutter speed range when the MD 12 is set at C is from 1 2 second to 1 1000 second with the FM With the FE in addition to the automatic setting AUTO you can set any of the marked speeds including M90 The B setting cannot be used The FE s automatic exposure capability allows you to follow subjects as they pass through areas of differing brightness yet still obtain correctly exposed res...

Страница 10: ...anual for details If at any time you wish to manually advance the film without removing the MD 12 from the camera turn off the motor drive s power switch after it has finished advancing the film from the previous exposure Then in the case of the FM Serial No be low 3 000 000 turn the mode selector switch so that the black line white on black camera bodies is adjacent to the line on the camera body...

Страница 11: ...d hold the multi exposure button or lever with your left hand before you remove your finger from the trigger button Otherwise the film will be advanced On the C setting triggering the release button while holding the multi exposure button or lever depressed will produce mul tiple images on the same frame Either the motion of the subject or your movement of the camera will result in the images bein...

Страница 12: ...r pulse longer than the interval time Other wise continuous or erratic operation will occur With the S C selector set to C if the triggering pulse s dura tion is longer than the shutter speed set or 0 25 sec in the case of the higher shutter speeds bursts will be fired at each inter val For example if the shutter speed is set at 1 1000 sec and the trigger pulse duration is 2 sec then approximately...

Страница 13: ...orfadio control systems are more convenient For simultaneous operation you can connect two or more mo tor driven cameras in parallel using a circuit containing two or more MC 4 cords plus additional wiring Refer to the diagram for details For troublefree operation the common electrical leads indicated by bold lines in the diagram should be kept as short as possible In particular the total length o...

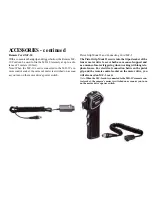
Страница 14: ...wer switch Pistol Grip Model 2 and Connecting Cord MC 3 The Pistol Grip Model 2 screws into the tripod socket of the lens or motor drive to serve both as a means of support and as a means of motor triggering when working with long tele photo lenses For electrical connection between the pistol grip and the remote control socket on the motor drive you will also need an MC 3 cord Note When the MC 3 c...

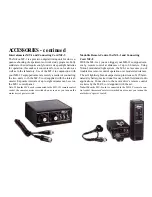
Страница 15: ...o the MD 12 s remote control socket the camera s meter is switched on as soon as you turn on the motor drive s power switch Modulite Remote Control Set ML 1 and Connecting Cord MC 8 With the ML 1 set you can trigger your MD 12 equipped cam era by remote control at distances of up to 60 meters Using Nikon s modulated light system the ML 1 set assures you of trouble free remote control operation ove...

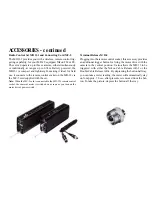
Страница 16: ...te When the MC 5 cord is connected to the MD 12 s remote control socket the camera s meter is switched on as soon as you turn on the motor drive s power switch Terminal Release M R 2 Plugging into the remote control socket this accessory provides an additional trigger button for firing the motor drive with the camera in the vertical position It also allows the MD 12 to be triggered with either the...

Страница 17: ...should advance the film ready for the next exposure If this does not clear the malfunction or you are unable to move the film advance le ver at all do not try to force the controls Turn the motor drive off once more and simply remove the motor drive from the camera This will clear the tension in the film advance mechanism allowing you to advance or finish advancing the film and make one exposure a...

Страница 18: ...r ies in particular suffer severely at temperatures below 0 C Camera fitting Shooting speed Shooting speed 3 5 fgs approx maximum at shut ter speeds faster than 1 125 sec Shooting mode Single frame S Continuous C Usable shutter speeds At S setting FM 1 1 1000 sec FE 8 1 1000 sec Auto M90 At C setting FM 1 2 1 1000 sec FE 8 1 1000 sec Auto M90 Pilot lamp LED lights up when in operation Power switch...

Отзывы: