IV. Assembly
60
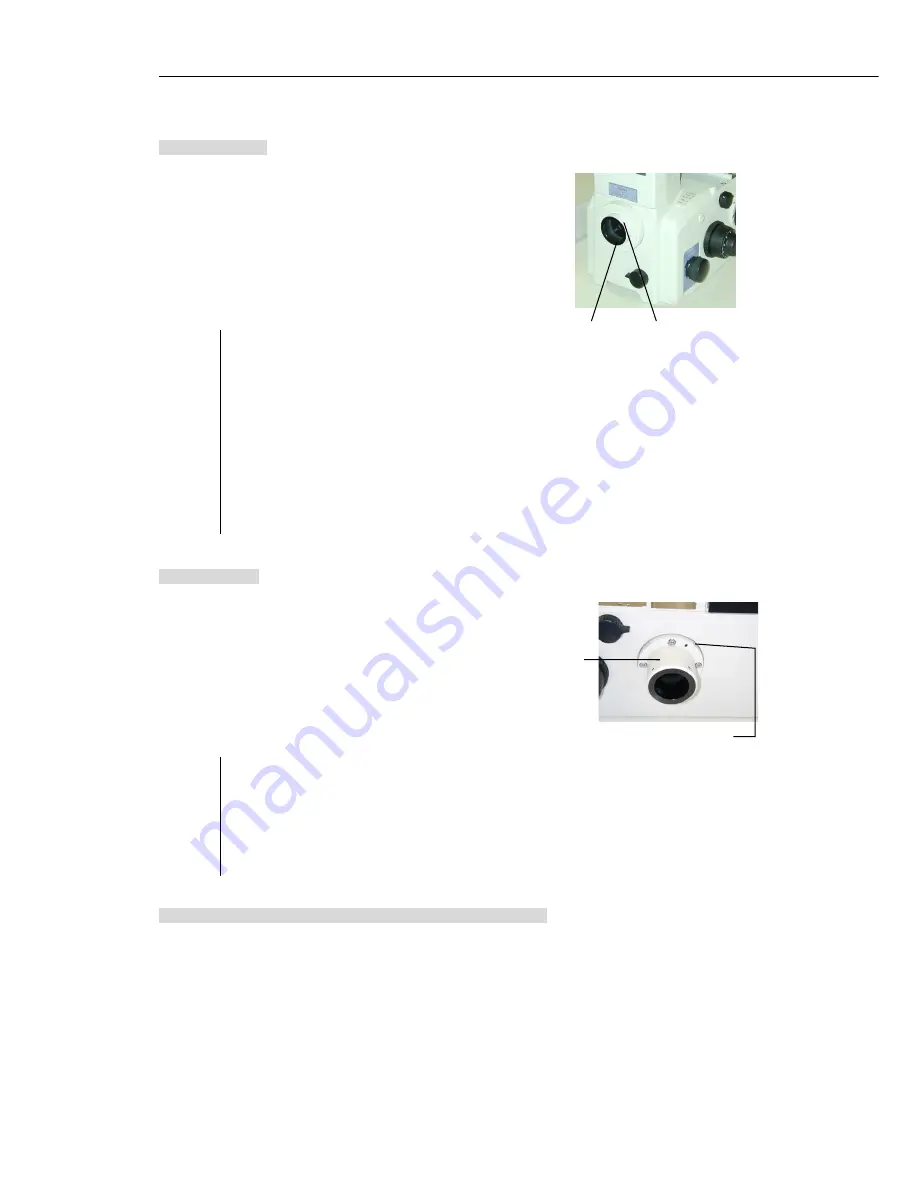
10. Front port
See page 51 for the photomicrography devices that can be attached
to the front port and the adapters needed.
1) Pull off the plastic cap on the front port with your hand.
2) Insert the adapter and fix it by the clamp screw.
(If the adapter has a positioning pin, match it with the
positioning groove on the front port.)
3) Attach the photomicrography device to the adapter. have
rubber eye guards, put it on the eyepieces.)
Ex.: Attaching “Digital still camera D1” to “T-BFA F-mount
adapter”
Remove the cap on the F-mount adapter. Attach the
camera to the adapter matching the index marks, and
rotate the camera in the direction shown by the arrow
on the mount (counterclockwise) till a click is heard.
Dismounting the camera:
Pressing the lens dismounting button on the camera,
slowly rotate the camera clockwise until it stops.
Note that the F-mount may be damaged if you
attempt to rotate the camera in the direction of the
arrow.
Positioning
groove
Adapter clamp
screw
11. Side port
See page 51 for the photomicrography devices that can be attached
to the side port and the adapters needed.
1) Remove the plastic cap on the side port by loosening the
clamp screw.
2) Insert the side port adapter and fix it by the clamp screw.
3) Insert the adapter to the side port adapter and fix it by the
clamp screw.
4) Attach the photomicrography device to the adapter.
Ex.: Attaching “Photomicrographic equipment U-III” to
“T-BPA photo adapter”
Insert the PLI projection lens to the “T-BPA photo
adapter” till it hits the limit. Insert the
photomicrographic equipment to the adapter so that
its finder faces forward. Fix it by tightening the
connection ring.
Side port
adapter
Side port adapter
clamp screw
12. Attaching various devices to the observation port
Remove the eyepiece tube from the microscope and attach the “T-TI intermediate tube” instead. The intermediate tube
accepts various devices such as the trinocular eyepiece tube for upright type microscopes and teaching head.
Содержание ECLIPSE TE2000-E
Страница 2: ......
Страница 71: ...VII Technical specifications 69 Blank Page ...
Страница 74: ......


