background image

90

8

T

h

e Pl

ay
bac

k

 M
e

nu

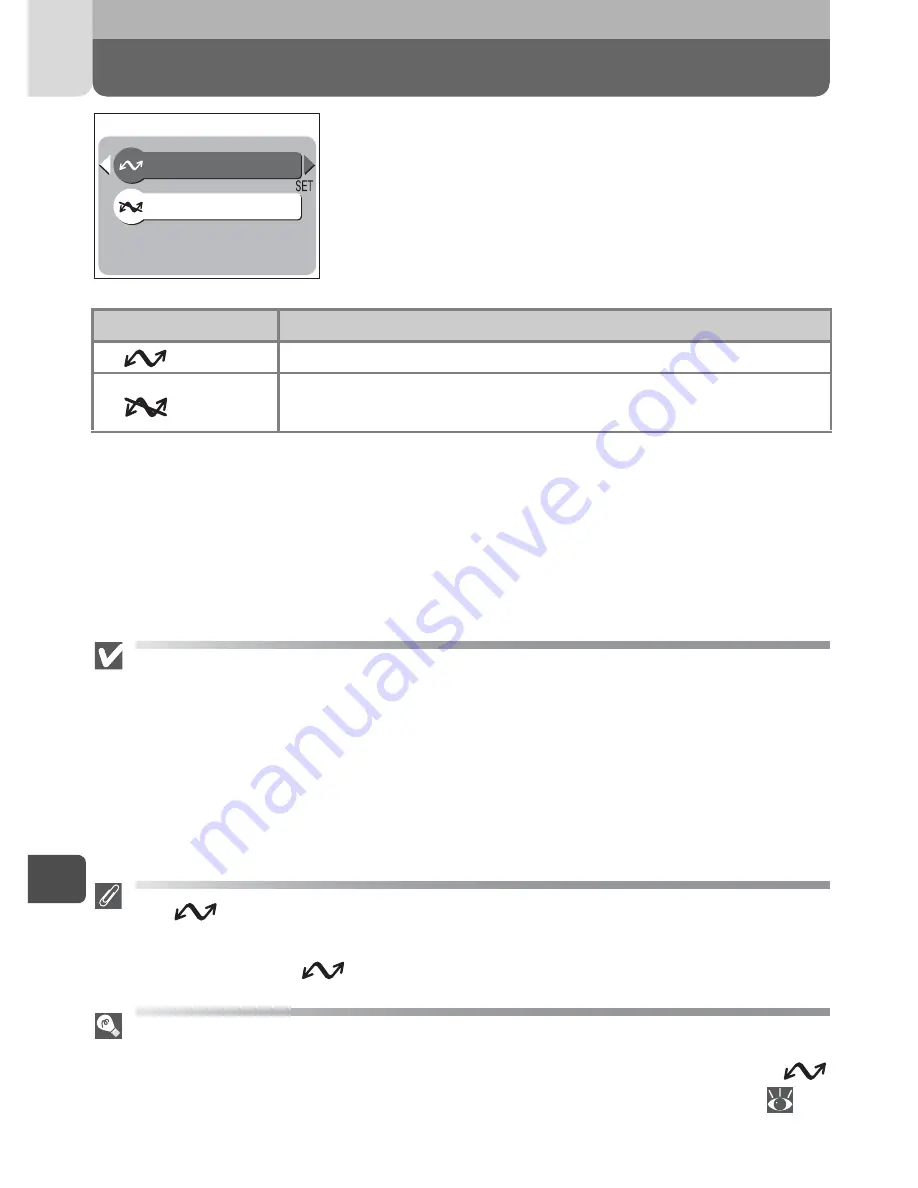
Auto Transfer

To turn transfer marking on or off for all pictures
simultaneously, select “Auto Transfer” from the
playback menu.

Notes on Transfer

• No more than 999 images can be marked for transfer on one memory card. To

transfer more than 999 images, use Nikon View to transfer all the images at one
time. For more information, see the Nikon View reference manual (CD-ROM).

• Pictures selected for transfer with another model of Nikon digital camera can

not be transferred when the memory card is inserted in the COOLPIX SQ. Use
the COOLPIX SQ to reselect the pictures.

The  

icon

• The COOLPIX SQ camera automatically marks all the pictures you have taken

for transfer with the 

 icon.

Selecting/Deselecting Pictures for Transfer

You can turn transfer marking for selected pictures on or off by pressing the 
button on the camera while the pictures are displayed in playback mode 

(

62)

.

Option

Description

 All

All pictures on the memory card are marked for transfer.

 None

Remove transfer marking from all pictures on the memory
card.

All

None

AUTO TRANSFER

Содержание Coolpix SQ

Страница 1: ...DIGITAL CAMERA The Guide to Digital Photography with the En ...

Страница 2: ...egistered trademarks of Microsoft Corporation Internet is a trademark of Digital Equipment Corporation CompactFlash is a trademark of SanDisk Corporation Lexar Media is a trademark of Lexar Media Corporation Adobe and Acrobat are registered trademarks of Adobe Systems Inc All other trade names mentioned in this manual or the other documentation provided with your Nikon product are trademarks or re...

Страница 3: ...s as this could result in explosion or fire Observe caution when using the camera strap Never place the strap around the neck of an infant or child Do not disassemble Touching the product s internal parts could result in injury In the event of a malfunction the prod uct should be repaired only by a qualified technician Should the product break open as the result of a fall or other accident remove ...

Страница 4: ...e cables provided or sold by Nikon for the purpose to maintain com pliance with product regulations Keep out of reach of children Particular care should be taken to prevent infants from putting the battery or other small parts into their mouths Removing memory cards Memory cards may become hot during use Observe due caution when removing memory cards from the camera CD ROMs The CD ROMs on which th...

Страница 5: ... radiate radio frequency energy and if not installed and used in accordance with the in structions may cause harmful interfer ence to radio communications How ever there is no guarantee that interfer ence will not occur in a particular instal lation If this equipment does cause harmful interference to radio or televi sion reception which can be deter mined by turning the equipment off and on the u...

Страница 6: ...on of the government has been obtained the copying or reproduction of unused postage stamps or post cards issued by the government is prohibited The copying or reproduction of stamps issued by the government and of certified documents stipulated by law is prohibited Cautions on certain copies and reproductions The government has issued cautions on copies or reproductions of securi ties issued by p...

Страница 7: ...ements of this electronic circuitry THE USE OF NON NIKON ELECTRONIC ACCESSORIES COULD DAMAGE YOUR CAM ERA AND MAY VOID YOUR NIKON WARRANTY For more information about Nikon brand accessories contact your local authorized Ni kon dealer Life Long Learning As part of Nikon s Life Long Learning commitment to ongoing product sup port and education continually updated information is available on line at ...

Страница 8: ...Select Mode 30 Step 2 Frame the picture 32 Step 3 Focus and Shoot 34 Step 4 View the Results Full Screen playback 38 Step 5 Deleting Unwanted Pictures 39 More on Photography 40 Using the Flash 40 Easy Close Ups Macro Close up Mode 42 Taking a Self Portrait Self timer Mode 43 Adjusting the Exposure Exposure Compensation 45 Scene Modes 46 Quick Deletion Memo Record 55 More on Playback 56 Viewing Pic...

Страница 9: ...y 74 Image Size 74 White Balance Only 76 Metering Only 78 Continuous Only 79 Best Shot Selector Only 80 AF Area Mode Only 81 Auto Focus Mode Only 82 The Playback Menu 83 Slide Show 84 Delete 85 Protect 87 Small Picture 88 Auto Transfer 90 CF Card Format 91 The Setup Menu 92 Welcome Screen 93 Brightness 95 Volume 95 Auto Off 95 Video Mode 96 Reset All 96 Technical Notes 97 Optional Accessories 97 C...

Страница 10: ...10 ...

Страница 11: ... in this manual Cautions information that you should read before use to prevent damage to your camera Tips additional information you may find helpful when using your cam era Notes information that you should read before using your camera Indication that more information is available elsewhere in this manual The Shooting Menu Movies More on Playback More on Photography Basic Photography First Step...

Страница 12: ...tter release button 17 34 Mode dial 16 Power switch 26 30 Microphone 55 58 69 Built in Speedlight 40 Self timer lamp AF Assist illuminator 44 36 Lens 32 99 107 Power on lamp 26 Battery chamber 20 Battery latch 20 Eject button 24 Memory card slot 24 1 ...

Страница 13: ...lash mode Transfer button 45 40 62 MENU button 46 72 83 Multi selector 17 DC IN connector 21 Audio video A V out connector 59 Speaker 58 70 Tripod socket 22 44 47 98 COOL STATION connector 22 63 Playback button also acts as secondary power switch 38 Battery chamber Memory card slot cover 20 24 Eyelet for camera strap 19 Interfaceconnector cover 21 59 ...

Страница 14: ...ow 5 Indicates that camera has raised sen sitivity automatically 2 Zoom indicator1 33 42 3 Recording indicator 35 4 Date not set icon2 28 5 Camera shake icon3 41 47 101 6 Battery level indicator4 26 7 Macro close up mode 42 8 White balance 76 9 Continuous shooting mode 79 10 Best Shot Selector BSS 80 11 Sensitivity gain indicator5 41 12 Exposure compensation 45 13 Number of exposures remaining len...

Страница 15: ...ing or playback guide is visible Press the multi selector to display indicators and icons for another five seconds 3 4 5 6 7 8 13 12 11 2 1 9 10 1 Time of recording 28 2 Date of recording 28 3 Current folder 39 4 File number and type 39 5 Battery level indicator 26 6 Transfer icon 62 7 Print order icon 66 8 Protect icon 87 9 Voice memo recording guide 58 10 Voice memo playback guide 58 11 Current ...

Страница 16: ...ers of digital cameras Scene Mode Choose from fifteen scenes suited to different subjects or shooting conditions and let the camera do the rest Easy Advanced Movie Mode Make movies up to 40s in length with sound re corded via the camera s built in microphone Setup Mode Choose this mode to display the setup menu where you can perform such tasks as setting the camera clock and ad justing monitor bri...

Страница 17: ...re The green focus area indicator in the monitor will light when the fo cus operation is complete Focus and exposure will remain locked while the shutter release button is pressed halfway Press the shutter release but ton the rest of the way down to take the picture Make selection or move cursor right Cancel and return to previous menu or move cursor left Move cursor up Move cursor down Shutter re...

Страница 18: ... you can Charge the battery inside the camera 22 Charge a spare battery 23 Transfer pictures to a computer 60 J Front J Rear Camera connector 22 63 Transfer button 64 Spare battery charge lamp 23 Spare battery charging slot 23 Camera catch 22 63 DC IN connector 22 63 USB connector 63 ...

Страница 19: ...he camera 21 or to the COOL STATION 22 63 the camera can be powered from a household electrical outlet EH 61 DC plug AC adapter plug Power lamp AC inlet Wall plug Camera or COOL STATION Power cable Shape of cable depends on country of use Attaching the Camera Strap Attaching the Lens Cap ...

Страница 20: ... to side c and insert the battery as shown on the la bel on the inside of the cover d The battery latch locks battery in place e Close the battery chamber memory card slot cover Close the battery chamber memory card slot cover c and slide back into place d Make sure that the battery chamber cov er is properly latched Read Battery Warnings Read and follow all warnings and instructions supplied by t...

Страница 21: ...sert the DC plug of the adapter into the DC IN connector of the camera When the AC adapter is connected to the camera for a long period the camera and the AC adapter may become hot but this is not a malfunction Read and follow all warnings and instructions supplied by the AC adapter manufacturer Only a Nikon brand EH 61 AC adapter should be used to connect the cam era to an AC power source Do not ...

Страница 22: ...g time about 2 hours for full charge Connect the EH 61 AC adapter to the COOL STATION The power lamp will glow showing the EH 61 is plugged in f Place the camera on the COOL STATION cCheck that the battery is inside the camera and the camera is turned off If the camera is on the power on lamp is green the battery will not be charged dOpen the COOL STATION connector cover on the camera 1 d c e f 2 ...

Страница 23: ...ery is not charged If both the camera with the battery inside and a spare battery are placed on the COOL STATION the battery inside the camera will be charged first When the battery inside the camera is fully charged charging of the spare battery will start Power on lamp Meaning Blinks red The battery is charging Lights red Charging is complete Blinks rapidly red Camera is not positioned correctly...

Страница 24: ...that the camera is off Open the battery chamber memory card slot cover Slide the battery chamber memory card slot cover c and open it d Insert the memory card Check label for correct orientation The memory card is fully inserted when the eject button protrudes slightly 1 c d 2 3 Terminals Rear label Direction of insertion ...

Страница 25: ...emory Cards To remove memory cards turn the camera off and open the battery chamber memory card slot cover Press the eject button c and remove the card d Note that memory cards may become hot dur ing use observe due caution when removing memory cards Formatting Memory Cards The supplied memory card is ready for use Other memory cards should be for matted first See CF Card Format 91 Approved Memory...

Страница 26: ... are performed for one minute default setting When the camera is powered by an AC adapter the camera will turn off after thirty minutes if no operations are performed Display Meaning Camera Status NO ICON Battery fully charged Camera functions normally Lights Low battery Ready spare batteries Fewer shots can be taken consec utively in continuous mode Warning Battery exhausted Battery exhausted Cha...

Страница 27: ...it rotate the power switch Do not remove the battery disconnect the AC adapter or eject the memory card until the power on lamp has gone out The button The camera can also be turned on by pressing the button for about two sec onds Your most recent picture will be displayed in the monitor 38 ...

Страница 28: ...tor when the camera is in shooting mode Any pictures taken before the time and date have been set will have a time stamp of 0000 00 00 00 00 Rotate the mode dial to and turn the camera on Highlight Language Display options Choose language from Deutsch German English Français French Japanese or Español Spanish Return to setup menu Highlight Date 1 2 Date Welcome screen Language SET UP MENU 3 Deutsc...

Страница 29: ...is installed or the camera is powered by an AC adapter the clock battery will charge in about 20 hours When fully charged the clock battery can provide approx 24 hours of back up power after the adapter or bat tery is removed from the camera 7 Y M D 2003 01 01 00 00 DATE 8 Y M D 2003 01 01 00 00 DATE 9 Y M D 00 00 DATE 2003 01 01 10 Y M D 12 10 DATE 2003 02 14 11 M D Y 12 10 DATE 02 14 2003 12 Dat...

Страница 30: ...hoot mode the majority of camera settings are controlled by the camera in response to shooting conditions producing the best possible results in most situations Set the mode dial to Turn the camera on The power on lamp will light and the monitor will display a welcome screen 93 The camera is ready to shoot when the monitor shows the view through the camera lens 1 2 3 ...

Страница 31: ... LCD optimizes visibility in sun light and other lighting conditions 74 74 40 Image quality Choose from three modes depending on how you plan to use the picture The default setting is NORMAL Flash mode Choose from four flash modes depending on lighting and your cre ative intent The default setting is AUTO auto Image size Choose from four sizes to suit your purpose The default setting is Shooting m...

Страница 32: ...hould be taken to avoid catching fingers hair or clothing in the lens sec tion when rotating it When adjusting the angle of the lens rotate the lens sec tion slowly do not use excessive force Taking Pictures of Yourself To frame a quick arms length self portrait rotate the lens to point in the same direction as the mon itor In this position the monitor will show a mirror image of what will appear ...

Страница 33: ... of 12x The zoom indicator turns yellow in the digital zoom range To cancel digital zoom press the W but ton until the zoom indicator turns white Digital Zoom In digital zoom data from the camera s image sensor are processed digitally en larging the center portion of the picture to fill the frame Unlike the optical zoom the digital zoom does not increase the amount of detail visible in the pic tur...

Страница 34: ...en the subject is in focus With the shutter release button pressed halfway check the focus area indicator and flash ready lamp In certain cases the Autofocus indicator 35 Status Meaning Focus area indicator Lights green Subject in focus Flashes red Camera unable to focus on subject Recompose the picture and try again Flash ready lamp On Flash will fire when picture is taken Blinks Flash charging R...

Страница 35: ... card or remove or discon nect the power source while or is displayed Your pictures are being recorded to the memory card at this time Autofocus Indicator When the lens is rotated to point in the same direction as the monitor 32 the digital zoom is in effect 33 or panorama assist mode is set 52 and the shutter release button is pressed halfway the autofo cus indicator in the monitor lights green f...

Страница 36: ...n or memo record After each shot the picture you have just taken will be displayed briefly in the monitor before re corded to the memory card If you are not satisfied with the picture you have just taken you can delete the picture instantly by pressing the button You can also record a voice memo of up to 15 seconds while pressing the button 55 AF Assist illuminator AF Assist illuminator will autom...

Страница 37: ...shutter release button pressed halfway check that the focus area indica tor lights green indicating that the sub ject is in focus Focus and exposure will remain locked while the shutter release button is pressed halfway Recompose the picture Do not change the distance between the camera and your subject while focus lock is in effect If your subject moves remove your finger from the shutter release...

Страница 38: ...tures in the monitor Your most recent picture will be displayed in the monitor Press the multi selector or to view pictures recorded before or after the cur rent photo Keep the multi selector or pressed to scroll rapidly to the desired frame num ber To return to shooting mode press the button For more information on 56 More on Playback 1 2 ...

Страница 39: ...er is not displayed but is visible when the picture is transferred to a computer Picture files are stored in folders created automatically by the camera and named with a three digit folder number followed by NIKON e g 100NIKON Folders can hold up to 200 pictures if you take a picture when the current folder contains 200 pictures a new folder will be created by adding one to the current folder numb...

Страница 40: ...main fl ash reducing red eye Use for portraits works best when sub ject is well within range of flash and looking at pre flash Not recommended when quick shutter response is required Flash Cancel off Flash will not fire even when lighting is poor Use to capture natural lighting under dim light or where use of flash is prohib ited If camera shake icon appears care should be taken to avoid blurring ...

Страница 41: ...imizing blur caused by camera shake An ISO icon will appear in the moni tor to warn that the picture may be slightly mottled The camera shake icon When lighting is poor and the flash is off shut ter speeds will slow and pictures may be blurred If the shutter speed is very slow a camera shake icon will appear in the monitor Use of a tripod or support is recommended Flash range Approx 0 3 5 0 m 1 16...

Страница 42: ...performed for about two seconds the selected mode is automatically set Frame picture In middle zoom range indicated by icon and zoom indica tor in monitor turn green and camera can focus on objects as close as 4 cm 1 6 measured from lens Close Ups The flash may not be able to light the entire subject at distances of less than 15 cm 5 9 When taking close ups play each picture back after shooting to...

Страница 43: ...a flat level surface To use the self timer Display self timer menu Highlight ON and press the multi selector to exit the menu icon countdown timer and icon appear in monitor If no operation is performed for about two seconds the selected mode is automatically set Frame picture and press the shut ter release button halfway to set the focus Press the shutter release button the rest of the way down t...

Страница 44: ...om range indicated by icon and zoom indicator in monitor turn green and camera can focus on objects as close as 4 cm 1 6 The self timer is not available in mode or some scene modes 47 51 52 69 Self timer lamp Self timer lamp blinks Press shutter release once Press shutter release twice 3 sec 1 sec Self timer lamp lights 10 sec Shutter releases ...

Страница 45: ... the frame are very bright containing for example sunlit expanses of water sand or snow or the background is much brighter than the main subject If the image in the monitor is too dark choose a positive value for the exposure compensation Similarly the camera may set the exposure too high if large areas of the frame are very dark containing for example an expanse of dark green leaves or the backgr...

Страница 46: ...lly adjusted to suit the se lected scene Set the mode dial to and press the MENU button to display the menu of scene choices Choose scene Current selection shown by large icon and caption Make selection and return to shooting mode The selected scene will be shown by icon in the monitor Take pictures Choosing a Scene Mode 1 Portrait 2 Landscape 3 4 ...

Страница 47: ...o or man ual and try again Image Quality and Size in Scene Mode In scene mode pictures are recorded with the image quality 74 and image size 74 set in the mode or mode Noise Reduction Noise in the form of randomly spaced brightly colored pixels tends to ap pear in pictures taken at slow shutter speeds This effect is particularly notice able in dark areas of the picture At settings of Night Portrai...

Страница 48: ...AF area mode Manual 81 Party Indoor Use for shots that include details of the background behind the main subject or to capture the effects of candlelight and other indoor background lighting Camera focuses on subject at center of focus area Night Portrait Use for shots that provide a natural balance between the main subject and the background when shooting portraits against a backdrop of night sce...

Страница 49: ...sed halfway Camera focuses on subject at center of focus area Beach Snow Vividly captures the brightness of such subjects as snow fields beaches or sunlit expanses of water Camera focuses on subject at center of focus area Landscape Use for vivid landscape shots that enhance outlines col ors and contrast in such subjects as skyscrapers and for ests Focus is fixed at infinity When the shutter relea...

Страница 50: ...e button is pressed halfway the autofocus indicator lights green instead of the focus area indicator The AF Assist illuminator does not fire even when the subject is dark 36 Night Landscape A slow shutter speed is used to produce stunning night landscapes Noise reduction turns on automatically Focus is fixed at infinity When the shutter release button is pressed halfway the autofocus indicator lig...

Страница 51: ...ted for example in museums and art galleries or in other set tings in which you do not want to use the flash The Best Shot Selector 80 turns on automatically reducing the effects of inadvertent camera movement Camera focuses on subject at center of focus area The AF Assist illuminator does not fire even when the subject is dark 36 Photography may be prohibited altogether in some settings Be sure t...

Страница 52: ...behind your subject or when your subject is in the shade but the background is brightly lit Camera focuses on subject at center of focus area Panorama Assist Use to take a series of photographs that you will later join to form a single scene for example a panorama or 360º virtual reality image When the shutter release button is pressed halfway the autofocus indicator lights green flashes red inste...

Страница 53: ...picture The left two thirds of the picture just taken is displayed on the left side of the monitor and the shoot ing screen is displayed on the right Compose the next shot to overlap with the previous picture Take the next picture Repeat Steps 4 and 5 until all shots in series have been taken Complete the Panorama Assist mode by the following way Press the MENU button or Change the mode dial setti...

Страница 54: ...to point in the same direction as the monitor panorama assist mode is not available Each time a new series of pictures is begun at a setting of Panorama Assist a folder will be created with a name consisting of P_ followed by a three digit number assigned automatically by the camera e g P_001 and all pictures in the series stored in this folder ...

Страница 55: ...dding Audio Commentary Voice Memo To Press Description Delete picture Press the button to display confirmation dialog Press the multi selector to select No or Yes and press to execute Select No to save picture and return to shooting mode Select Yes to delete picture Record voice memo Memo of up to 15 s can be recorded using the camera s microphone while button is held down During recording length ...

Страница 56: ...switch to full screen playback With nine thumbnails displayed press the T button once to view four thumbnail pictures and press again to switch to full screen playback Delete highlighted picture Press the button to display the confirma tion dialog Press the multi selector to select Yes or No and press to execute Select No to exit with out deleting picture Select Yes to delete picture Select highli...

Страница 57: ...n the memory card first cancel the zoom To Press Description Zoom photo in Zoom increases each time the T button is pressed to maximum of 6 0x While picture is zoomed in the icon and zoom ratio are displayed in upper left corner of monitor View other areas of image Use multi selector to scroll to areas of picture not visible in monitor Cancel zoom Press the W button to cancel zoom ...

Страница 58: ...ing length of memo that can be recorded is displayed in monitor Recording ends after 15 s or when button is released Do not cover the microphone during recording a memo Playback memo If a voice memo has been recorded for current picture will be displayed during playback Press button to play recording back over the camera s speaker Playback ends when entire recording has been played back blinks dur...

Страница 59: ... the black plug into the camera s A V out connector the yellow plug into the video in jack on the television or VCR and the white plug into the audio in jack Turn the TV to the video channel For more information refer to the manu al for the video device Press the button for about two seconds to enter full screen play back Pictures will be played back on the televi sion screen The camera monitor wi...

Страница 60: ...e depends on your computer s operating sys tem and the USB option selected in the camera setup menu After con sulting the following table select the appropriate option using the USB item in the camera setup menu The default option is Mass Storage Pictures cannot be transferred using the button on the COOL STA TION in Mac OS X 10 1 2 Use Nikon View button to transfer pic tures after turning the cam...

Страница 61: ...uter running one of the above operating systems If you have connected the camera to a computer running one of the above operating systems with PTP selected in the USB menu disconnect the camera as described below Be sure to select Mass Storage in the USB menu before reconnecting the camera Windows 2000 Professional A dialog will be displayed welcoming you to the Found New Hardware Wiz ard Click Ca...

Страница 62: ...able to use the driver needed for the Nikon Digital Camera SQ_PTP USB device Click Cancel to close the dialog and then disconnect the camera Selecting Pictures for Transfer Pictures selected for transfer to a computer are marked with a icon You can turn transfer marking for selected pictures on or off by pressing the button on the camera while the pictures are displayed in playback mode Pictures a...

Страница 63: ...computer using the UC E7 USB cable Turn the camera off and place it on the COOL STATION cCheck that the camera is turned off Be sure to turn the camera off before placing the camera on the COOL STATION dOpen the COOL STATION connector cover on the camera ePlace the camera on the COOL STATION fCheck that the power on lamp on the camera lights red or blinks red When the power on lamp is off replace ...

Страница 64: ... displayed in the computer monitor the power on lamp will blink green When you press the button on the COOL STATION pictures with the icon will be transferred to the computer Pictures cannot be transferred using the COOL STATION button with Mac OS X 10 1 2 Turn on the camera placed on the COOL STA TION and click the button in Nikon View For information on how to use Nikon View see the Quick Start ...

Страница 65: ...ars Windows 2000 Professional Click the Unplug or Eject Hardware icon in the taskbar and select Stop USB Mass Storage Device from the menu that appears Windows Millennium Edition Me Click the Unplug or Eject Hardware icon in the taskbar and select Stop USB Disk from the menu that appears Windows 98 Second Edition SE In My Computer click with the right mouse button on the removable disk correspondi...

Страница 66: ...ital print order press MENU button during playback and se lect Print Set from PLAYBACK MENU 83 then follow the steps below Highlight Print Set Display Print Set menu Highlight Print All Images to se lect all the pictures for printing one per picture and press Then proceed to Step 8 Highlight Print Selected to select pictures for printing and press Select Delete print set to cancel all the print se...

Страница 67: ... and display the Print Set menu To print date of recording on all selected photographs highlight Date and press the multi selector Check will appear in box next to item To print shutter speed and aper ture on all selected pictures high light Info and press the multi selector Check will appear in box next to item To deselect a checked item high light and press the multi selector To complete print o...

Страница 68: ...ion recorded with the picture and will not be correct if the camera clock was set in correctly when the picture was taken 28 The date will not be printed if the print system does not support the DPOF date function Print Set If you display the PRINT SET menu screen of step 8 after creating a print order the Date and Info options will be reset Done Date ON Info OFF PRINT SET ...

Страница 69: ...ore space is available on the memory card Movie Mode If the lens is rotated to point in the same direction as the monitor you cannot record movies When rotating it during movie recording you can record the movie but the image will be upside down The movie will be stored as a QuickTime movie file with a file name ending in MOV The flash turns off automatically and the self timer macro close up mode...

Страница 70: ... start play back When the movie ends the final frame is displayed for one second fol lowed by a still image of the first frame Pause Resume playback Press the multi selector during play back to pause To resume playback press again Advance Rewind movie one frame When the movie is paused press the multi selector to advance the movie one frame Press the multi selector to rewind the movie one frame St...

Страница 71: ...arging BASIC to reduce file size 74 Image Size Choose small sizes for e mail or the web large sizes for printing 74 White Balance Match white balance to your light source 76 Metering Control how the camera sets expo sure 78 Continuous Take pictures in sequence or create collages of sixteen consecutive photographs 79 Best Shot Selector Use when photos could be blurred by inadvertent camera movement...

Страница 72: ... Display options Highlight option to return to previ ous step press multi selector Make selection Press the MENU button to exit the menu and return to shooting mode 1 2 White Balance Image Quality Image Size SHOOTING MENU 3 Sunny Auto White Bal Preset WHITE BALANCE 4 Cloudy Incandescent Fluorescent WHITE BALANCE 5 White Balance Image Quality Image Size SHOOTING MENU 6 ...

Страница 73: ...rows on the playback and setup menu screens correspond to on the multi selector corresponds to the button Cloudy Incandescent Fluorescent WHITE BALANCE Set selected item or go to next screen Return to previous screen Go to next page Go to previous page 1 4 3 6 Set Select Done ERASE SELECTED IMAGES 2 5 5 End setting Select Image Select On or Off ...

Страница 74: ...he amount of compression performed Image size refers to the physical dimensions of the image measured in pixels Choose an image size according to the space available on the memory card and the task at hand Image Quality Size Image quality and image size are shown in the monitor Option Compression ratio approx Description FINE 1 4 Fine image quality suitable for enlargements or high quality prints ...

Страница 75: ...ality and size affect the number of pictures that can be stored view the table below which shows the approximate number of pictures that can be stored on 16 and 64 megabyte memory cards at different combinations of image quality and size Figures are approximate File size of JPEG images depends on the scene recorded producing wide variations in the number of images that can be stored Option Size pi...

Страница 76: ...than A Auto white bal ance is shown by an icon in the monitor Option Description A Auto White balance automatically adjusted to suit lighting conditions Best choice in most situations PRE White Bal Preset White object used as reference to set white balance under unusual lighting conditions Sunny White balance adjusted for direct sunlight Incandescent Use under incandescent lighting Fluorescent Use...

Страница 77: ...isplayed in the monitor Option Description Cancel Recalls the most recent value for preset white balance from memory and sets white balance to this value Measure To measure a new value for white balance place a white object such as a piece of paper under the light ing that will be used in the final picture Frame this object so that it fills the square in the center of the menu shown above Highligh...

Страница 78: ...he monitor Mode When to Use It Matrix Compares measurements from multi areas of frame with library of typical compositions to produce optimal exposure for entire image Best choice in most circumstances Spot Camera measures light in area shown by circle in center of monitor Ensures that subject in metering target will be correctly exposed even when background is much brighter or darker Can be used ...

Страница 79: ...rrent continuous setting is shown in the monitor Option Description Single Camera takes one picture each time the shutter release button is pressed all the way down Continuous Camera takes pictures continuously while shutter release button is held down Pictures are recorded at rate of about 3 frames every 2 seconds rate of shooting will slow when icon is dis played About seven pictures can be reco...

Страница 80: ...ex ample when the camera is zoomed in taking macro close up pictures the flash cannot be used although lighting is poor Notes on BSS BSS may not produce the desired results with a moving subject or if you change the composition while the shutter release button is pressed all the way down BSS is available only at a setting of Single BSS When BSS is On a BSS icon is shown in the monitor Option Descr...

Страница 81: ...sest to camera Selected focus area is displayed in green focused or red not focused when shutter release button is pressed halfway This setting is useful when your subject is moving erratically or you have little time to check focus Manual User selects focus area manually using multi selec tor This option can be used instead of focus lock 37 to focus on a relatively motionless subject that is not ...

Страница 82: ...ected In movie mode S AF Single AF is a default setting When C AF Continuous AF is selected in manual mode however C AF Continuous AF is selected in mode Option Description C AF Continuous AF Camera adjusts focus continuously until shutter release but ton is pressed halfway minimizing time needed to focus before photo is taken S AF Single AF Camera focuses when shutter release button is pressed ha...

Страница 83: ... Select Pictures for printing on a DPOF compatible device specify number of prints and information to be included on each print 66 Slide Show View pictures on the memory card in an automatic slide show 84 Delete Delete all or selected pictures 85 Protect Protect selected pictures from accidental deletion 87 Small Pic Create small copy of picture Choose size of new picture 88 Auto Transfer Mark all...

Страница 84: ...r setting a slide show Auto Off will take effect and the camera will turn off automatically To Press Description Pause slide show The slide show pauses and the dialog appears in the monitor To restart the slide show highlight Restart then press the multi selector To end the slide show highlight Quit then press the multi selector Go forward or back one frame Press the multi selector to skip to the ...

Страница 85: ...eat steps 3 and 4 to select ad ditional pictures for deletion To deselect picture highlight and press the multi selector or Option Description Erase Selected Images Delete selected pictures Erase All Images Delete all pictures Erase Selected Images Erase All Images DELETE 1 Erase Selected Images Erase All Images DELETE 2 1 4 3 6 Set Select Done ERASE SELECTED IMAGES 2 5 5 3 1 4 3 6 Set Select Done...

Страница 86: ...ss the multi selector or to highlight option then press to execute Select No to return to playback menu without deleting pictures Select Yes to delete all pictures Notes on Delete menu Once deleted pictures cannot be recovered Be sure that any pictures you would like to keep have been transferred to your computer Pictures marked with a icon are protected and can not be deleted 87 5 Erase 1 image s...

Страница 87: ... Complete operation Done is displayed and the screen returns to the playback menu To exit the Protect menu without changing the protected status of the pictures press the MENU but ton Notes on Protect Menu Protected files cannot be deleted in full screen playback thumbnail playback or from the Delete menu Note however that protected pictures will be deleted when the memory card is formatted 1 4 3 ...

Страница 88: ...ppears in the cor ner of the selected picture Only one picture can be selected for copying at any one time Complete operation The size options is displayed Highlight the size of the copy Pictures cannot be copied in a size larger than the original Complete operation and return to playback menu The copy will be displayed after the last picture recorded 1 4 3 6 Set Select Done SMALL PIC 2 5 5 1 2 1 ...

Страница 89: ...ned auto matically by the camera Copy will have same time and date of creation as original Notes on Small Picture Copies The COOLPIX SQ may not be able to create small copies from images taken with another make of camera Small Picture copies created with the COOLPIX SQ may not display correctly when viewed on other digital cameras You may also not be able to transfer copies from other digital came...

Страница 90: ...other model of Nikon digital camera can not be transferred when the memory card is inserted in the COOLPIX SQ Use the COOLPIX SQ to reselect the pictures The icon The COOLPIX SQ camera automatically marks all the pictures you have taken for transfer with the icon Selecting Deselecting Pictures for Transfer You can turn transfer marking for selected pictures on or off by pressing the button on the ...

Страница 91: ...hown above will be dis played Notes on Formatting Do not turn the camera off remove the battery or memory card or unplug the AC adapter while formatting is in progress Formatting memory cards permanently deletes all data they contain including protected pictures 87 and any other data that may be on the card Before formatting be sure to transfer to a computer any pictures you would like to keep 1 C...

Страница 92: ...93 Language Choose a language for camera menus and mes sages 28 Date Set the time and date 28 Brightness Adjust monitor brightness 95 Volume Adjust volume of sound 95 Auto Off Choose how long the camera will remain on before turning off automatically to save power 95 CF Card Format Format memory cards for use in your camera 91 USB Choose PTP or Mass Storage according to your computer s operating s...

Страница 93: ...ayed when camera is turned on COOLPIX 1 Image shown at right is displayed when camera is turned on COOLPIX 2 Image shown at right is displayed when camera is turned on Select Image Select this option to choose wel come screen from pictures cur rently stored on camera memory card Select Image Select Sound WELCOME SCREEN SELECT IMAGE COOLPIX 2 Select Image COOLPIX 1 Disable Welcome 1 1 4 3 6 WELCOME...

Страница 94: ...OLPIX 1 or COOLPIX 2 the image is deleted To return to the original image re insert the memory card containing the image and select it again Select Sound Choose the sound played back when the cam era turns on from Disable Welcome mute 1 and 2 When Disable Welcome is selected in Select Image menu Disable Welcome is automati cally set and fixed in Select Sound menu 1 SELECT IMAGE COOLPIX 2 Select Im...

Страница 95: ...from Loud Soft and Off When operated on battery power the camera will turn off automatically if no operations are performed for a specified period of time Choose from thirty seconds 30 s one minute 1 m the default setting five minutes 5 m or thirty minutes 30 m When powered by the EH 61 AC adapter the camera will remain on for 30 minutes if no op erations are performed regardless of the setting in...

Страница 96: ...39 from memory Numbering will continue from the lowest number available on the memory card All other settings are unaffected Resetting File Numbering to 0001 To reset file numbering to 0001 select Reset All after either deleting all pictures 85 or formatting the memory card 91 Option Description No Exit menu leaving settings unchanged Yes Restore settings to default values Setting Default Setting ...

Страница 97: ...Rechargeable battery Additional EN EL2 Li ion batteries are available from your retailer or local Nikon representative AC adapter EH 61 AC adapter Carrying case CS CP15 soft case CompactFlashTM mem ory card adapter EC AD1 PC card adapter COOL STATION MV 10 Monitor hood HL CP10 LCD hood Nikon EC CF All capacities SanDisk SDCFB 32 MB 64 MB 128 MB 256 MB 512 MB 1 GB SDCFH Ultra 128 MB 192 MB 256 MB 3...

Страница 98: ... to another while the AC adapter is connected Do not drop The product may malfunction if subject ed to strong shocks or vibration Keep away from strong magnet ic fields Do not use or store this device in the vi cinity of equipment that generates strong electromagnetic radiation or magnetic fields Strong static charges or the magnetic fields produced by equip ment such as radio transmitters could i...

Страница 99: ...the camera at the beach or seaside wipe off any sand or salt with a cloth lightly dampened with fresh water then dry thor oughly Do not use alcohol thinner or other volatile chemicals Notes on the Monitor The monitor may contain a few pixels that are always lit or that do not light This is a characteristic common to all TFT LCD monitors and does not indicate a malfunction Images recorded with the ...

Страница 100: ...ed vehicle on a sunny day are subject to humidity of over 60 To prevent mold or mildew take the camera out of storage at least once a month Turn the camera on and release the shutter a few times before putting the camera away again Store the batteries in a cool dry place Batteries When you turn the device on check the battery level displayed in the monitor to determine whether the battery needs to...

Страница 101: ... camera on level surface or by holding camera in both hands with elbows against torso 40 47 32 Writing image data Camera turned off or button pressed during recording Message clears from display auto matically when recording is com plete 35 No Memory Card Camera cannot detect memory card Turn camera off and confirm that memory card is correctly inserted 24 Memory Card is not formatted Format No Me...

Страница 102: ...ard or delete pictures 91 24 39 85 Card contains no images No pictures on mem ory card Press the button to return to shooting mode 38 File contains no image data File created by com puter or cameras other than COOLPIX SQ Reformat memory card 91 No images are marked for transfer No pictures selected for transfer when the button on the COOL STATION pressed to trans fer pictures to computer Remove ca...

Страница 103: ...source as described above may result in the loss of any data not recorded to the memory card at the time the problem occurred Data already recorded to the memory card will not be affected Problem Possible cause Monitor is blank Camera is off Battery is not correctly inserted or battery chamber memory card slot cover is not securely closed Battery is exhausted EH 61 AC adapter is not properly conne...

Страница 104: ...sed Exposure compensation is too high 45 Photos are out of focus Subject was not in focus area when shutter release button was pressed halfway Use focus lock 36 37 Randomly spaced bright pixels noise appear in image Shutter speed too slow Use the flash Noise reduction which helps reduce noise at slow shutter speeds is available in the following scenes Night Portrait Dusk Dawn and Night Landscape U...

Страница 105: ...ated from photos 88 Can not zoom in Picture is a movie 69 Nikon View does not start when camera connected to the COOL STATION or memory card inserted The button on the COOL STATION is not pressed or camera is off AC adapter is not properly connected Camera not correctly connected to the COOL STA TION USB cable not correctly connected or card not properly inserted in card reader card adapter or car...

Страница 106: ...Nikon View Turn camera off and replace the camera on the COOL STATION reconnect cable or replace memory card then press the button on the COOL STATION and transfer pictures USB option set incorrectly Turn camera off and remove it from the COOL STA TION then choose new USB setting in camera setup menu and replace camera If error reoccurs use Nikon View button to transfer pictures Error occurred whe...

Страница 107: ...election nine area manual focus area selection and Center focus area selection available Monitor 1 5 117 600 dot low temperature polysilicon TFT trans flective LCD with brightness adjustment Advanced brightness control LCD Frame coverage shooting mode Approximately 97 vertical and 97 horizontal Storage Media Type I CompactFlash CF cards File system Compliant with Design rule for Camera File system...

Страница 108: ...be selected NTSC and PAL I O terminals DC input Audio video A V output connector Power sources One rechargeable Nikon EN EL2 lithium ion battery supplied EH 61 AC adapter supplied Battery life EN EL2 Approximately 65 minutes Measured at standard temperature 20 C 68 F with fully charged battery under standard Nikon test conditions zoom adjusted with each shot flash used in approxi mately one third ...

Страница 109: ...andard that allows information stored with pictures to be used for optimal color reproduction when images are output on Exif compliant printers Compatible camera Nikon COOLPIX SQ Charging time Approx 2 hours Compatible battery EN EL2 lithium ion rechargeable battery I O terminals DC input Data output USB Interface Camera connector Rechargeable Nikon EN EL2 Lithium ion battery charg ing terminal Op...

Страница 110: ...o with red eye reduction 40 Autofocus indicator 35 Auto Focus mode 82 Auto power Off 26 95 Auto Transfer 90 B Back Light 52 Battery 20 22 100 Battery level 26 Beach Snow 49 Best Shot Selector BSS 80 Brightness 95 C Camera strap 19 CF Card Format 91 Clock battery 29 Close Up 51 CompactFlash card 24 97 Compression ratio 74 Continuous 79 COOL STATION 18 22 63 Copy 52 D Date 28 68 Delete 39 55 56 58 8...

Страница 111: ... 78 MENU button 46 72 83 Microphone 12 55 58 69 Mode dial 16 Monitor 13 14 MOV 39 69 Movies 69 70 Multi selector 17 Museum 51 N Night Landscape 50 Night Portrait 48 Nikon View 60 Noise Reduction 47 48 50 Number of exposures remaining 31 75 O Optional accessories 97 P Panorama Assist 52 53 Party Indoor 48 PTP 60 Playback zoom 57 Playback menu 83 Portrait 48 Power on lamp 26 Power switch 26 30 Prese...

Страница 112: ...harge lamp 23 Specifications 107 Speedlight 12 40 Speedlight white balance 76 Sports 49 Sunset 50 Support information 7 T T button 33 56 57 Thumbnail playback 56 Tripod 41 43 98 Troubleshooting 103 U USB 60 61 USB cable 63 V Video mode 96 Voice memo 55 58 Volume 95 W W button 33 56 57 Web resources 7 Welcome screen 93 White balance 76 Z Zoom buttons 33 56 57 Zoom indicator 14 33 ...

Страница 113: ...MEMO ...

Страница 114: ...MEMO ...

Страница 115: ...MEMO ...

Страница 116: ...NIKON CORPORATION Printed in Japan Fuji Bldg 2 3 Marunouchi 3 chome Chiyoda ku Tokyo 100 8331 Japan 6MAA5711 ...

Отзывы: