10
First Steps
Turning the Camera On
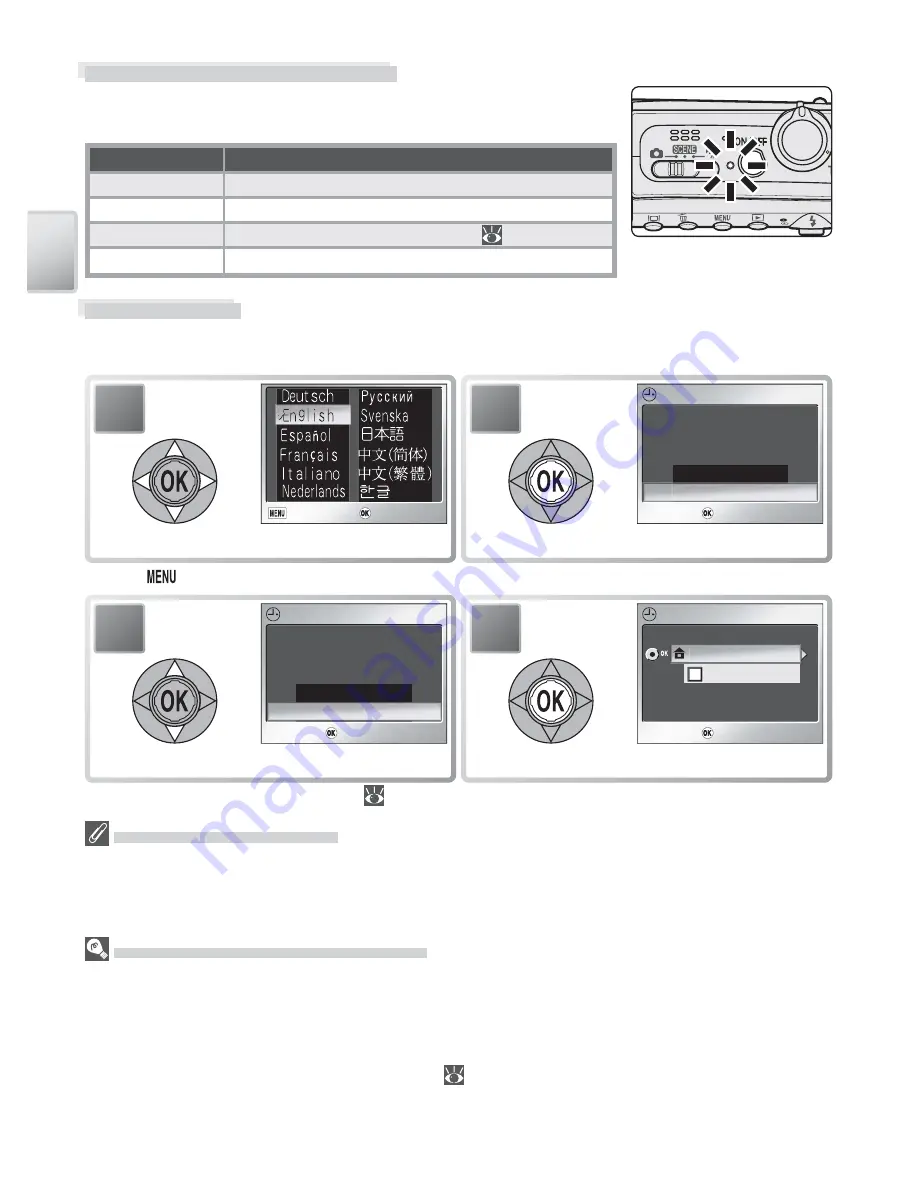
Press the power switch until the power-on lamp lights.
The power-on lamp shows camera status as follows:
Power-on lamp
Camera status
On
On
Blinks
Auto power off (standby mode)
Flickers
Batteries exhausted (
85)
Off
Off
Basic Setup
The fi rst time the camera is turned on, a language-selection dialog will be
displayed. Choose a language and set the time and date as follows:
Turning the Camera Off
To turn the camera off, press the power switch again. The camera is off when the
power-on lamp is off. Do not remove the batteries or memory card or disconnect the
optional AC adapter until the power-on lamp has gone out.
Auto Power off (Stand-by Mode)
If no operations are performed for about fi ve seconds, the monitor will gradually dim
to save power. Full brightness can be restored by pressing the shutter-release button
or operating any of the controls next to the monitor. If no operations are performed
for about a minute, the monitor will turn off and the camera will enter stand-by mode,
further reducing the drain on the battery (
78). The power-on lamp will blink and the
monitor can be reactivated by pressing the shutter-release button halfway. The camera
will turn off automatically if no operations are performed for another three minutes.
2
DATE
DATE
DATE
Confirm
Confirm
Confirm
Set time and date?
No
Yes
Confi rmation dialog displayed.
1
Cancel
Cancel
Confirm
Confirm
Cancel
Confirm
Highlight language.
*
* Press
button to exit without selecting language.
4
TIME ZONE
TIME ZONE
TIME ZONE
Confirm
Confirm
Confirm
DaylightSaving
London, Casablanca
TIME ZONE menu displayed.
†
3
DATE
DATE
DATE
Confirm
Confirm
Confirm
Set time and date?
No
Yes
Highlight
Yes
.
† See “The Setup Menu: Date” (
74) for information on setting daylight saving time.


