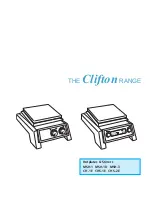


The Clifton Range - 3 Year Warranty
4
High Quality Products at Affordable Prices
Operation
Heating
,
analogue models
The control knob labelled on the front panel controls the heat output and hence the plate
temperature. It is graduated with an approximate temperature scale. This scale refers to the
temperature of the top plate and not to the temperature of the contents of the vessel being heated,
When the heat is switched on an amber pilot light illuminates, (see figure 1).
When the surface becomes too hot to touch a red warning light on the front panel will begin to
flash, (see figure 1). This will continue to flash while the plate temperature is above 50°C so long
as the unit remains connected to the electricity supply.
WARNING:
The top surface of the instrument may be HOT In free air a surface temperature of
450°C can be achieved on the ceramic top models and 325°C on the metal top models. Do not
leave heaters switched on when not in use.
Stirring
,
analogue models
The control knob labelled on the front panel controls the stirrer speed. When switched on an
amber pilot light illuminates, (see figure 1).
The knob is graduated with an arbitrary 1-9 scale. Turning the knob to a higher number increases the
stirrer speed.
Heating
,
digital models
Ensure that the external temperature probe is NOT connected to the instrument.
The control knob on the left hand side of the display controls the heating function.
To switch on the heating function briefly press and release the knob. Repeat to turn off the heating
function.
When switched on the display will show actual plate temperature at the bottom of the screen and the
set temperature directly above. The heating icon will show , indicating that the displayed
temperatures are those of the plate surface.
The plate temperature can be selected and controlled to a resolution of 1°C.
To increase the set temperature turn the knob clockwise until the required setting is shown in the
display. To decrease the setting turn the knob anti-clockwise.
The unit will now begin to heat until the set temperature is reached and then will hold the plate at
this value. The actual plate temperature is continuously displayed at the bottom of the screen. When
the set temperature is reached an alarm will sound. When the plate surface is too hot to touch (>
50°C) a red warning light on the front panel will begin to flash. This will continue to flash while
the plate temperature is above 50°C even after the heating function is turned off.
WARNING:
The top surface of the instrument may be HOT. In free air a
surface temperature of 450°C can be achieved on the ceramic top CHS-1E model and 325°C
on the metal top MSH-1D model. Do not leave heaters switched on when not in use.
Use as a Stirrer
The control knob on the right hand side of the front panel controls the stirrer speed.
To switch on the stirring function briefly press and release the knob. Repeat to turn off the stirring
function When switched on the icon on the display will revolve and the display will show the set
speed.
Turning the knob clockwise increases speed from 100rpm to 1300rpm. Turning the knob
anti-clockwise decreases the speed.


