
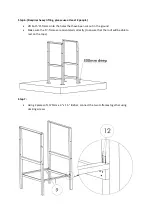


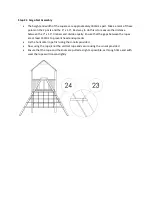


Step 24: Fireman’s Pole Assembly
•
Place the fireman’s pole into its position and mark the position that it will go into the
ground, which will be the centre of the railing and out the same distance as the turn in the
pole itself
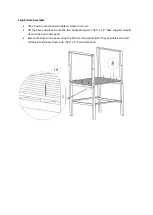
•
Dig a hole about 10” deep and 10” in diameter
•
Place the fireman’s pole into the hole and cut off any excess length so that the pole can be
secured into the top rail
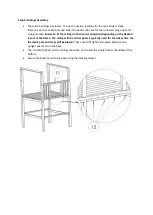
•
Secure the pole onto the top rail using 65mm decking screws supplied
•
Concrete the pole into its place ensuring that it remains parallel to the tower posts


