background image

Step 5

Assign a Home Name and Family Location.

Select Add another room and name each room as needed.

Select Save  to store your settings.                             

60 %

9:41 AM

60 %

9:41 AM

60 %

9:41 AM

Device name 

To rename device, click on the pencil icon on the upper 

right hand side, enter a different name, and click 

Save.

60 %

9:41 AM

60 %

9:41 AM

Содержание NHE-S100

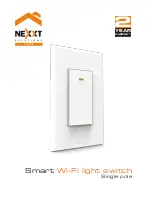
Страница 1: ...WARRANTY nexxtsolutions com warranty YEAR 2 Smart Wi Fi light switch Single pole...

Страница 2: ...t electrical fixture requires 110 220 volt AC This device has been tested by the manufacturer according to all international electrical standards However every state has different standards and rules...

Страница 3: ...rnet connection available LED light Status Description Turn power off at the circuit breaker or fuse Use only when it s installed with a residual current device RCD or current leakage protector at hom...

Страница 4: ...in the package If any part is missing or damaged do not attempt to assemble install or operate this product Estimated installation time about 30 minutes Tools that may be required but are not include...

Страница 5: ...e circuit breaker switch and verify that power is off Note you can use the circuit tester at this point to verity that power is cut off ON OFF ON OFF ON OFF Step 2 Remove the original switch from the...

Страница 6: ...ground wire in existing electrical installations Step 3 Label your wires Mark the corresponding cables before removing the existing light switch Always follow code standards when installing wired con...

Страница 7: ...nstalling wired connections Step 4 Mount the smart switch Using the correct polarity match each wire from the smart switch with those coming from the junction box Connect the wire ends of each pair in...

Страница 8: ...ch for approximately 7 seconds or until the red LED starts blinking rapidly ON OFF ON OFF ON OFF Installing the Nexxt Solutions Home App Download Nexxt Home app from Google Play or Apple App Store 60...

Страница 9: ...in the required fields 60 9 41 AM Register by email United States of America Email Get authentication code Step 2 Enter the verification code you received 60 9 41 AM Enter verification code Verificati...

Страница 10: ...tep 3 Create a new password and then select Completed 60 9 41 AM Set Password Completed 6 20 characters including letters and numbers Step 4 The Nexxt Solutions Home App has been successfully installe...

Страница 11: ...lt the device will be in pairing mode Confirm Indicator rapidly blinks Otherwise manually reset the device press and hold the ON OFF switch for approximately 7 seconds or until the red LED starts blin...

Страница 12: ...is displayed assign a location and click on Done 60 9 41 AM Step 3 You must connect to a 2 4GHz WiFi network Enter your network password Make sure you enter the correct password otherwise the device w...

Страница 13: ...d another room and name each room as needed Select Save to store your settings 60 9 41 AM 60 9 41 AM 60 9 41 AM Device name To rename device click on the pencil icon on the upper right hand side enter...

Страница 14: ...AM Configuration tools Schedule Allows you to add time and day schedule for the device to turn on or off Schedule setup Click on the schedule icon to access the Add schedule screen Set the time you wi...

Страница 15: ...remove a schedule on iOS slide item to the left and for Android press and hold Schedule followed by Delete 60 9 41 AM Press and hold the Schedule Settings Click on the pencil on the upper right hand c...

Страница 16: ...lexa and Google Assistant Offline notication provides a selection button to enable disable this feature Share device allows sharing the Wi Fi switch with family and friends Create group makes manageme...

Страница 17: ...hen tap on Add sharing Enter their e mail address Tap Completed Save The newly configured user will now have access to your smart light switch Note family or friend will need their own Nexxt Solutions...

Страница 18: ...nteligente requiere una tensi n de 110 220 voltios para funcionar El dispositivo ha sido sometido a las pruebas pertinentes por el fabricante conforme a todas las normas el ctricas internacionales No...

Страница 19: ...ere contar con un cable neutro para alimentar el interruptor de luz ADVERTENCIA Este dispositivo es de una sola banda y por consiguiente funciona solo con routers Wi Fi de 2 4GHz Rojo Rojo Verde Rojo...

Страница 20: ...Tiempo de instalaci n aproximado 30 minutos Herramientas que se podr an requerir para la instalaci n pero que no est n incluidas 1 Destornillador philips 2 Destornillador plano 3 Alicate 4 Pelador co...

Страница 21: ...siva el interruptor de cortacircuito y verifique que ya no fluye corriente a trav s de l Nota puede utilizar el probador de circuito en esta etapa para cerciorarse de haber desconectado la electricida...

Страница 22: ...egro representa el cable de fase y de circuito mientras que el amarillo verde es el de conexi n a tierra TIERRA FASE CARGA Fase Carga NEUTRO Nota es posible usar un alambre de cobre pulido para repres...

Страница 23: ...e ubicado en la caja de empalme 4 Cable de circuito rojo proveniente del interruptor inteligente con el cable de circuito ubicado en la caja de empalme Introduzca con cuidado todo el cable sobrante de...

Страница 24: ...itivo en forma manual manteniendo presionado el Interruptor de encendido apagado durante 7 segundos o hasta que el LED rojo comience a parpadear r pidamente Instalaci n de la aplicaci n Nexxt Solution...

Страница 25: ...los campos requeridos 60 9 41 AM Register by email United States of America Email Get authentication code Paso 2 Ingrese el c digo de verificaci n que recibi 60 9 41 AM Enter verification code Verifi...

Страница 26: ...contrase a nueva y seleccione Completo a continuaci n 60 9 41 AM Set Password Completed 6 20 characters including letters and numbers Paso 4 La cuenta de Nexxt Solutions Home ha sido configurada sati...

Страница 27: ...emparejamiento Confirme que el indicador parpadea r pidamente De lo contrario restablezca el dispositivo a su configuraci n original en forma manual mantenga presionado el intrruptor de encendido apa...

Страница 28: ...la pantalla proceda a asignar la ubicaci n y haga clic en Terminar al final Paso 3 Debe conectarse a la red Wi Fi de 2 4GHz Ingrese la contrase a de la red Aseg rese de utilizar la contrase a correcta...

Страница 29: ...los puntos de instalaci n respectivos Seleccione Guardar para almacenar sus par metros Denominaci n del dispositivo Para cambiar la denominaci n del dispositivo haga clic en el cono del l piz ubicado...

Страница 30: ...io Le permite programar la hora y el d a cuando desea conectar o desconectar el dispositivo Configuraci n del horario Haga clic en el cono del horario para abrir la pantalla Agregar horario Defina el...

Страница 31: ...e el tem a la izquierda en iOS pero mantenga presionado el Horario respectivo de utilizar Android seguido de Borrar al final 60 9 41 AM Pulse el Horario deseado Configuraci n Haga clic en la cono del...

Страница 32: ...l cono del l piz para acceder al men correspondiente a la denominaci n del dispositivo Informaci n del dispositivo exhibe los datos relacionados con el interruptor Wi Fi Activaci n r pida y automatiza...

Страница 33: ...en pantalla Seleccione Confirmar 60 9 41 AM 60 9 41 AM Compartir dispositivo Seleccione Compartir dispositivos seguido de Agregar acceso compartido Ingrese la direcci n de correo electr nico Seleccion...

Страница 34: ...Alexa y todos los logos relacionados son marcas registradas_ de_ Amazon com Inc o sus afiliados Google Android y Google Play son marcas registradas de Google LLC Todas las dem s marcas y nombres come...

Страница 35: ...Smart Wi Fi light switch Single pole...

Отзывы: