13
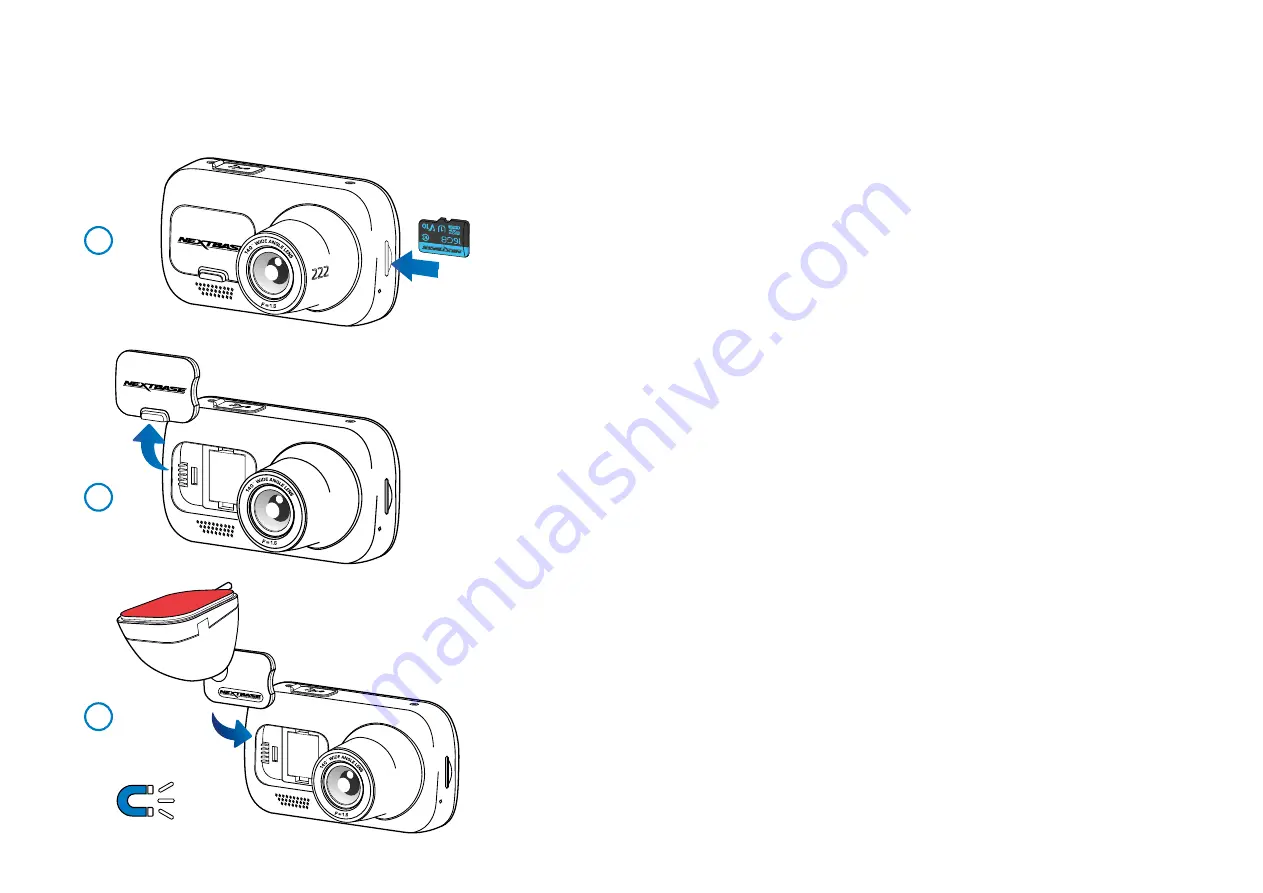
1 Insert MicroSD Card
Insert a suitable MicroSD card (Class 10, U1 minimum 48/Mbps) in to the Dash Cam, taking care that
the gold contacts are facing towards the LCD screen side of the Dash Cam.
Push the memory card until it clicks into place.
Note:
- Use the edge of a small coin (or similar object) to push the memory card in place if required.
Take care that card has 'clicked' into place, a second push inwards will release the memory card.
- For best results, we recommend using Nextbase
™
branded SD cards.
- Do not remove or insert the memory card when the Dash Cam is turned on.
This may damage the memory card.
2 Remove dust cover from the Dash Cam
Remove the dust cover that is located on the front of the Dash Cam to gain access to
the mounting point.
To remove the dust cover, lift the cover away from the body of the Dash Cam.
Note:
- If the Dash Cam is not to be used for a period of time replace the dust cover to help keep
the components free of dust or other contaminants.
3 Attach the mount to the Dash Cam
Place the mount in space under the dust cover on the Dash Cam. Once in place, magnets within
the mount and camera will hold the two parts together.
See page 16 for more information on changing mounts attachments.
1
2
3
In Vehicle Installation
Please follow the instructions below for the first-time installation of the Dash Cam. For day to day use,
simply remove the camera from the mount as required.
Содержание NBDVR222
Страница 1: ...User Manual...
Страница 36: ...NBDVR222 ENG R2...


