Access Files
Power On
PC Connection
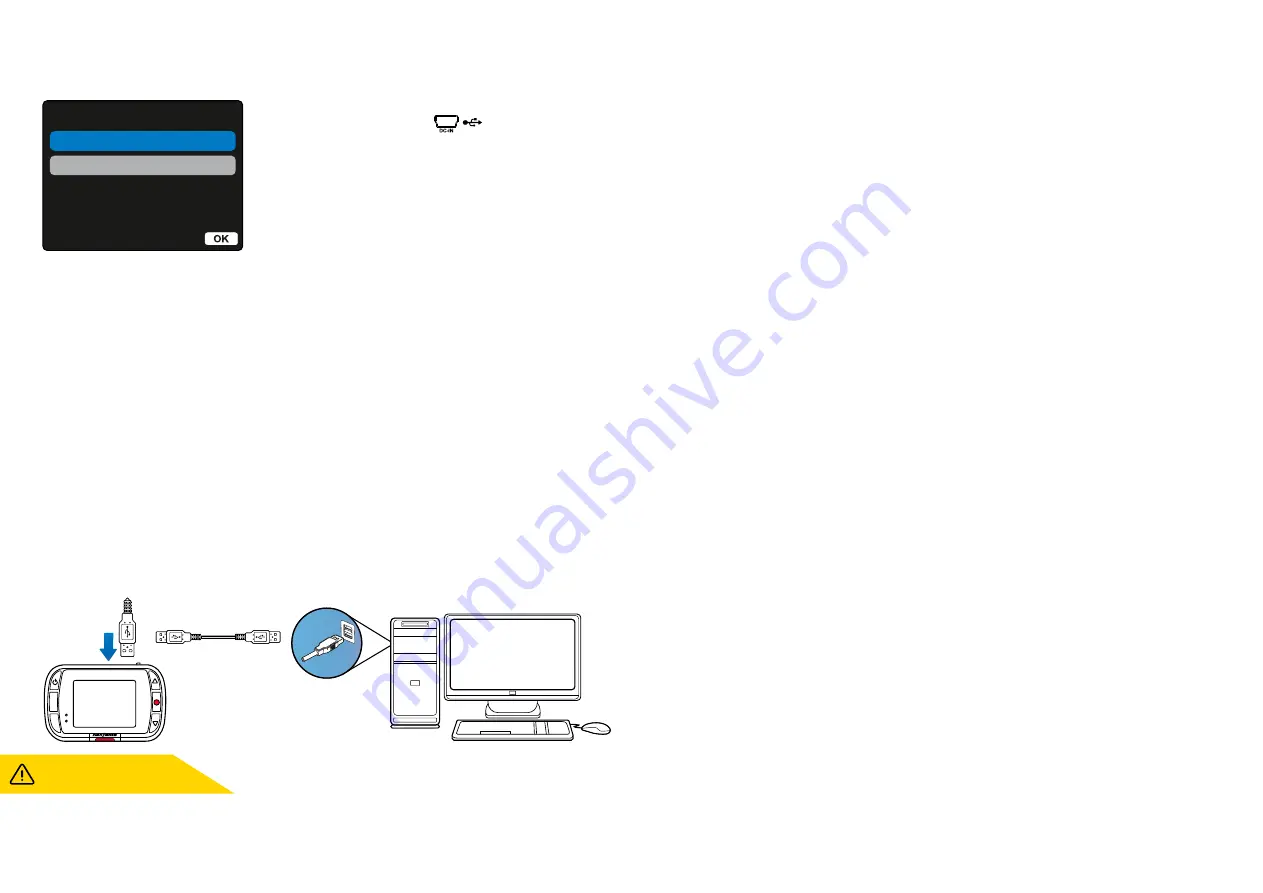
Use the supplied USB cable to connect the Dash Cam
directly to your PC via the socket on top of the
Dash Cam;
do NOT connect the USB cable to the Powered Mount.
Once connected the Dash Cam will turn on with two options
available; ‘
Access Files
’ and ‘
Power On
’, as described below.
Use the UP and DOWN buttons to select required function
and press OK to confirm selection.
Access Files (Windows)
When this option is selected, the Dash Cam will function as a card reader for your PC. An extra drive will
appear, e.g. NEXTBASE (D:) and you will be able to view / manage the stored files upon the MicroSD card
within the Dash Cam. You will be able to view your files using your system’s default media player.
The Dash Cam is a ‘read-only’ device, therefore uploading files to the SD card when in Mass Storage
mode is not possible. If you wish to add files to the SD card you can do this using a MicroSD card reader.
Access Files (Mac)
When this option is selected, the Dash Cam will function as a card reader for your MAC. The 'Nextbase’
external USB disk icon will appear on your MAC and you will be able to view and/or manage stored files.
You will be able to view your files using your system’s default media player.
The Dash Cam is a ‘read-only’ device, therefore uploading files to the SD card when in Mass Storage
mode is not possible. If you wish to add files to the SD card you can do this using a MicroSd card reader.
Power On (Windows & Mac)
When this option is selected, the Dash Cam will power on with all functions available. This includes
charging of the internal battery; a full charge will take approximately 2 hours.
MODE
MENU
PC Connection
25
Firmware Update Information
Firmware controls the basic functioning of the Dash Cam. If your Dash Cam is not functioning correctly,
you may need to update the firmware.
Firmware updates may also be released to fix bugs, and improve the general functionality of the Dash Cam.
In short, it’s important to keep the firmware on your Dash Cam up to date so it can operate to it’s full capacity.
We recommend you regularly check for updates to get the most from your Dash Cam.
How to Check your Dash Cam’s current Firmware Version
Within the Setup Menu, on page 3, select ‘System Info’. Here you will find information relating to your
Dash Cam, including what firmware version is currently active (i.e R05.3).
How to Update Firmware on your Dash Cam
Connect your Dash Cam’s SD Card to PC using a card reader. This will open a file explorer drive,
(e.g) Removable Disk (E:) and show the contents of your SD Card. Go to the ‘Support & Downloads’ page
on nextbase.com and download the newest firmware version (i.e R05.4); this will download as .bin file.
Drag and drop the .bin file to the SD Card explorer.
Eject the SD card and insert it back into your Dash Cam. When you connect the power cable your Dash
Cam will turn on, and will automatically begin updating. While updating, both the Nextbase™ logo
beneath the screen and the red LED to the left of the screen will start flashing.
Once the update has been completed, the logo and LED will stop flashing, and your Dash Cam will
automatically restart.
If ‘Keep User Settings’ is turned ON in the Setup Menu, your Dash Cam will boot up normally,
Notes:
straight into video live view mode, ready to use. If ‘Keep User Settings’ is turned OFF, after the update is
complete, the Dash Cam will boot up into the First Time Use menu, which must be completed before the
Dash Cam can be used.
Be sure to externally back up any files you want to keep before updating the firmware.
ALWAYS turn OFF the Dash Cam
before disconnecting from your PC/Mac.
Enter
Содержание NBDVR122
Страница 1: ...User Manual...
Страница 33: ...NBDVR122 ENG R2...


