NextBase A26 Series Скачать руководство пользователя страница 19

18

19

English

UPDATING THE FIRMWARE

For A263(W)/A262(W)

Download the latest firmware from NEXTBASE website (www.next-base.com), and prepare a microSD card.

Upzip the zipped file and store the firmware (“FWA262.bin” or “FWA263.bin”) into the root directory of the memory 

card.

Turn off the camera and insert the memory card into its slot.

Turn on the camera. The firmware upgrade process will start automatically and may take a few minutes to 

complete. Once the process is complete, the camera will restart automatically.

NOTE:

During the upgrading process, the LED indicator will blink.

Press the


 button and select 

Format

 to format the memory card.

Restart the camera by pressing the 

 button. See the “Powering On/Off the Camera Manually” section on page 

12.

For A26R

Download the latest firmware from NEXTBASE website (www.next-base.com), and prepare a microSD card.

Upzip the zipped file and store the firmware (“EthcamTxFW.bin” and “EthcamTxFW.update”) into the root directory 

of the memory card.

Turn off the camera and insert the memory card into its slot.

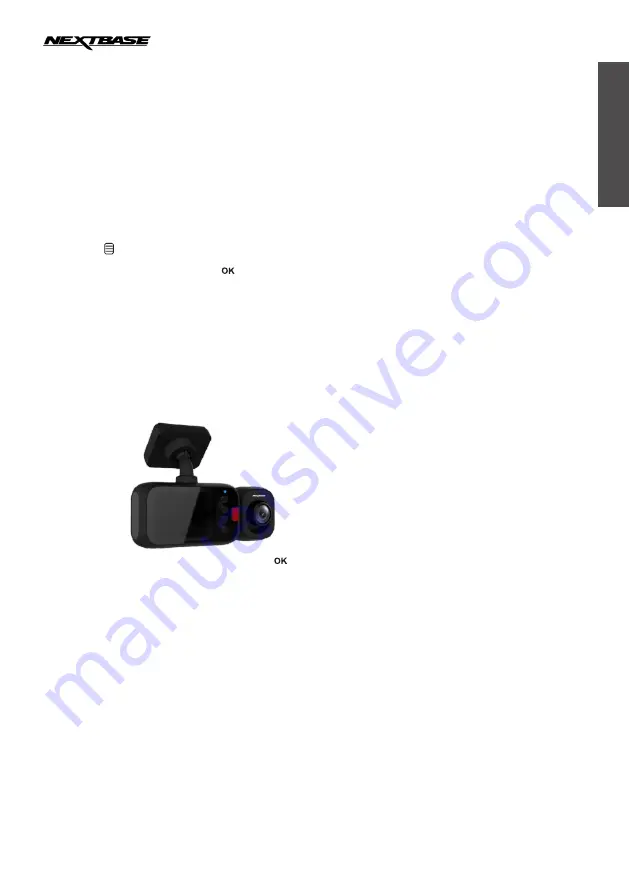
Turn on the camera, and then insert 

A26R

 to 

A263

/

A262

After both recording screens appear, press the 

 button to start updating the firmware. The “Tx Start Update 

FW...” message will appear on the screen.

NOTE:

For more information on installing and connecting the rear view camera, see the “Installing the Rear View Camera” 

section on page 10.

After the message disappears, the monitor will show both front/rear recording screens. This indicates the firmware 

had been updated. Please restart the camera.

Содержание A26 Series

Страница 1: ...Instruction Manual English Professional A26X Series High Definition Car DVR...

Страница 2: ...are qualified to do so Have the unit serviced by a qualified service technician if The Unit has been exposed to rain or water The unit does not seem to operate normally The unit exhibits a marked chan...

Страница 3: ...fps 2K 30fps 1080P 30fps 1080P 60fps 1080P 60fps 1080F 1080P 30fps 1080P 30fps 1080F 720P 60fps 720P 30fps A26R Single Channel 1080P 30fps Screen 2 0 inches screen Video Code Format H 264 MP4 or TS Au...

Страница 4: ...3W with Wi Fi Single Channel Dual Channel Voltage 5V Current 570 640mA Voltage 5V Current 950 1010mA A262 without Wi Fi Single Channel Dual Channel Voltage 5V Current Voltage 5V Current A262W with Wi...

Страница 5: ...esive sticker Window Stickers x2 3M Adhesive Sticker NOTE Car charger with Type C adapter is used for supplying power from the 12 24Vdc outlet of your vehicle USB data cable is used for connection to...

Страница 6: ...ent and accurate video or images even in low light environments The camera is suitable for wide range contrast environment G Sensor File Protection In the event of an impact the camera will automatica...

Страница 7: ...emergency situation 8 DOWN Recording Mode Take a snapshot Playback Mode Move to the previous file Video Playback Mode Fast forward playback In the Menus Navigate down within menus 9 OK Video Mode Shor...

Страница 8: ...UHS 1 rating or better and a capacity between 16GB and 256GB Recording Time The camera supports microSD card up to 256GB Card Capacity Mode FPS 4K 30fps 2K 60fps 2K 30fps 1080P 60fps 1080P 30fps 720P...

Страница 9: ...k 2 Wipe clean the chosen area of the windshield with a dry cloth Then attach the window sticker onto the windshield 3 Peel off the adhesive cover layer from the GPS bracket Then place and press down...

Страница 10: ...to the rear window 2 Peel off the adhesive cover layer from the mounting bracket Then place and press down the bracket firmly onto the attached window sticker 3 Connect one end of the USB cable to the...

Страница 11: ...of the GPS bracket 2 Route the car adapter around the windshield to the 12 24Vdc socket ensuring that your view is not obstructed and that the adapter is not a distraction Then plug the other end of t...

Страница 12: ...camera directly in front of the driver Do not place the Dash Cam in such a way that it may interfere with the deployment of air bags or other safety equipment Adjust any settings or review the record...

Страница 13: ...OFF in the OSD menu 4 Recording Time Display the length of current recording 5 Resolution Display the current video resolution 6 Time Lapse Recording ON Can be switched OFF in the OSD menu 7 GPS Recep...

Страница 14: ...tivity is set to Low Sensitivity it will only detect the significant shocks G Sensor sensitivity can be adjusted in the OSD menu See page 18 30 or 40 2 Manual emergency recording During video recordin...

Страница 15: ...deo 2021 10 30 07 55 5 5 Emergency 2021 10 30 07 55 Normal Videos Emergency Videos Preview Mode 20211017144755_000029A 1080P30 00 00 16 1X 1X 1X File name Buttons guideline Video resolution Video leng...

Страница 16: ...layback VIEWING PHOTOS Press the or button to browse the desired photo file Then press the button to view the photo in full screen 5 5 Photo File 2021 10 30 07 55 Preview Mode 20211017143828_000028A 3...

Страница 17: ...with optional hardwire kit connected Select the parking mode type Off Disable the Parking Mode function Normal Mode Perform the interval recording when in Parking Mode When the camera is on and then t...

Страница 18: ...e power supply specification used in your country or geographical region Choosing the correct value will reduce flickering caused by incandescent fluorescent lamps at night time The LED traffic lights...

Страница 19: ...ing the button See the Powering On Off the Camera Manually section on page 12 For A26R 1 Download the latest firmware from NEXTBASE website www next base com and prepare a microSD card 2 Upzip the zip...

Страница 20: ...video files you can find them in the RO subfolder Photo Video snapshot files REVIEWING VIDEOS WITH GPS LOG Software Installation and Registration 1 Download the third party GPS Player software at www...

Страница 21: ...d and Distance info G Sensor data Current location Driving direction on the map Auto play of the next video Volume adjustment Video playback controls Take snapshot Video scaling ratio Recording Data D...

Страница 22: ...s to switch to the Wi Fi mode Once the Wi Fi mode is activated the SSID and password will appear on the screen 00 00 13 30 10 2021 SSID A263_fceee645bdb1 PWA2 12345678 SSID A263_fceee645bdb1 PWA2 1234...

Страница 23: ...screen 00 00 13 30 10 2021 13 30 25 4KP30 1080P30 4KP30 1080P30 USING THE APP Overview 1 On your mobile device tap the icon to launch the My_NB app 2 Tap CONNECT YOUR CAMERA to enter the main screen T...

Страница 24: ...essage will appear on the screen Tap OK to dismiss the message To view the recorded videos 1 On the bottom panel tap 2 Select the video category Video or Emergency tab that you want to view 3 Select t...

Страница 25: ...25 English To view the recorded photos 1 On the bottom panel tap Then select the Photo tab 2 Select the desired photo that you want to view...

Страница 26: ...the video category Video or Emergency tab or Photo tab 2 Tap and select the file s that you want to download Then tap to download the selected file s 3 Select one of the following options Save to sys...

Страница 27: ...mply tap to save the file To save all files to your mobile device 1 On the bottom panel tap Then select the video category Video or Emergency tab or Photo tab 2 Tap Then tap to select all files NOTE T...

Страница 28: ...On the bottom panel tap Then tap on the top right panel 2 Select the video category Video or Emergency tab or Photo tab 3 Select the file that you want to view NOTE To delete the file tap When a conf...

Страница 29: ...Then tap to delete the selected file s 3 A confirmation message will appear on the screen Tap Ok to confirm the deletion To delete all files 1 On the bottom panel tap Then select the video category Vi...

Страница 30: ...e for video recording Motion Detection Enable disable the motion detection function G Sensor Select the sensitivity level of the G Sensor Date Stamp Turn on off the date stamp shown on the recorded fi...

Страница 31: ...e Memory Space View the remaining storage space on the microSD card Format SD Card Format the inserted microSD card Reset Camera Setting Reset the camera to the factory default settings App Version Di...

Страница 32: ...seconds to switch to the Wi Fi mode Once the Wi Fi mode is activated the SSID and password will appear on the screen 00 00 13 30 10 2021 SSID A263_fceee645bdb1 PWA2 12345678 SSID A263_fceee645bdb1 PWA...

Страница 33: ...appear from the screen 00 00 13 30 10 2021 13 30 25 4KP30 1080P30 4KP30 1080P30 USING THE APP Overview 1 On your mobile device tap the icon to launch the My_NB app 2 Tap CONNECT YOUR CAMERA to enter t...

Страница 34: ...reminder message will appear shortly on the screen To view the recorded videos 1 On the bottom panel tap 2 Select the video category Video or Emergency tab that you want to view 3 Select the desired...

Страница 35: ...35 English To view the recorded photos 1 On the bottom panel tap Then select the Photo tab 2 Select the desired photo that you want to view...

Страница 36: ...ur mobile device 1 On the bottom panel tap Then select the video category Video or Emergency tab or Photo tab 2 Tap and select the file s that you want to download Then tap to download the selected fi...

Страница 37: ...tap Then select the video category Video or Emergency tab or Photo tab 2 Tap Then tap to select all files NOTE To deselect the files tap again 3 Tap to download all files After the saving process is...

Страница 38: ...n the bottom panel tap Then tap on the top right panel 2 Select the video category Video or Emergency tab or Photo tab 3 Select the file that you want to view NOTE To delete the file tap When a confir...

Страница 39: ...tap to delete the selected file s 3 A confirmation message will appear on the screen Tap DELETE to confirm the deletion To delete all files 1 On the bottom panel tap Then select the video category Vi...

Страница 40: ...vidual video files Recording Audio Turn on off the microphone for video recording Motion Detection Enable disable the motion detection function G Sensor Select the sensitivity level of the G Sensor Da...

Страница 41: ...e Memory Space View the remaining storage space on the microSD card Format SD Card Format the inserted microSD card Reset Camera Setting Reset the camera to the factory default settings App Version Di...

Страница 42: ...o playback is really quick on my PC not consistent with the driving scene that was recorded Set the Time Lapse Recording setting is set to Off See page 18 Video playback is lagged To play the high res...

Отзывы: