


12
English
Powering On/Off the Camera Manually
To manually turn on/off the power, press and hold the
button for at least 3 seconds.
NOTE:
•
Your Dash Cam is shipped with the
Screen Saver
function set to Default OFF. This is for ease of initial setup.
Once setup is complete, the screen saver should be set to 15 seconds, in order to blank the screen completely
whilst driving. This avoids any potential distraction and may be a legal requirement in some countries.
•
It is recommended to position your Dash Cam on the passenger side of the car, behind the rear view mirror,
as shown above. Whilst the camera needs to be located in a position within the wiper swept area, do not allow
the camera to obstruct your vision of the road ahead. Recommended position is no more than 40mm within the
wiper swept area. Do NOT mount the camera directly in front of the driver.
•
Do not place the Dash Cam in such a way that it may interfere with the deployment of air bags or other safety
equipment.
•
Adjust any settings or review the recordings whilst stationery, not whilst driving.
•
In vehicles where the 12V / 24V output remains on when the ignition is turned off. Please disconnect the camera
when not in use.
•
When using the camera for the first time, make sure to set the correct date and time settings.
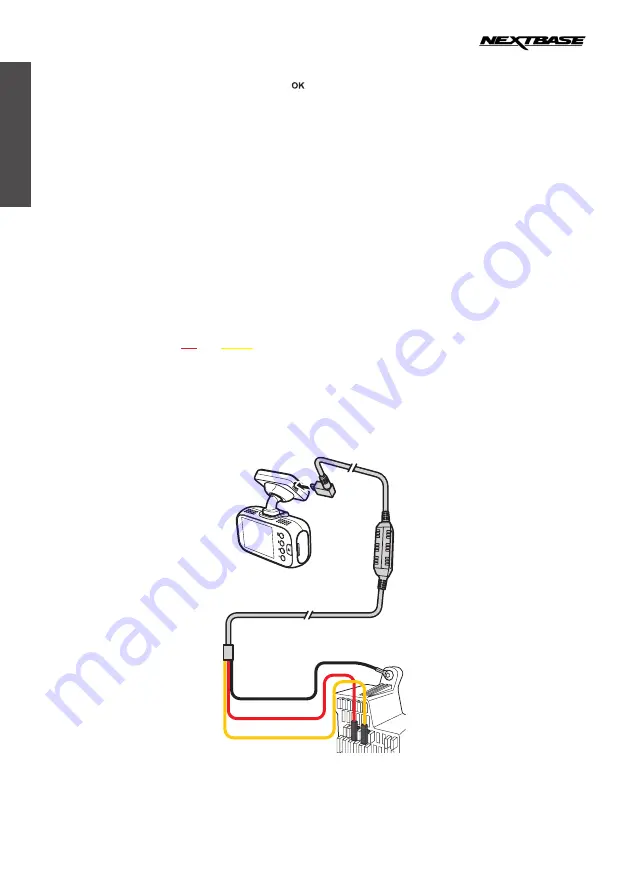
Installing Smart Hardwire Kit
Warning!
Do not connect the
red
and
yellow
wires into the same fuse slot.
1
Locate the fuse box of your vehicle.
The fuse box location varies depending on your vehicle type.
2
Connect the
red
wire to the positive electrode of the fuse adapter.
3
Connect the
black
wire to the metal (ground-negative electrode).
4
Connect the
yellow
wire to the ACC power supply.
Ground
ACC
NOTE:
Please be noted the smart hardwire kit will stop working when car battery voltage is too low, it’s to prevent over
consuming of car battery.


