background image

10

should display an animating battery icon indicating the charging status. When the
battery is fully charged, the battery icon turns green.
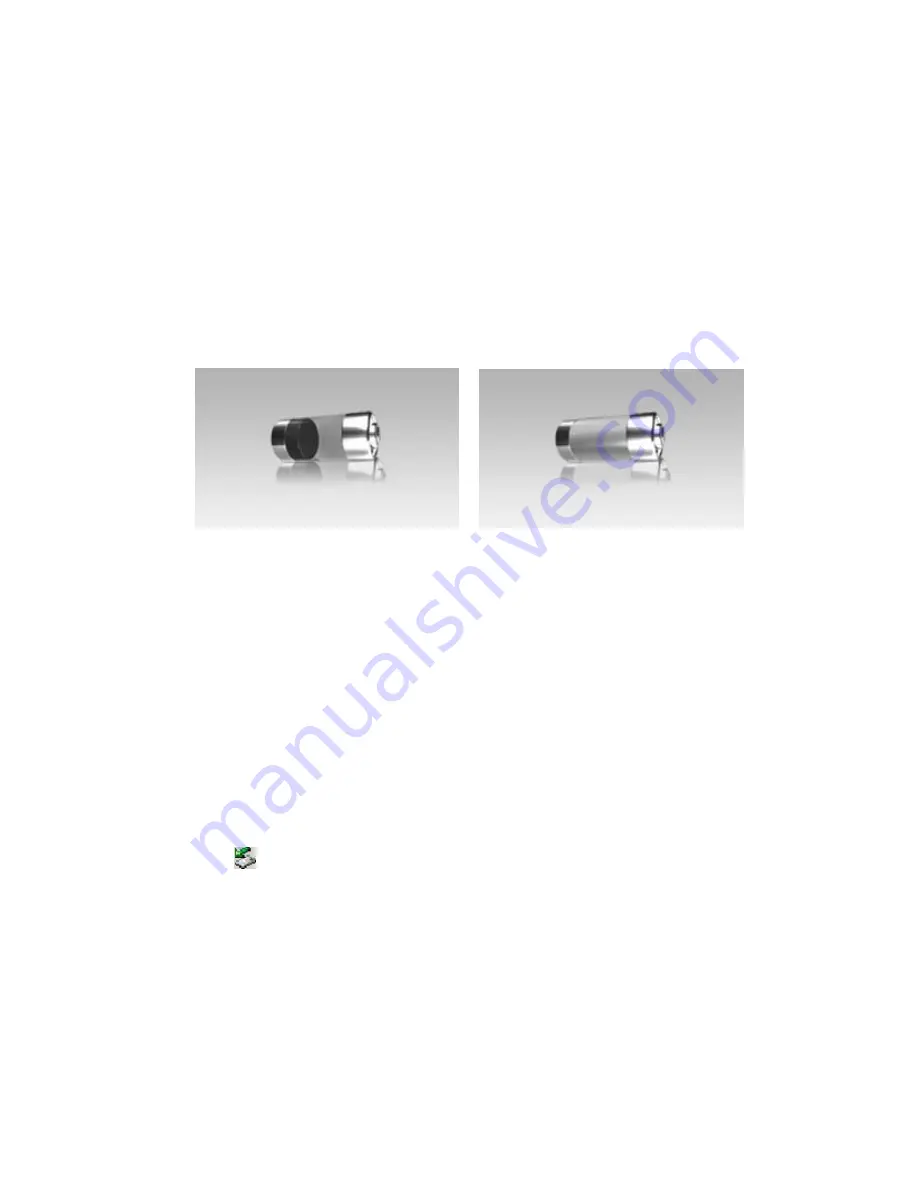
Charging

Full Charge

NOTICE:

For maximum performance, lithium-ion batteries need to be used often. If

you don’tuse the device often, be sure to recharge the battery at least once per
month.

Connect to a PC and download audio files

This player is plug & play for WIN2000/XP/ME/Vista OS.
To connect it with PC for transferring files,

(1) Plug the larger end of the USB cable to the USB port of the PC, and plug the

smaller end to the USB port of the player.

(2) When the “ ”icon appear at the right bottom of the PC screen, double click

Содержание MA809

Страница 1: ...1...

Страница 2: ...PC safely 11 Power On Off 11 Lock Unlock buttons 12 Enter Various Function Modes 13 Music 14 Video 24 Photos 25 E book 26 Voice Recording 30 FM Radio 31 Explorer 35 Other Function 36 Settings 37 Conve...

Страница 3: ...c Player Video player Image viewer Micro SD card reader Folder Navigation Voice Recorder Stereo FM radio FM Recording Removable Storage Device Built in rechargeable lithium ion battery Multiple repeat...

Страница 4: ...128 MB RAM Mac OSX V 10 0 or later version Power PC G5 800MHz or above 512 MB RAM Linux OS Kernel V2 4 0 or later version Intel Pentium II 200MHz or above 128 MB RAM DRM9 support requires Windows XP o...

Страница 5: ...Off and Play Pause D MENU Press and hold to return Briefly press to confirm selection E Previous Play the previous track Also select the previous item F Next Play the next track Also select the next...

Страница 6: ...indication Time clock Volume level Bit rate Track number EQ Mode Track Title Lyric Play Pause Elapsed time Progress bar Total playing time Repeat mode Video Play pause File Name Progress Elapsed time...

Страница 7: ...7 Photo FM Radio Signal indication Stereo Mono indication Region Current station Channel number Volume level Frequency band...

Страница 8: ...8 E book Current page number Total number of pages File Name Text Record Voice file name Recording quality Remained time Elapsed time...

Страница 9: ...first time It takes about 3 hours to fully charge the battery Connect the larger end of the USB cable to the USB interface of PC and connect the other smaller end of the USB cable to the USB interface...

Страница 10: ...often If you don t use the device often be sure to recharge the battery at least once per month Connect to a PC and download audio files This player is plug play for WIN2000 XP ME Vista OS To connect...

Страница 11: ...t click the icon at the right hand corner of the taskbar 2 Click the pop up mini window with message of Stop the USB Mass Storage Device Drive X 3 When you are prompted to remove the device pull out t...

Страница 12: ...ed or lost Lock Unlock buttons To lock the buttons against being pressed accidentally 1 On the main menu select the item and press the MENU button to enter the system settings mode 2 Press the PREVIOU...

Страница 13: ...To unlock the buttons press the PLAY PAUSE button Enter Various Function Modes On the main menu press the PREVIOUS NEXT button to select a mode and then press the MENU button to enter it Music Video P...

Страница 14: ...tings Music 1 Enter the music mode On the main menu use the PREVIOUS NEXT button to select menu and press the MENU button to confirm selection 2 Listen to music by category 1 Press PREVIOUS NEXT butto...

Страница 15: ...tist Album play music files by album Genre play music files by genre My Favorite play my favorite tracks Record play recording files Dir List display all music files by directory MediaLib Update updat...

Страница 16: ...the PREVIOUS button 4 Music Playback Setting When the music is being played shortly press the MENU button to display the submenu You can use options on the submenu to set the play mode EQ mode etc Pr...

Страница 17: ...e MENU button to continue or press and hold the MENU button to return 3 Press the PREVIOUS NEXT button to select your desired mode and then press the MENU button to confirm or press and hold the MENU...

Страница 18: ...turn Play Mode Options Order Play all tracks in order Shuffle Shuffle all tracks To set the MSEQ Microsoft EQ 1 In the music playback screen shortly press the MENU button to display the submenu 2 Pres...

Страница 19: ...press the MENU button to continue or press and hold the MENU button to return 3 Press the PREVIOUS NEXT button to select your desired mode and then press the MENU button to confirm or press and hold t...

Страница 20: ...PREVIOUS NEXT to select a setting column and then press the VOL VOL button to adjust the level 5 Shortly press the MENU button to confirm setting To set the display mode 1 In the music playback scree...

Страница 21: ...Display the music file name only 5 Search for track You can search for a track by entering the preceding letters of the track name 1 Enter the Music mode from the main menu 2 Select Search from the m...

Страница 22: ...you can enter is up to 6 letters 6 Once finished entering all letters press the Play Pause button to confirm and start searching or press and hold the MENU button to quit 7 Once found all music files...

Страница 23: ...NEXT button to select My Favorite and then press the MENU button to enter it You see all your favorite songs are listed Press the PREVIOUS NEXT button to select a song and then press the MENU button...

Страница 24: ...o file that you want to play and press the MENU button to play Basic Operations Play Pause Press the PLAY PAUSE button to play or pause Adjust Volume Shortly press the VOL VOL button to decrease or in...

Страница 25: ...ress the MENU button to confirm 3 Press the PREVIOUS NEXT button to select an image and press the MENU to confirm and enlarge it to full screen 4 In the full screen mode you can press the PREVIOUS NEX...

Страница 26: ...photo that you want to delete 2 Briefly press the VOL button to display Delete File menu 3 Select Delete File from the menu and then press the MENU button to confirm 4 Press the PREVIOUS NEXT button...

Страница 27: ...Auto Mode and then press the MENU button to confirm Selecting Manual Mode will exit from the slide show mode 2 Using bookmark During reading you can use the bookmark to mark the page for resuming read...

Страница 28: ...the bookmark and press the MENU button to confirm Delete Bookmark To delete the bookmark that you saved 1 Briefly press the MENU button to display the submenu 2 Press the PREVIOUS NEXT button to sele...

Страница 29: ...pressing and holding the PREVIOUS NEXT button 4 Press the MENU button to confirm 4 Set the font size 1 Briefly press the MENU button to display the submenu 2 Press the PREVIOUS NEXT button to select...

Страница 30: ...y press the MENU button to display the submenu 2 Press the PREVIOUS NEXT button to select Flip Time and press the MENU button to confirm 3 Press the PREVIOUS NEXT button to select a time and then pres...

Страница 31: ...ording Play recordings To play the recording 1 Enter the MUSIC mode by selecting from the main menu 2 Press the PREVIOUS NEXT button to select Record from the music category list and then press the ME...

Страница 32: ...or stations within the frequency band and save the found stations automatically Note Please plug in the earphones to the player before scanning radio stations Search for stations manually 1 Shortly pr...

Страница 33: ...and press the MENU button to confirm Listen to saved stations 1 Shortly press the MENU button to activate submenus 2 Press the PREVIOUS NEXT button to select Preset menu and press the MENU button to e...

Страница 34: ...tton to activate submenus 2 Press the PREVIOUS NEXT button to select Stereo Switch menu and press the MENU button to continue 3 Press the PREVIOUS NEXT button to select On to enable the Stereo mode or...

Страница 35: ...g recording you can press the PLAY PAUSE button to pause or resume recording 4 Shortly press the MENU button to stop recording 5 Press the PREVIOUS NEXT button to select Yes and then press the MENU bu...

Страница 36: ...nue 4 Press the PREVIOUS NEXT button to select Yes and then press the MENU button to confirm Other Function This player provides other useful tools in the Other Function Stopwatch 1 On the main menu s...

Страница 37: ...ection cursor 4 Press the MENU button to jump to the Month item and then press the PREVIOUS NEXT to change the month The calendar view changes accordingly 5 Press the MENU button again to jump to the...

Страница 38: ...Upgrade upgrade the firmware Load to defaults restore to default system settings System Setting Key Lock Time set the idle time after which the buttons are locked automatically Time adjust the time Pr...

Страница 39: ...the AVI converter make sure that the Windows OS is installed with DirectX9 0 or above Before you download videos to the device make sure they are AVI files and can be played by the device If not conv...

Страница 40: ...40 4 Select an installation interface language 5 Click Next to continue Browse to a destination for the installation...

Страница 41: ...41 6 Click Install to start installation 7 Wait for the installation to be completed before you see the following window Click Finish to finish installation...

Страница 42: ...enu to see the following window 2 Click button to display Conversion Setting window 3 For the Source File field specify the file that you want to convert by clicking the button on the right For the Ta...

Страница 43: ...layer s screen otherwise the conversion may fail 5 Set the conversion quality in the Quality field and display mode in the Aspect Ratio filed 6 Click Save to save your setting To convert another file...

Страница 44: ...ick Convert Now to start converting 9 Click Finish after the converting is finished Firmware Update To get the latest software version or recover the system 1 Obtain the upgrade program files from the...

Страница 45: ...em Setting and then press the MENU button to confirm 8 Select Upgrade and press the MENU button to confirm 9 Select Yes and press the MENU button to confirm and start upgrading 10 Wait for a few minut...

Страница 46: ...r The player is disconnected from the PC abruptly while transferring files Do not disconnect the player from the PC when transferring files Total memory displayed on the player is not in accordance wi...

Страница 47: ...file The photo cannot be displayed The image resolution is beyond limitation of the device Try to decrease the image resolution The TXT file cannot be read The file format is not supported Skip it or...

Страница 48: ...Power 5mW 5Mw Video Format AVI Audio Format MP3 WMA Photo Format JPEG BMP GIF SNR 90dB USB Port USB2 0 high speed Operational Temperature 0 55 Storage Temperature 20 55 Operational Relative Humidity...

Страница 49: ...not supported by this device please check whether it is on the following format benchmark Audio Decoding Benchmark MP3 AUDIO Codec MPEG1 2 2 5 Audio Layer 3 Channel 2 Bitrate 8 320Kbps CBR and VBR Sam...

Страница 50: ...E If the image is previewed a file named RKBROWSER DAT will be created in the device automatically Video Benchmark MPEG 4 VIDEO Codec XviD DivX 3 4 5 Resolution Max 800x480 pels Bitrate No restriction...

Страница 51: ...e wait for the process to be completed Listening Cautions Do not play your earphones or headphones at a high volume Hearing experts advise against continuous extended play If you experience a ringing...

Страница 52: ...ou can hear it comfortably and clearly and without distortion Once you have established a comfortable sound level leave it there Precautions 1 When not using the player for an extended period of time...

Страница 53: ...een tested and found to comply with the limits for Class B digital device pursuant to part 15 of the FCC Rules These limits are designed to provide reasonable protection against harmful interference i...

Страница 54: ...to computer Any unauthorized changes or modifications to this equipment would void the user s authority to operate this device This device complies with part 15 subpart B of the FCC Rules Operation is...

Страница 55: ...55 Industry Canada Requirement This Class B apparatus complies with Canadian ICES 003...

Страница 56: ...Any unauthorized distribution of this manual is expressly forbidden 2008 Nextar Hong Kong Limited Nextar is a trademark and service mark of Nextar Hong Kong Limited All other brand names trademarks an...

Отзывы: