NR-05-0001/1.0
User
Guide
2.3 Installing the EKKO Projector Adapter
The adapter should be placed in a ventilated area away from direct sources of heat.
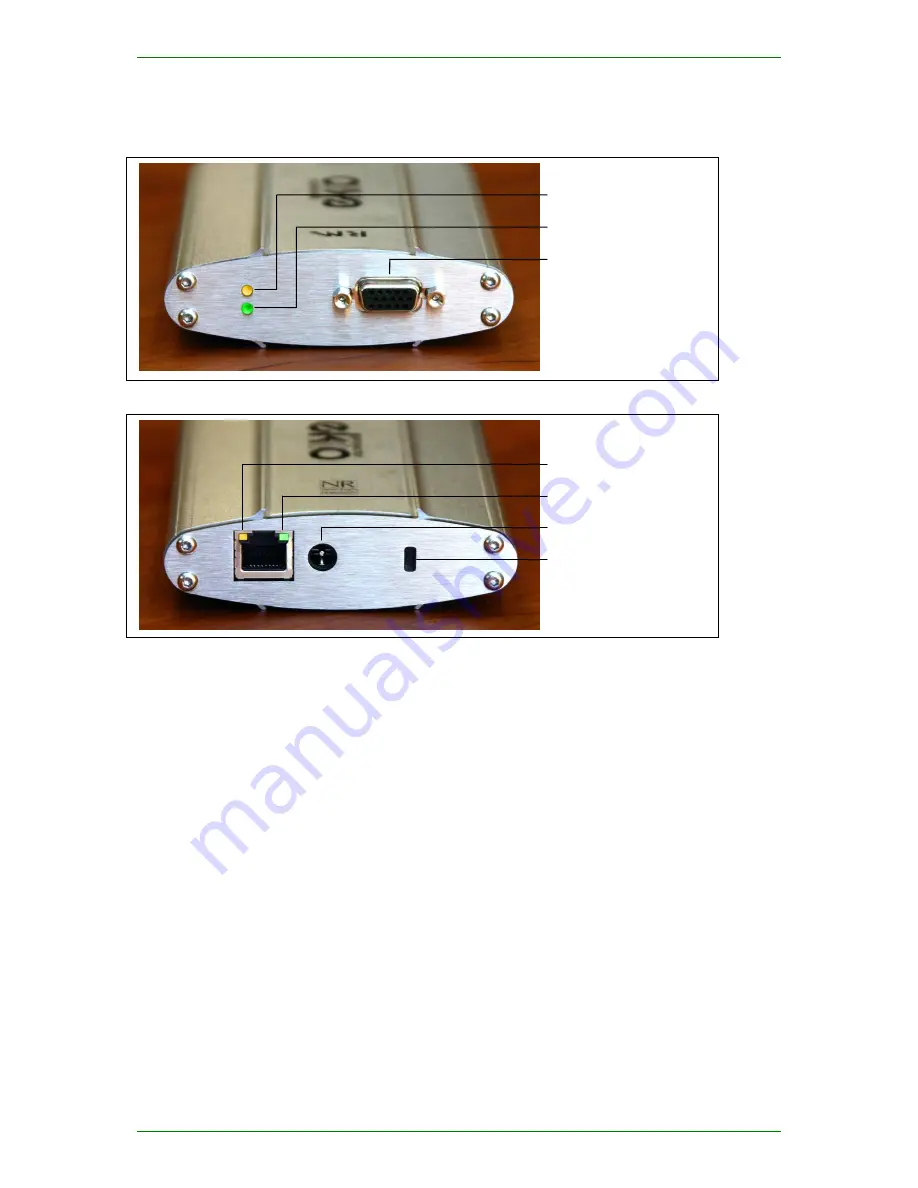
Figure 1 – EKKO Projector Adapter viewed from VGA connector end
Figure 2 - EKKO Projector Adapter viewed from Network connector end
Kensington Security Slot
Power
Network Link (Green)
Network Activity (Yellow)
VGA Connector
Idle Status (Green)
Client Status (Yellow)
Figure 1 and Figure 2 show the details of the various sockets, which should be connected as follows:
1.
Connect a projector to the VGA Connector
2.
Connect the EKKO Projector Adapter to the Ethernet network using the NETWORK socket
3.
Connect the power adaptor to the POWER socket
When the power is switched on the device will go through a boot sequence which will take a few
seconds (see section 3.2 ). Once the boot is complete the Network Link indicator and the Idle Status
indicator should be lit. The Network Activity light will flash intermittently when there is other activity
on the network. If the device does not boot within 15 seconds, check the troubleshooting section
below (section 3.3.1 ).
At this point, assuming the adapter has been given an IP address as described in section 2.1.3 above, it
is possible to test that it is operating correctly, using the ping command-line utility, e.g.:
ping ekko1
or
ping 192.168.0.101
If the EKKO Projector Adapter’s IP address and/or name is not known, it will be necessary to examine
the DHCP server’s information panel or logs for this information. This is best done by your network
administrator.
Newnham Research Ltd
page 5 of 15


