SECTION 10 – ENGINE – CHAPTER 1
10-34
5. Use a seat cutter to correct any seat eccentricity,
or clean up of pits and grooves. Ensure after any
rework that seat width is within specified limits.
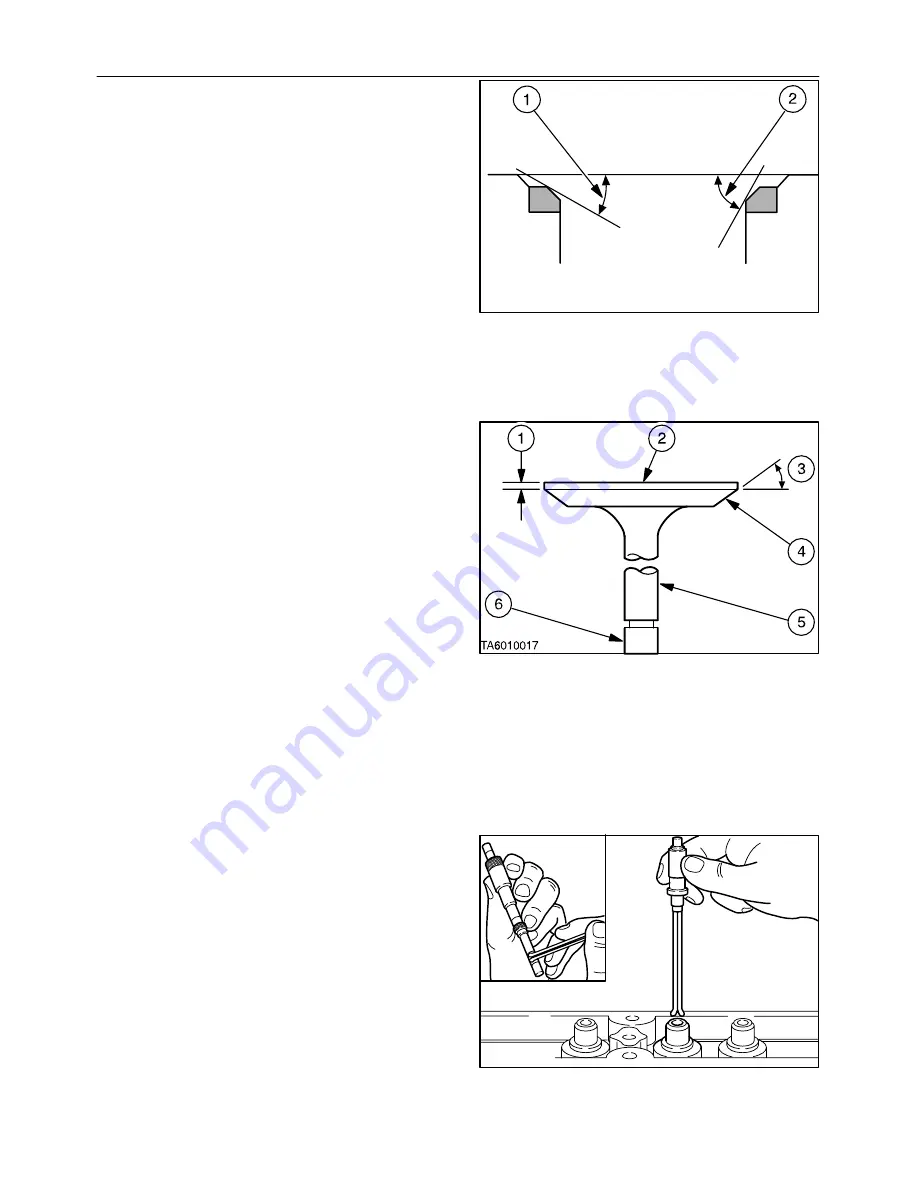
6. Rotate a new or refaced valve in the seat using
engineering blue, ensure all the blue is
transferred to the valve head protrusion, If any
blue remains below or around the seat raise or
lower the seat accordingly, Figure 41, in the
following manner.
7. Lower, the valve seats, item 1 Figure 41, by
removing material from the top of seat using a,
30
°
grinding wheel for exhaust
valves and a 15
°
grinding wheel for intake valves.
8. Raise, the valve seats, item 2 Figure 41, by
removing material from the bottom of seat using
a, 60
°
grinding wheel for exhaust
valves and a
45
°
grinding wheel for intake
valves.
TA6010016
41
Critical valve points, Figure 42:
1.
Valve Land Edge
2.
Valve Head
3.
Valve Face Angle
4.
Valve Face
5.
Valve Stem
6.
Valve Tip
Valve Guides
1. Using a telescopic gauge, and micrometer,
measure the valve guide bore clearance, and
ensure it does not exceed,
0.0045 in (0.114mm),
on the intake valve stem,
0.0055 in (0.140mm),
on the exhaust valve stem, Figure 43.
42
Production cylinder heads may have one or more
machined, oversize valve guide bores, or valves
installed, 0.015 in (0.38mm). Such cylinder heads
have 15 or VO15OS stamped on the cylinder head
exhaust manifold side adjacent to the valve
concerned.
2. Using reamer set, 380000319 (FNH02136),
ream out the valve stem guide, with three reamer
and pilot combinations as follows:–
When going from a standard valve stem to an
oversize, always use reamers in sequence
0.015 in (0.38mm) oversize reamer, and
0.003 in (0.076mm) oversize pilot.
TA6010018
43


