


BROWSER-BASED GUI - TRAFFIC PAGE
Network Video Technologies
(+1) 650.462.8100 • +44 (0) 208 977-6614
nvt.com • [email protected]
Page 20 of 25
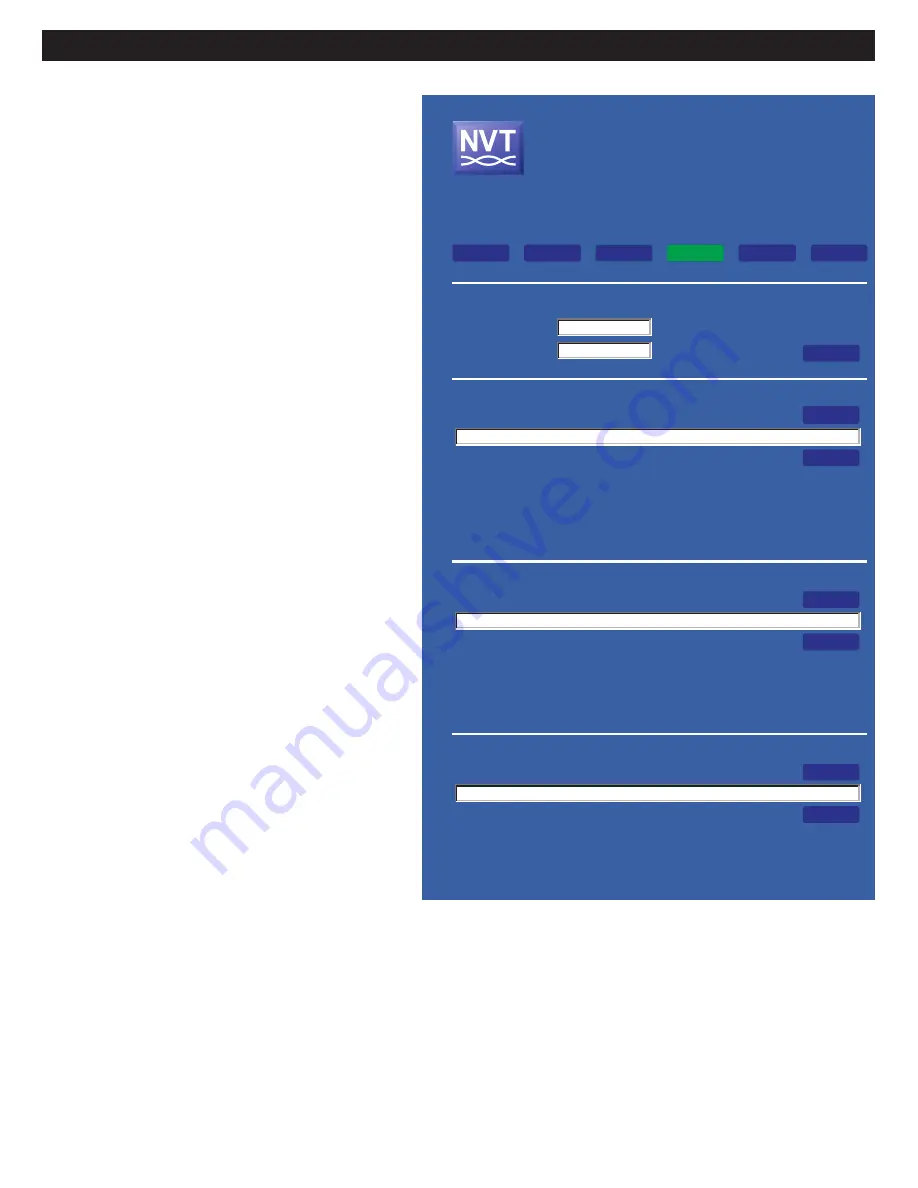
Click the Settings button to:
•
Change Network settings
•
Backup or restore configuration
•
Upgrade firmware
Network Settings
To change the IP address of the NV-ER1808i hub, enter its new
IP address, and subnet mask (typically
255.255.255.0), and click Submit.
Reminder #1
: Once the hub’s IP address has been
changed, you must point your browser to the new IP
address to continue communication.
Reminder #2
: Don’t forget to document this new IP
address somewhere, possibly as a label on the chassis.
Given the static nature of most CCTV LANs, the NV-ER1808i does
not support DHCP IP address assignments.
If you have more than one NVT hub on your network, you MUST
change the IP address so that no two hubs have the same IP
address.
The factory default IP address is 192.168.254.1. Should
you need to restore the hub to its Factory Default settings, use
a paperclip to hold in the Join button while powering up the
NV-ER1808i.
Back-up & Restore
Once you have entered your configuration information into the
NV-ER1808i hub, you may wish to save it as a text-based report.
To do so, select into which folder you want to save this file, and
click Backup.
The file will be saved under the name:
NV-ER1808i_192-168-254-1.doc
.
If you have changed the hub’s IP address, that IP address
will be reflected in the saved filename.
To restore this data into a new or factory-reset NV-ER1808i,
select the correct file using the search path, and click Restore.
Firmware Upgrade
Firmware upgrades will be available from time to time on the
nvt.com website.
For security, most CCTV LANs are closed (not accessible to the
internet). To avoid this issue, first plug your laptop into an inter-
net-accessible LAN and download the binary/hex upgrade into
the PC. Then plug your laptop into the CCTV LAN and select this
downloaded file using the Firmware File Search Path. Then click
Submit to load this file into the NV-ER1808i.
Figure 24 - Settings Page
Network Video Technologies
Security Industry Leader
TBus
®
Eight Port Ethernet Receiver
Model NV-ER1808i
HW Rev A
FW rev 1.2
IP Address 192.168.254.1
Browse...
Backup
Network Settings
IP Address:
Subnet Mask:
192.168.254.1
255.255.255.0
Backup
Folder Search Path:
C:\
Saves all the configuration settings of this NV-ER1808i onto your PC.
File is stored as text under the name: NV-ER1808i_192-168-254-1.doc.
This information can be reviewed, edited, or used to restore into new hardware.
Use the Browse... button to locate the folder into which you wish to store this file.
After selecting the folder, press Backup.
Browse...
Restore
Restore
Search Path:
C:\
Loads saved configuration settings from your PC to this NV-ER1808i .
This information can be used to restore into new hardware.
Use the Browse... button to locate the folder into which you previously stored this file.
After selecting the folder, press Restore.
Browse...
Submit
Firmware Upgrade
Firmware File Search Path:
C:\
Download the latest firmware from nvt.com into your PC.
Use the Browse... button to locate this downloaded firmware file.
After selecting the firmware file, press Submit.
Submit
GUI MAC: 74BC00110000
TBus MAC: 74BC00110001
Joining
Logout
Settings
Monitor
Power
Joining
Logout
Settings
Multicast
Monitor
Power


