Network Technologies Incorporated ST-1FODVI-SC Скачать руководство пользователя страница 9

NTI XTENDEX DVI FIBER OPTIC EXTENDER 


6


Self-EDID Programming Procedure 

The video source generally requires communication of display information (EDID). Display information (EDID) contains resolution 
and timing information for your display. 

ST-1FODVI-SC supports Self-EDID programming. Self-EDID programming means that the EDID from the display is stored in the 
Transmitter.  Use the Self-EDID programming feature if the resolution of the display is 

not

 WUXGA(1920x1200) because the 

default resolution setting of the ST-1FODVI-SC is preset at 1920x1200, 60Hz.  Follow these steps to record the EDID of the display 
into the Transmitter unit. 

Note1 : If you know that EDID is not required by the video source, Self-EDID programming is not necessary. 

Note2 : The default EDID setting of the ST-1FODVI-SC is the VESA standard WUXGA (1920x1200) 60Hz. 


1. Power ON the display.    

Note: The Transmitter should not be connected to the display when the display is powered ON. 


2. Connect the transmitter to the display.   


3.  Plug the included 5VDC power adapter into an AC outlet.  Insert the 5VDC power adapter into the Transmitter. 


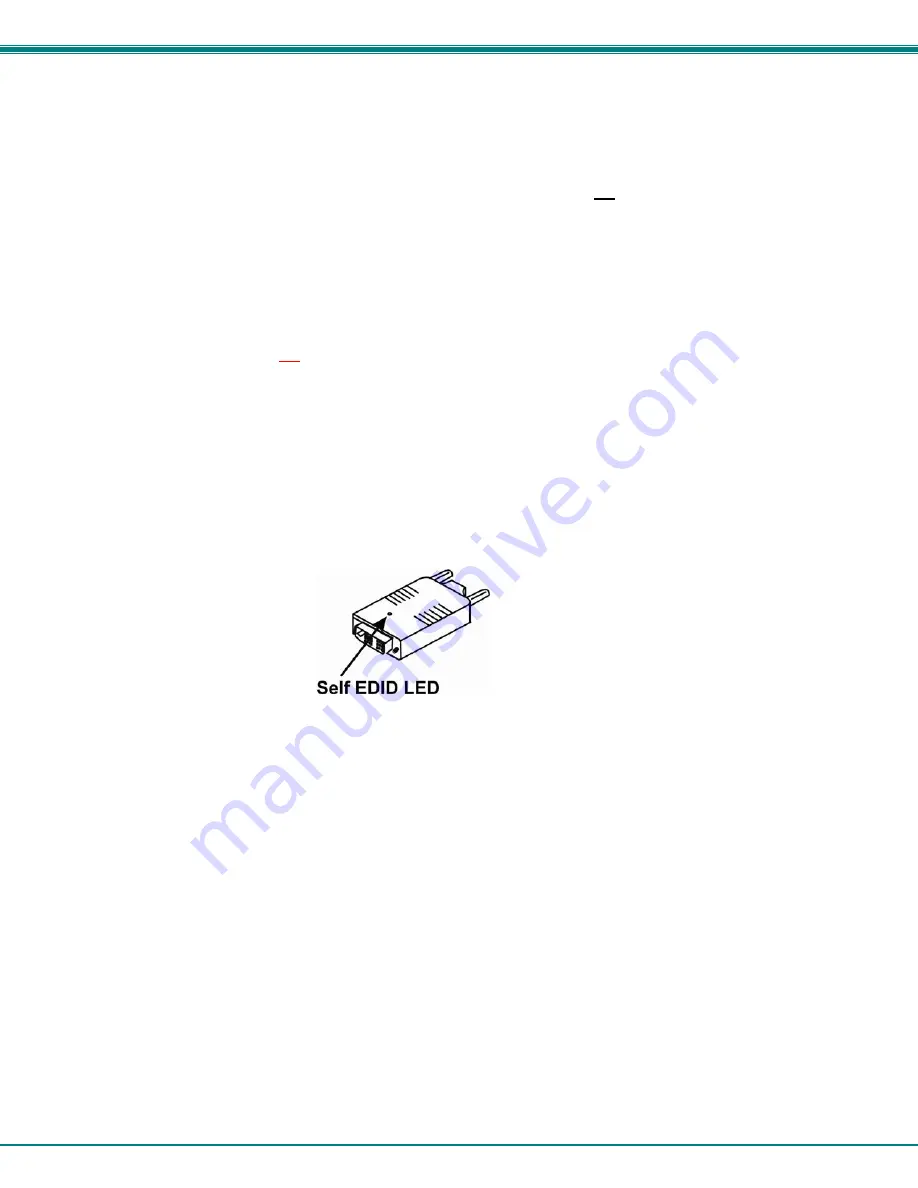
4. The Self-EDID LED will blink rapidly for a few seconds and then be solid ON.   If this does not happen, disconnect the 5VDC 
power from the Transmitter, wait 10 seconds, reconnect the power, and try again. 


                                              Figure 7- Position of EDID LED 


5.  Disconnect the Transmitter from the display

.  


6.  Disconnect power from the Transmitter, and connect the Transmitter to the video source. 


7. Connect the Receiver to the display, and then power to the Receiver .   


8. Connect a multimode optical fiber between the Receiver and Transmitter.    


9. Reboot the PC. 


If the Transmitter's LED does not illuminate,  then disconnect the AC adapter from the Receiver and connect it to the 
Transmitter instead.    If the LED illuminates, then a second AC adapter will be needed. Contact NTI to place your 
order for a PS4169 (US Plug).    


Содержание ST-1FODVI-SC

Страница 1: ...MAN394 Rev Date 05 20 2021 ST 1FODVI SC DVI Extender via Fiber Optic Cable Installation and Operation Manual XTENDEX Series...

Страница 2: ...l system or transmitted in any form or by any means electronic mechanical photocopying recording or otherwise without the prior written consent of Network Technologies Inc 1275 Danner Drive Aurora Ohi...

Страница 3: ...anty Information 8 TABLE OF FIGURES Figure 1 Schematic connection diagram of optical DVI extension modules 2 Figure 2 Connection of the power adapter to the receiver 3 Figure 3 Connection of optical f...

Страница 4: ...can be installed in conduit prior to extender installation Built in default EDID table can be programmed to support any DVI display device Low RFI EMI for sensitive applications No software to instal...

Страница 5: ...AC Adapter 1 URL slip with path to User s Manual Materials required but not supplied Fiber optic cable to run between the receiver and transmitter Available from NTI FIBER S SCSC 50 xxM simplex singl...

Страница 6: ...supply can be ordered from NTI However the receiver Rx module must be powered by the supplied AC power adapter Note In general most laptops or desktop PCs with PCI Express graphic card require using...

Страница 7: ...in Figure 3 Figure 3 Connection of optical fibers 5 Plug the transmitter to the DVI receptacle of the DVI source such as a PC Figure 4 Connection of the transmitter to the DVI source Note We recommend...

Страница 8: ...receiver to the display 7 Power ON the PC and the display Caution When you touch the surface of modules the surface of modules may be hot This is normal TIP If you want to display a video source on mu...

Страница 9: ...ON the display Note The Transmitter should not be connected to the display when the display is powered ON 2 Connect the transmitter to the display 3 Plug the included 5VDC power adapter into an AC ou...

Страница 10: ...n 1920x1200 at 60Hz refresh ratio Reset the system Disconnect and reconnect the optical DVI cables or 5V power adapters For technical service contact Network Technologies Inc at 800 742 8324 800 RGB T...

Страница 11: ...ems This symbol on the product or on its packaging indicates that this product shall not be treated as household waste Instead it shall be handed over to the applicable collection point for the recycl...

Отзывы: