


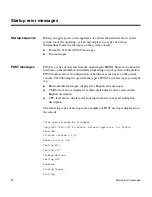


14
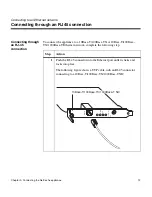
Connecting to an Ethernet network
Connecting to an Ethernet network
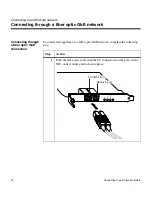
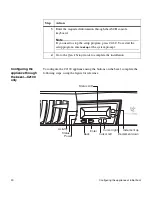
Connecting through a fiber optic GbE network
Connecting through
a fiber optic GbE
connection
To connect the appliance to a fiber optic GbE network, complete the following
step.
Step
Action
1
Push the fiber optic cable with the SC connector into the ports on the
NIC, until it clicks and locks into place.
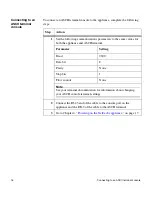
TX
RX
LINK
Transmit port
Receive port
Содержание C1200 NetCache
Страница 10: ...x Preface...
Страница 32: ...22 Configuring the appliance at initial boot...