NETGEAR Stora Скачать руководство пользователя страница 138

Premium Features

138

NETGEAR Stora 

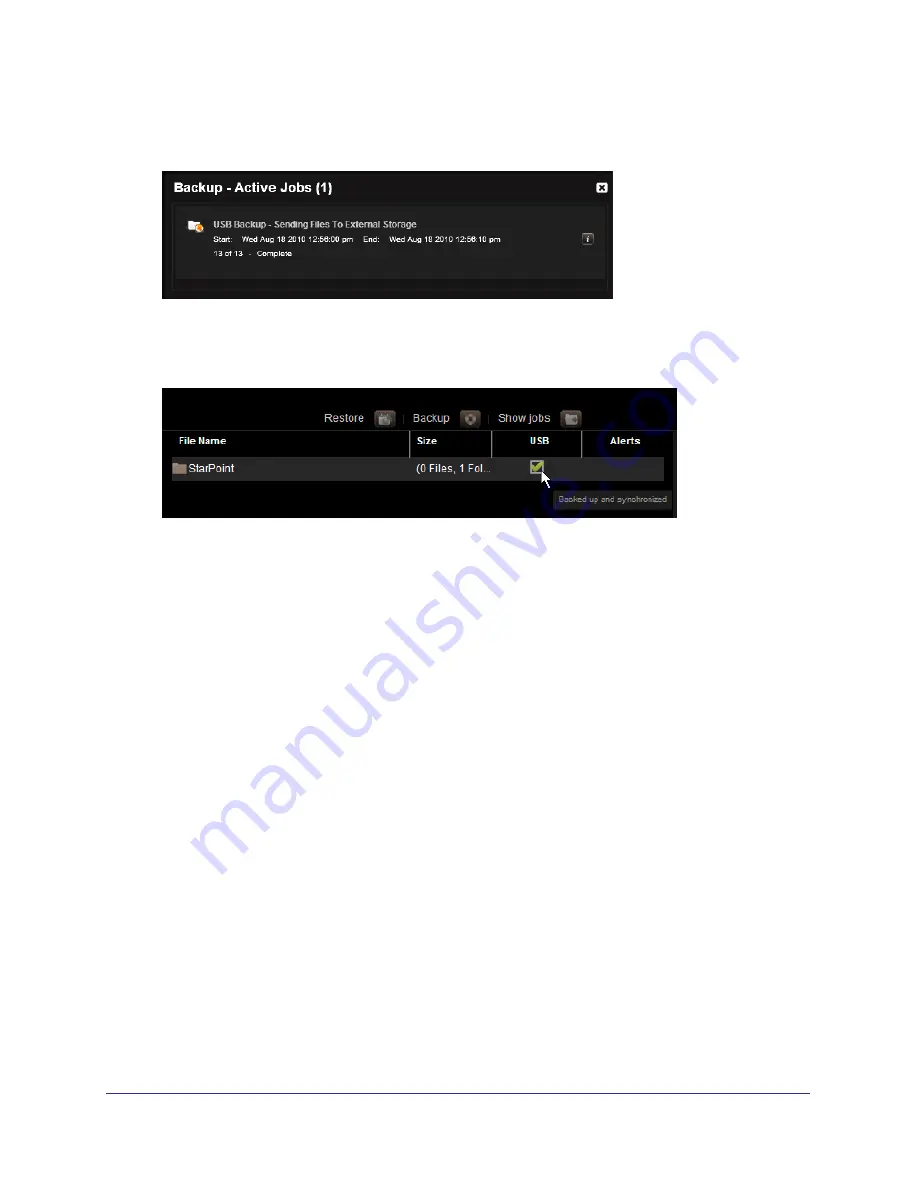
A progress bar displays. When to backup job is complete, a screen similar to the following 
displays:

Click the 

X

 button in the upper-right corner to close this screen.

A check mark in the USB column indicates that the folder was backed up to a USB 
device. 

Содержание Stora

Страница 1: ...350 East Plumeria Drive San Jose CA 95134 USA May 2011 202 10540 05 Stora User Manual ...

Страница 2: ...EAR Phone Other Countries See support information card Trademarks NETGEAR the NETGEAR logo and Connect with Innovation are trademarks and or registered trademarks of NETGEAR Inc and or its subsidiaries in the United States and or other countries Information is subject to change without notice 2011 NETGEAR Inc All rights reserved Statement of Conditions To improve internal design operational functi...

Страница 3: ...iptions 15 Install a Disk 16 Replace a Disk 17 Chapter 3 Installation Initial Setup 20 Check Package Contents 20 Connect Stora to Your Network 21 Configure Your Stora 21 Install Desktop Applications 28 Backup Options 32 Access Your Stora 35 Web Browser 35 Local Area Networking 35 Stora Agent 36 Mapped Drives 36 Documentation Tools and More 37 Register Your Stora 37 Documentation and Support 37 Res...

Страница 4: ...n 54 Stora Application Home Screen 56 Menu Bar Options 58 Albums 60 Media Library 62 Access the Media Library 62 Tip of the Day 63 Media Sources Area 64 MyLibrary 65 Working with Folders 66 Folder Options 72 Working with Albums 77 File Options 83 Working with Files 84 Working with Images 88 Setting Up Contacts 90 Preferences 94 Display the Preferences Screen 94 User Preferences 95 Server Preferenc...

Страница 5: ...Folders 129 Change Account Settings 130 Identity Tab 130 Schedule Tab 131 Advanced Tab 131 View Online Help 132 About Desktop Mirror 132 Chapter 7 Premium Features Back Up My Stora to a USB Device 134 Enable a Device 134 Back Up Stora Data to a USB Device 137 Schedule Backups 139 Show Backup Jobs 140 Remove a Folder from a Backup Job 141 Archive Stora Data to a USB Device 143 Torrents 144 Using To...

Страница 6: ...ting Started This chapter provides an overview of the NETGEAR Stora Topics discussed in this chapter include About NETGEAR Stora Standard and Premium Features File Types Media Server iTunes Client Mobile Devices ...

Страница 7: ... Organize your digital media into shared FamilyLibrary folders or into the private MyLibrary folders After you upload a file you can add a caption and tags to the file Later you can search for files that match the caption and tags See Chapter 5 Stora Application for more information Share Create albums to share your digital media with family on your home network and friends across the Internet You...

Страница 8: ...integration and support x x FTPS integration x RSS integration and support x Cooliris picture wall view x Flickr integration and support x Access to new Premium features added during your subscription period x To access premium features you can upgrade your subscription at the time of installation or at any time after installation For a complete list of premium features see Premium Subscription Of...

Страница 9: ...r The media server built into Stora makes content available to a wide variety of media players on your home network The media player needs to support the UPnP AV Universal Plug and Play Audio Visual DLNA Digital Living Network Alliance or Windows Media Connect standard Media players include gaming consoles Xbox 360 and PS3 digital photo frames iTunes clients IP televisions networked sound systems ...

Страница 10: ...e interface for the device Depending on the device mobile users can do the following Browse albums Browse folders in the Media Library Create new folders Upload media directly from the mobile device to Stora After you set up your Stora you can access it from a mobile device by visiting http www myStora com mobile Stora supports the following mobile devices iPhone iPad Blackberry Android Windows Mo...

Страница 11: ... 2 Stora Hardware This chapter describes the physical features of the NETGEAR Stora It includes the following topics Front Panel Disks and Disk Bays Rear Panel LED and Connector Descriptions Install a Disk ...

Страница 12: ...Stora Hardware 12 NETGEAR Stora Front Panel The following figure shows the Stora s front panel 2 4 3 1 1 Exhaust fan vent 2 Power LED 3 Disk 1 and Disk 2 LEDs 4 USB port ...

Страница 13: ...nd Disk Bays The following figure shows the Stora s disk bays which are located inside the unit behind the front panel 1 2 1 Disk 1 bay 2 Disk 2 bay See Install a Disk on page 16 for information about installing ejecting and replacing disks ...

Страница 14: ...ETGEAR Stora Rear Panel The following figure shows the Stora s rear panel 1 3 5 4 6 2 1 Disk release latches 2 Unit serial number and network MAC address 3 Power button 4 Power cable socket 5 Ethernet port 6 Reset button ...

Страница 15: ... Solid green Drive is operating normally Blinking green Stora is booting up or shutting down Also indicates activity such as copying data Solid amber Drive is not ready however if the LED is solid amber constantly it indicates a problem with the drive Try one or more of the following troubleshooting tips Check that cables are securely connected and power is on Remove and then reinsert the disk Tur...

Страница 16: ...could render your disks useless The following procedure explains how to set up and install a single drive If you purchased a Stora with only one installed drive and you want to add a second drive carefully repeat these same instructions To install a disk 1 Unplug the power cord 2 Remove the front cover 3 Press the lever on the back of the unit to unlock the drive 4 Insert the disk as follows a Ens...

Страница 17: ...tp support netgear com app answers detail a_id 12109 Replace a Disk If a disk fails in your Stora device you are notified of the failure by e mail On the front of the Stora device an amber LED might indicate a failed disk The top LED is disk 1 the bottom one is disk 2 Take note of the failed disk To ensure compatibility check the Hardware Compatibility list on the NETGEAR support site for a list o...

Страница 18: ...ut ejecting disks To replace a disk 1 View the disk status LEDs to identify which disk has failed If necessary unlock the tray lock by moving it to the right and press the release of the failed disk The latch pops out 2 Pull out the disk and replace it with a new disk 3 Slide the disk tray back into the unit and secure the latch Note To protect against data loss add a second disk to your Stora to ...

Страница 19: ...n This chapter describes how to install your NETGEAR Stora system It includes the following topics Initial Setup Install Desktop Applications Backup Options Access Your Stora Documentation Tools and More Reset Your Stora ...

Страница 20: ...it and check your package contents to be sure all components are available Stora unit Power cable Ethernet cable Installation guide Stora Resource CD which includes the following Stora software applications Warranty information card Worldwide customer support information Note If you purchased a Stora unit with only one disk and want to add a second disk for redundancy NETGEAR recommends that you f...

Страница 21: ... following figure 3 Press the Power button to power up your unit The power LED flickers while the unit boots and obtains an IP address then it turns solid blue The first time you turn the unit on the disk LEDs are solid amber After you complete the setup the disk LED indicators are solid green Note The router in your network needs to have an Ethernet port available to connect the Stora unit to the...

Страница 22: ...software for your operating system To run the Stora setup software from the Resource CD 1 Make a note of the product key The product key is located on the Resource CD sleeve and on the bottom of Stora unit Write the product key down as it is required later in the installation process 2 Insert the Resource CD into your computer Wait approximately 2 minutes for the Setup program to initialize The We...

Страница 23: ...w minutes the Setup screen changes to show a series of steps 3 Click Step 1 Set Up Your Stora The software license agreement displays 4 Click the I Accept button A registration screen displays 5 Enter the product key that you noted in Step 1 ...

Страница 24: ...og in to the Stora system Your user name is case sensitive 9 Enter a display name This is a case sensitive name that guests see when they view your shared files and photos 10 Enter a case sensitive password and confirm it Be sure to make a note of your Stora name your user name and your password 11 Click Next and follow the prompts to complete the setup process A Summary screen displays The Summar...

Страница 25: ...to a Premium subscription During installation you have the option to upgrade your Stora subscription to include premium features not available with the Standard subscription See Standard and Premium Features on page 8 for a list of premium features You have the following options Click Upgrade Now to start your premium service immediately Click Continue Trial to activate your 30 day free Premium tr...

Страница 26: ...ora finds a setup problem with your UPnP router or if your router is not UPnP capable Most users with newer routers should not see this message See UPNP Router Configuration on page 99 and UPNP Port Mapping on page 99 for more information 16 Click Next The Configuration Wizard Finish screen displays ...

Страница 27: ...Finish button The Setup screen displays with a check mark next to Step 1 You can do one of the following Click Exit to end the installation Click Step 2 to install desktop applications Click Documentation Tools and More to see additional options ...

Страница 28: ...n of your Stora you have the option to install these applications To install desktop applications 1 Click Step 2 Install Desktop Applications The InstallSheild Wizard extracts the desktop applications and then displays a Welcome screen 2 Click Next The Destination Folder screen displays You can accept the default destination or click the Change button to select a different destination ...

Страница 29: ...EAR Stora 3 Click Next The Setup Type screen displays 4 Select an option Typical This is the recommended setup option Custom Select which applications you want to install If you select Custom the following screens display ...

Страница 30: ...EAR Stora 5 Click Next The Ready to Install the Program screen displays 6 Verify the settings and click Install A progress screen displays When the application installation completes the Back and Next buttons become active ...

Страница 31: ...p screen displays A check mark next to Step 2 confirms that the applications were successfully installed Your Stora is now ready for you to use You can do one of the following Click Exit to end the installation Click Step 3 to schedule and configure a backup Click Documentation Tools and More to see additional options ...

Страница 32: ...s For more information see Computers Backup on page 112 Windows Backup requires configuration before it will work with Stora To configure Windows Backup to work with Stora 1 On the Resource CD s Setup screen click Step 3 Windows Time Machine Backup Configuration The Windows Backup Configuration Wizard launches ...

Страница 33: ...e Windows Backup and create a password 4 Select the Activate Windows Backup Feature check box 5 Create and enter a password This password is different from your Stora credentials You might want to write it down for future reference 6 Click Next and on the next screen click Next again The Windows backup status and configuration tool launches ...

Страница 34: ...Installation 34 NETGEAR Stora 7 In the Backup area click the Set up backup link and follow the prompts 8 In the Restore area click an option and follow the prompts ...

Страница 35: ...e Internet A Premium subscription enables additional remote access options including extended permissions and folder access To access your Stora using a web browser 1 Enter http www mystora com in your browser s navigation field A login screen displays 2 Enter the Stora name user name and password that you created when you set up your device 3 Click Sign In Local Area Networking When you use defau...

Страница 36: ... dock on a Mac During installation a shortcut is also added to your desktop The Agent cannot be used for remote access See Chapter 4 Stora Agent for more information Mapped Drives In a Windows environment Stora Agent automatically maps three drive letters x y and z to network shares on Stora This provides a simple drag and drop interface that is always available from the My Computer window ...

Страница 37: ...n and Support A link to the Stora user manual is available on the Resource CD that came with your product You can also obtain the Stora user manual by visiting http documentation netgear com ms200 enu 202 10540 01 index ht For more information about Stora visit these websites http support netgear com app products list p3 779 http support netgear com app answers list kw stora Registration is requir...

Страница 38: ...es not delete data from the disk however you need to re create the same login and password after the reset in order to access the data in private folders To reset from the Resource CD 1 Insert your Stora Resource CD The Setup software launches If the Setup software does not launch follow the prompts to launch the software manually The Setup screen displays 2 Click Documentation Tools and More The ...

Страница 39: ...ays 4 Select an option Reset Click this option when you have only one Stora system Refresh Click this option if you have more than one Stora on the system you can choose which unit to reset If you have more than one Stora choose the one you want to reset 5 Follow the prompts to reset your Stora ...

Страница 40: ...ws on the LEDs and the recovery mechanism stops The power LED turns off Disk 1 and disk 2 LEDs blink together 3 times All of the LEDs turn off If your Stora cannot acquire an IP address try running the factory reset process a second time If that fails contact NETGEAR technical support After the Stora acquires an IP address the reset process begins During the process the LEDs behave as follows The ...

Страница 41: ...41 4 4 Stora Agent This chapter provides information about the Stora Agent It includes the following topics About the Stora Agent Connect a Printer ...

Страница 42: ... work with the Windows 7 operating system The Stora Agent icon resides on your system tray PC or dock Mac and usually displays when you start your computer Right click the Stora Agent icon to display menu options Some of the options vary between a PC and a Mac For example only a PC menu displays your login status and provides login and logout options as shown in the illustration Note The Stora Age...

Страница 43: ...inder and browse to Applications Stora Desktop Applications Stora Agent Login Status The label at the top of the Stora Agent menu displays who is currently logged in to Stora or shows Not logged in This menu option is available on a PC only Log In Use the Log in menu option to select your Stora and enter your user name and password If you select Remember Me on the Connect to Stora dialog box your ...

Страница 44: ...nt user and allows another person to log in Note that this option is not available if no one is logged in to the system This menu option is available on a PC only Log Out Use the Log Out menu option to close the current connection to Stora Logging out prevents other users from accessing your albums and MyLibrary folders ...

Страница 45: ... Folders are available whether Stora is located locally on the home network or remotely across the Internet Note If the Stora administrator has blocked access you cannot see these folders To view Stora folders using the Stora Agent 1 Right click the Stora Agent icon Select Explore my Stora folders 2 If prompted enter your Stora name user name and password and click Sign in Windows Explorer or Mac ...

Страница 46: ...is option is available whether Stora is located locally on your home network or remotely across the Internet For more information see Chapter 5 Stora Application Open Desktop Mirror Desktop Mirror lets you back up PCs and Macs on your home network to Stora The Desktop Mirror application backs up selected folders on a regular basis The Open Desktop Mirror menu option starts the Desktop Mirror appli...

Страница 47: ...the Stora Agent allows you to check for software updates to the desktop applications and displays the name and IP address of Stora on your home network The Advanced tab shows Stora devices found on your network and allows you to keep Desktop Mirror running in the background ...

Страница 48: ...ys the Stora Agent version installed on your computer Exit Stora Agent The Exit Stora Agent menu option closes Stora Agent and removes the icon from the system tray For information about how to restart Stora Agent on a Mac or PC see Starting Stora Agent on page 43 ...

Страница 49: ...tiple USB drives Currently multiple printers are not supported While NETGEAR does not maintain a list of all supported printers you might find that searching this database is helpful http www openprinting org printers To add a printer to a PC 1 Connect a USB cable from the printer to the Stora or to a USB hub connected to the Stora 2 Log in to the Stora 3 Double click the Stora Agent icon and sele...

Страница 50: ...owing message click Yes 7 Use the Add Printer Wizard to load the printer driver 8 Select a manufacturer and printer and click OK The printer is now available through Stora You can select it from the list of printers by selecting Settings Printer and Faxes ...

Страница 51: ...rinter to the Stora or to a USB hub connected to the Stora 2 From the Apple menu select System Preferences Printer Fax 3 Click the plus sign button to add a printer 4 Click Windows and select workgroup and Stora 5 Select Registered User enter your user name and password and click Connect ...

Страница 52: ...printer model and click Add 7 The first time you print you are prompted for your user name and password a Enter your user name and password b Select remember this password in my keychain c Click Connect The next time you print you are not prompted for your password ...

Страница 53: ...tion This chapter describes how to use the standard Stora Application features It includes the following sections About the Stora Application Albums Media Library MyLibrary Preferences Set Up Social Networking Connections ...

Страница 54: ...his icon was enabled during installation To start the Stora Application from Stora Agent Right click the Stora Agent icon located on the bottom right corner of your computer and select Open Stora application from the menu that displays To start the Stora Application from a browser Open a new browser window and navigate to http www mystora com To start the Stora Application from the Start menu on a...

Страница 55: ... and the premium features are unaccessible until you upgrade your subscription Subscription reminders are delivered by email 7 days before the trial ends and then daily reminders are sent when 5 days remain in the trial period If you choose not to upgrade your trial premium subscription reverts to a standard subscription To set subscription preferences see Stora Premium Subscription on page 106 To...

Страница 56: ...hich contains a link to the User Manual and Stora support The following image shows the home screen for a Stora with a Standard subscription 1 2 1 Main menu 2 Standard subscription features The following figure shows the home screen for a Stora with a Premium subscription 1 2 1 Main menu 2 Standard and Premium subscription features You can customize the home screen by adding an image to the backgr...

Страница 57: ...nnects directly to Stora support When you enter one of the application areas the Go To menu displays on the top This lets you toggle between the home screen and the application areas the menu option for the application area you are currently using is dimmed About Stora The About Stora link displays at the bottom left corner of the home screen Click this link to see the software version your produc...

Страница 58: ...file type and size Moving the mouse over a file in List view shows an arrow which allows you to display a menu Thumbnail Displays an image for each file that indicates what the file contains It also shows the file name size and caption Moving the mouse over a file in Thumbnail view shows the Options arrow which allows you to display the menu Shuffle Displays a larger image for each file It also sh...

Страница 59: ...d 2 Click the Search icon The Files section shows files that contain the search text in the caption tag or file name It also shows folders that contain the search text in the folder name The search term is highlighted If you enter one word you see all the items that share the word If you enter more than one word the search results are include only those items that have all the words After the file...

Страница 60: ... to allow those viewing it to download original full resolution versions of the files This is especially important if the album contains documents because the album lists these files but cannot open them To allow files to be downloaded select the Allow downloads for this album option Downloading a file retrieves the original full resolution version of the file You can download all the files from t...

Страница 61: ...ngs you can open the file download it to a specific directory or download it to the default directory Run a Slideshow Running a slideshow displays the images within the album or folder one at a time along with their captions Music videos and documents are not shown You can run a slideshow using the Albums screen or after displaying an album To run a slideshow using the Albums screen Select an albu...

Страница 62: ... and family Access the Media Library From Stora application home screen click Media Library The Media Sources screen displays It allows you to manage your files folders and digital media and place them into albums that you can share with friends and family If you want to share the files in a folder with your friends display the menu for that folder and select Share Selected Items ...

Страница 63: ... them by selecting the Don t show tips check box To enable or disable Tip of the Day 1 Select Preferences from the application home screen 2 Select User Preferences User Hide help tips 3 Select Yes No This toggles the Tip of the Day setting between enabled and disabled 4 Click Submit For more information see Preferences on page 94 Information Icon Each screen displays an Information icon on the to...

Страница 64: ... a Torrent Downloads folder These folders are accessible to all users unless you block their access In addition these folders can be shared with digital media adapters DMAs such as Xbox360 PS3 and other DLNA compliant devices making the content available to media players on the home network For more information see Server Preferences on page 98 For more information about working with these folders...

Страница 65: ...C enable Windows Networking to see your MyLibrary folders See Server Preferences on page 98 For more information about working with these folders see Working with Folders on page 66 Although the subfolders within MyLibrary and FamilyLibrary are intended for specific file types you can put any type of file into any folder MyComputers The MyComputers folder contains a folder for each computer using ...

Страница 66: ...s Selecting a folder highlights the folder name and displays its subfolders and files in the Files section To select a folder Click a folder name The following figure shows that the MyMusic folder is selected from the MyLibrary media source An arrow displays on the lower right corner of a folder when you move the pointer over the folder Clicking the arrow provides access to additional options For ...

Страница 67: ...w changes to a right arrow and the folder s contents are hidden Collapsing a folder hides its subfolders This is useful when many folders are open and you want to reduce clutter on the screen Add a Folder Adding a folder creates a new subfolder within the current folder Using subfolders is a good way to keep your content organized A new folder within FamilyLibrary is accessible to all users unless...

Страница 68: ...Stora Application 68 NETGEAR Stora 3 When prompted enter a name for the folder and click the Create button The new folder displays alphabetically on the left navigation panel and in the main screen ...

Страница 69: ...lder any item in that folder that is contained within an album is no longer available in the album To delete a folder 1 Select the folder you want to delete 2 Click the arrow to display the options 3 Select Delete from the menu You are asked to confirm the action 4 Click Yes to confirm that you want to delete the folder If you click No the folder is not deleted ...

Страница 70: ...t of files that are less than 2 GB If you want to copy files greater than 2 GB use Stora folders For more information see Explore My Stora Folders on page 45 Desktop Mirror Overview on page 119 or FTP on page 115 To upload files 1 Select a destination folder from the left panel or a folder 2 Click the Upload icon The Upload window displays 3 Select either Manual Upload or Drag and Drop Manual Uplo...

Страница 71: ...from Explorer or Finder Follow these steps to use drag and drop to upload a file a Drag the file from Explorer or Finder and drop it into the window You can drag multiple files or folders at the same time b Click Upload The upload process begins c When the upload process completes close the window ...

Страница 72: ...f the folder 2 Click the arrow to display a menu Open a Folder Opening a folder shows its subfolders and displays the subfolders and files To open a folder Double click the folder name Move a Folder Moving a folder takes it out of one location and places the folder along with its subfolders and files in a different location To move a folder using the drag and drop method 1 Select a folder icon 2 D...

Страница 73: ...ication 73 NETGEAR Stora To move a folder using the cut and paste method 1 Select the folder you want to move and display the menu 2 Select Cut 3 Select the destination folder and display the menu 4 Select Paste ...

Страница 74: ...contains Note The details and advanced options display on the far right If the Stora interface is in a small window or the screen resolution is too low the details and advanced options might not show To fix the problem increase the window size until the entire screen displays Copy a Folder Copying a folder puts it in an additional location along with its subfolders and files while keeping the fold...

Страница 75: ...play the menu 2 Select Copy or Cut 3 Select a destination folder and display the menu 4 Select Paste Note You cannot copy and paste a folder from the Stora Application into another application and you cannot copy and paste data from another application into the Stora Application ...

Страница 76: ...ges its name To rename a folder 1 Select a folder and display the menu 2 Select Rename 3 When prompted enter a new name 4 Click Rename Note If you rename a folder and an album contains a reference to a file within the folder the item is no longer be available from the album ...

Страница 77: ...iles but does not actually contain copies of the files themselves This way you can have the same file in multiple albums without taking up additional space However if you delete a file from the folder it is no longer available in the albums If you already added files to an album and they do not appear it might be that Stora is disconnected or the files might have been deleted moved or renamed You ...

Страница 78: ... beside the name Rename an Album If you rename a shared album whether shared with friends or with everyone the original link no longer works However the link does go to a screen listing all your albums so others might be able to find the renamed album To rename an album 1 Select the album display the menu options and select Rename The Rename Album dialog box displays ...

Страница 79: ...Album You can add the contents of a folder to a new album that only you can see You can share the album later by using the Details panel to modify the settings To create a new album 1 From the Media Library go to the Albums area and click the new album icon The Create Album dialog box displays ...

Страница 80: ...h the Stora Application 5 Optional Click the More Sharing Options link The dialog box expands 6 Optional In the Friends field enter the email address or addresses of the people with whom you want to share the album Entering email addresses in the Friends field means that the album you are creating will be a shared album To keep the album private or unshared do not enter any email addresses in this...

Страница 81: ... the calendar to select your end date Password protect this album Email notifications contain a link to the album By default anyone who clicks the link can view the album unless you limit access by requiring a password To limit access select the Password protect this album option If you select this option an initial password is automatically generated for your friends so they can access the file W...

Страница 82: ...scription Theme Sharing settings Share the album using RSS or add it to social media sites like Facebook and Flickr Delete an Album Deleting an album removes access to its files but the files themselves remain within the folders in MyLibrary If you shared the album on Facebook or Flickr the images remain on these services If you shared an album through RSS the images are no longer available to the...

Страница 83: ...s not deleted If you click Yes the album is deleted File Options File options are similar to folder options To display the options from the Media Sources list or subfolders 1 Move the mouse over a file An arrow displays on the lower right side of the file 2 Click the arrow to display the options ...

Страница 84: ... album 1 Select the folder that contains the file you want to add 2 Display the menu and select Add to Album Album Name Note If you select multiple files and then select Add to Album New or Share Selected Items the album does not have a default name Play Songs Playing songs plays the music within a folder or album starting with the selected song Images videos documents and songs within subfolders ...

Страница 85: ...ou can delete multiple files at once If you delete a file and an album contains a reference to it the item is no longer available from the album To delete a file 1 Select the folder that contains the file 2 Select the file display the menu and select Delete Copy a File Copying a file puts it in an additional folder while keeping it in the original folder You can copy multiple files at once Copying...

Страница 86: ...tore additional information about the file Tags allow you to describe each file on your Stora If you tag files consistently you can find them more easily especially as their number grows over time For example assume you took a number of pictures at Jane s 11th birthday which was held at your cottage You enter tags for each picture birthday Jane 11 cottage Some pictures have Mary or Joe in them so ...

Страница 87: ...the menu and select Rename 3 When prompted enter a new name and click Rename Download a File Downloading a file retrieves the original full resolution version of the file You can select multiple files for downloading at once Depending on your browser settings you can open the file download it to a specific directory or download it to the default directory To download a file 1 From a library folder...

Страница 88: ...heme 1 From Media Library select the image that you want to use 2 Display the menu and select Use as Home Background The image displays on your home screen To modify the home screen background image 1 Select Preferences User Home Background Position 2 Select Center or Fit to Screen To clear the home screen background image 1 Select Preferences User Clear Home Background 2 Click the Clear button ...

Страница 89: ...ted there as well To rotate an image 1 Select the folder that contains the image you want to rotate 2 Select the image display the menu and select Rotate Clockwise or Rotate Counterclockwise Access a File The file type determines what happens when you access a file An image is displayed within a paused slideshow A video is played A song is played followed by other songs within the album A document...

Страница 90: ... for each new album This allows you to share each album with a different set of your friends Additionally all Stora users can set up their own address books that contain the names and email addresses of their contacts View Your Contacts Viewing your contacts shows your address book and the contact list for the current album To view your contacts 1 From an album open the options menu and select Vie...

Страница 91: ... Book Your address book stores email addresses of people with whom you want to share Stora content To add a contact in your address book 1 In the Media Library select an album display the menu and select View Details The Details screen displays 2 Select the Friends check box The list of people if any with access to this album displays in the box 3 Click the Address Book link ...

Страница 92: ...e contact s email address c Click the Add button To edit a contact in your address book 1 In the Address Book list select the contact you want to edit 2 Click the Edit Contact icon on the bottom of the screen 3 Edit the contact details To delete a contact from your address book 1 In the Address Book list select the contact you want to delete 2 Click the Delete Contact icon on the bottom of the scr...

Страница 93: ...pands 3 Click the Address Book link The Share with your contacts screen displays 4 To add a contact select a name from the Address Book list and click the Add button 5 To remove a contact select a name from the Allowed Access list and click the Remove button 6 Click the Save button Note If you email an invitation to a friend and then remove him or her from the list he or she no longer has access t...

Страница 94: ... preferences Where noted some preferences are available to all users Other preferences require administrator permission Display the Preferences Screen From the home screen click Preferences The Preference area is divided into three main sections User Preferences Server Preferences Administration Preferences ...

Страница 95: ...pplication user interface The selection of languages depends on your region The default language is from your computer s configuration Your Email A valid email is required to share files Home Background Position Determines how the home background image is displayed as follows Center This is the default position Fit to screen Fits the home screen background image to the screen Clear Home Background...

Страница 96: ... media players Yes New albums are shared with media players You can override the setting when you create or edit an album Media players need to support the UPnP AV Universal Plug and Play Audio Visual DLNA Digital Living Network Alliance or Windows Media Connect standard Media players include gaming consoles Xbox 360 and PS3 digital photo frames iTunes clients IP televisions networked sound system...

Страница 97: ...eferences Change Password The change password area expands 2 Enter a new password in the Password field 3 Re enter your new password in the Confirm Password field 4 Click Submit Note If you change your password here and back up your computer using Desktop Mirror you need to update the Desktop Mirror with your new password See Change Account Settings on page 130 ...

Страница 98: ...ss to FamilyLibrary folders A user always has access to these through Explorer or Finder Click the arrow next to Network Sharing to expand the area The Network Sharing list controls whether users can access their private folders through Stora Folders as follows Yes Users can access their private folders through Explorer or Finder No Users cannot access their private folders through Explorer or Fin...

Страница 99: ...re your router its interface shows a table similar to the following Active Protocol Internal Port External Port IP Address Stora Port Usage YES TCP 20 20 192 168 1 2 FTP YES TCP 21 21 192 168 1 2 FTP YES TCP 22 22 192 168 1 2 SSH YES TCP 80 80 192 168 1 2 HTTP YES TCP 443 443 192 168 1 2 HTTPS YES TCP 50000 50000 192 168 1 2 FTPS YES TCP 50001 50001 192 168 1 2 FTPS YES TCP 51413 51413 192 168 1 2...

Страница 100: ... 80 Stora update checks 443 IP address updates to the central server Notifications Click the arrow next to Notifications to expand the area To set up email notifications 1 Enter email addresses where you want to receive notifications about your Stora in the Notifications field You can set one or more email addresses to receive notifications about Stora Use a comma to separate email addresses 2 Cli...

Страница 101: ...from the router The administrator can set IP address information for Stora as follows Yes Stora automatically obtains a dynamic IP address from the router using DHCP In most cases use this setting No Stora uses the static IP address entered into the Server IP address field This is rarely required but might improve performance for remote users Selecting No makes the following settings available Ser...

Страница 102: ...r DNS This is obtained automatically from your router s DHCP configuration and is provided by your ISP DNS Server 2 Sets the secondary domain name server This is obtained automatically from your router s DHCP configuration and is provided by your ISP Date and Time The administrator can set the date and time for Stora The administrator can control the following date and time settings Set date and t...

Страница 103: ... Country Select your country City Select a city within your time zone Remote Access Remote access enables your device to be accessed from anywhere in the world over the Internet To enable remote access you need to provide the Stora name used to identify your device remotely Select the check box to enable remote access Clear the check box to remove access Torrents Torrent service allows you to down...

Страница 104: ...ch user in your family can have their own MyLibrary folders You can control the following settings Account User Name Sets the name of the user It must begin with a letter and include at least three characters and up to 32 characters in length It can contain numbers periods underscores and hyphens Display Name Sets the name that displays in the main menu of Stora Application The display name also d...

Страница 105: ...lt setting grants access Note If you disable access to the FamilyLibrary folders a user can still access them using Windows Explore or Mac Finder through Stora folders Edit User Click the arrow next to Edit User to expand the area After a user is added you can edit user accounts The options are the same as for when you add a new user See Add New User on page 104 for detailed descriptions of each s...

Страница 106: ...dates Click the Check Now button If no updates are available a Your Stora is up to date message displays Stora Premium Subscription You can update your Standard subscription to a Premium subscription at any time For a list of Premium features and benefits see Standard and Premium Features on page 8 To update your subscription 1 Go to the Stora Application home screen 2 Select Preferences Administr...

Страница 107: ...is button allows you to erase all data from Stora disk This option automatically reboots your Stora You can maximize data protection by adding a second backup disk to your RAID1 configuration When you add a second disk the data stored on the first disk is copied to the second disk as a mirrored backup and protects your data against disk failure and loss If you add a second disk you need to format ...

Страница 108: ...disk 1 Click the Format button 2 Click Yes to continue the format process 3 Follow the prompts as they display Rebuild This button displays only if a disk has a problem To restore functionality Click the Rebuild button and click OK to refresh the browser ...

Страница 109: ...1 By using the RAID format and two disks you can create a mirrored backup of the first disk on the second disk and protect your data against disk failure JBOD If you have two disks in your Stora you can increase your storage capacity by choosing to use the disk as a second storage drive rather than as a mirroring of the first disk To use the disk as a second storage drive you must configure the di...

Страница 110: ...tton If you click the Cancel button the reconfigure process is aborted You are prompted to confirm that you want to reformat the disk 5 Click the Yes button If you click the No button the reconfigure process is aborted 6 Follow the prompts that display as the process progresses External Storage USB You can use an external device that uses a USB port to upload or download content to and from your S...

Страница 111: ...After the device is ejected it shows as inactive Note You might use a powered hub to expand the USB port to support a single printer and multiple USB drives Multiple printer support is not available Power Timer Stora automatically spins down when not used for 12 minutes To reduce power consumption you can use Power Timer to set your Stora to turn on and off automatically ...

Страница 112: ...the contents are not usable by the user directly and can be used only for restoring backups Vista Backup users can choose to go through the setup tutorial after installing the desktop applications or at a later time by selecting Vista Backup in the Stora Desktop Applications program group The tutorial provides step by step instructions about setting up Vista Backup Time Machine backup support is a...

Страница 113: ...ia RSS is available with a Premium subscription only For more information about this Premium subscription feature see RSS Integration and Support on page 148 Share with Media Players Sharing files with media players allows media players on your home network to detect and access content within the album The media player needs to support the UPnP AV DLNA or Windows Media Connect standard Media playe...

Страница 114: ...horize Stora to link with your Facebook account 6 Close the browser window and click Authorization complete 7 Select an existing photo album or create a new photo album by entering its name and optional description and click Submit Stora uploads the images to the photo album 8 To complete the photo album log in to Facebook and then select the photo album A message similar to This album contains ph...

Страница 115: ...lder display the menu and select Share with DMA All of its subfolders are shared as well To stop sharing a folder with media players Select the folder display the menu and select Unshare with DMAs You can then enable or disable sharing for its individual subfolders FTP You can upload and download files from your Stora using File Transfer Protocol FTP FTP provides access to your MyLibrary folders I...

Страница 116: ...ork The iTunes server can run on either the host computer or Stora Adding songs to the iTunes library makes them available to the iTunes clients To add songs to the iTunes library 1 Move the music files to subfolders within FamilyLibrary FamilyMusic 2 Ensure that the folder is shared 3 Select the FamilyMusic folder and display the menu If the Unshare with DMA command is displayed the folder is sha...

Страница 117: ...ithin iTunes If you move all of your music files on all of your computers to the FamilyMusic folder in FamilyLibrary they are all accessible through each computer s iTunes program Up to five iTunes clients on your home network that is computers and media players can play iTunes DRM protected music but an unlimited number of iTunes clients can play iTunes Plus music or songs imported from CD To pla...

Страница 118: ...rting Desktop Mirror Initial Configuration Add Folders to the Desktop Mirror Backup View Files within a Folder Remove Folders from the Desktop Mirror Backup View the Desktop Mirror Backup Report Manual Desktop Mirror Backups Restore All Backed Up Folders Change Account Settings View Online Help ...

Страница 119: ...ked up data is available to Premium users only The directory structure within the MyComputers folder makes it easy to locate and restore single files or entire folders Desktop Mirror backs up the files in one direction from the computer to Stora It backs up the files in the listed folders using the settings in the Schedule tab Files that have not changed since the last backup are ignored New and u...

Страница 120: ...and click Next Use the credentials you created when you installed Stora When you log in to the Stora Application using these credentials the backup directory for the computer displays under MyComputers The Select your content screen displays 2 Select the content you want to back up By default the My Documents PC or Documents Mac folder is selected for backup To back up your entire My Documents or ...

Страница 121: ...s Backup every Choose your backup time Options range between every 5 minutes up to every 24 hours Backup at Choose an exact time on a specific day to backup your folders Backup at program startup Backs up your files every time you launch Desktop Mirror Depending on the amount of data this operation could take several hours if you are backing up gigabytes of data Select your options so that all you...

Страница 122: ... Click Next The Congratulations screen displays 6 Optional Select the Start backing up my folders when I click finish check box If you click this check box the Desktop Mirror begins as soon as you click the Finish button 7 Click Finish ...

Страница 123: ...er includes the folder its subfolders and its files in the subsequent backups To add folders to the Desktop Mirror backup 1 Select File Add The Browse for Folder dialog box displays 2 Navigate to the folder you want to add 3 Click OK The added folder displays on the Desktop Mirror screen ...

Страница 124: ...AR Stora View Files within a Folder After files and folders are backed up they are marked with a check mark as shown in the following figure To view files within a folder Double click a folder link The backed up files display ...

Страница 125: ...ts files from subsequent backup jobs 1 Select the folder you want to remove from the backup job 2 Select File Remove You are prompted to confirm the folder removal 3 Click OK to confirm If you click Cancel the folder is not removed from the Desktop Mirror backup job If you click OK the folder is removed from the Desktop Mirror backup job ...

Страница 126: ...rt is generated after every backup or restore event To view the desktop mirror backup report 1 Select View View Report The backup data log displays in the Backup Activity screen The Backup Activity screen always shows the most recent addition to the log at the top of the report ...

Страница 127: ...ckups 1 Select the folder or folders you want to back up You can select multiple folders by pressing the Ctrl key while selecting the folders 2 Select a synchronization option from the Tools menu as follows Synchronize Selected Items Allows you to select only the folders you want to backup Synchronize All Items Backs up all new and modified folders listed Alternately you can click the Synchronize ...

Страница 128: ... in progress During a backup click the X button on the status bar A Process aborted message displays on the status bar The folder or folders included in the job are marked with a warning icon indicating that they are out of sync and need to be backed up ...

Страница 129: ...copies all folders and files back to the computer To restore all files 1 Select Tools Restore You are prompted to confirm the restore command 2 Click OK If you click Cancel the restore process is aborted If you click OK files and folders on Stora are added to or replace those on the computer ...

Страница 130: ... Tab You can use the Identity tab to choose which Stora and user you want to mirror To choose a Stora and user account to mirror 1 Choose Tools Account Settings The Options screen displays 2 Click the Identity tab 3 Edit the fields as desired and click OK For information about editing an account for a user who changes his or her password see Edit User on page 105 ...

Страница 131: ...se your backup time Options range between every 5 minutes up to every 24 hours Backup at Choose an exact time on a specific day to backup your folders Backup at program startup Backs up your files every time you launch Desktop Mirror Depending on the amount of data this operation could take several hours if you are backing up gigabytes of data Select your options so that all your changes are saved...

Страница 132: ...m within Desktop Mirror Select Help View Online Help The manual displays About Desktop Mirror You can view details about the current version of Desktop Mirror To view details about the version of Desktop Mirror installed on your computer 1 Select Help About Desktop Mirror The About Desktop Mirror pop up window displays 2 Click OK to close the window ...

Страница 133: ...ium subscription in addition to the Standard offerings Stora offers the additional features that are described in the following sections Back Up My Stora to a USB Device Torrents FTPS Integration RSS Integration and Support Flickr Cooliris TiVo Support ...

Страница 134: ...a to an external device You manage these backups in the Backup my Stora area that is accessible from the home screen Enable a Device Before you can back up the data on your Stora unit you need to enable the backup device to receive the data To enable a backup device 1 Click the Backup my Stora icon on the home screen 2 The Welcome to Stora Backup screen displays ...

Страница 135: ...s informing you that you need to remove any data that you want to keep from the USB device This is because during the backup process all data stored on the device is erased and cannot be recovered 4 Click Yes to continue If you click No the enable USB device process aborts This gives you the opportunity to remove any data from the device that you want to keep and save it elsewhere If you click Yes...

Страница 136: ...e files on the USB device that are currently visible in the Media Library will no longer visible in the Media Library 6 Click Yes to continue If you click No the enable USB backup process aborts If you click Yes the Welcome to Stora Backup screen displays 7 Click Ok The backup application launches Your device is now ready to back up Stora data ...

Страница 137: ...tora For information about how to enable your device see Enable a Device on page 134 To back up Stora data to a USB device 1 Click the Backup my Stora icon on the home screen The backup screen displays 2 Right click the media source that you want to back up and select Add to Backup from the drop down menu A check mark displays 3 Select Backup Run USB Backup ...

Страница 138: ...ess bar displays When to backup job is complete a screen similar to the following displays Click the X button in the upper right corner to close this screen A check mark in the USB column indicates that the folder was backed up to a USB device ...

Страница 139: ...ckup application screen The Backup Scheduling dialog box displays 2 Use the arrows to set the time and click Ok The clock uses 24 hour increments for example 00 00 indicates that no backup time is set 04 37 denotes that the backup time is set for 4 37 a m 00 01 12 00 denotes a m hours 16 47 indicates that the backup time is set for 4 37 p m 12 01 24 00 denotes p m hours ...

Страница 140: ...active and previous backup jobs To view active jobs Select Backup My Stora Show Jobs View Active Jobs from the backup application screen The screen populates with information about active jobs if any 3 Click the X button in the upper right corner to close the window ...

Страница 141: ...b history click the X button next to the job To completely clear the job history click the Clear All button 1 2 3 1 Information icon 2 Clear Job button 3 Clear All button 2 Click the X button in the upper right corner to close the Backup History screen Remove a Folder from a Backup Job You can remove data from a backup job To remove a folder from a backup job 1 Click the Backup My Stora icon on th...

Страница 142: ...Premium Features 142 NETGEAR Stora 3 Select Remove from Backup from the drop down menu Stora removes the folder from the backup device and marks it accordingly ...

Страница 143: ... that content are canceled To archive Stora data 1 Click the Backup My Stora icon on the home screen The backup to USB application launches 2 Select the check box next to the file you want to archive A drop down menu displays 3 Select Archive from the drop down menu The archive process begins When the archive process completes the check mark changes to a circle ...

Страница 144: ...arge files Rather than downloading the entire file from one place which is the traditional download method torrents allow you to download pieces of a file from multiple places at the same time Stora s torrents service allows you to download files from torrent sites directly to your Stora This feature requires different login credentials than your Stora credentials To use this feature you must firs...

Страница 145: ...nagement application For security reasons NETGEAR recommends that you use a different user name and password than you use for your Stora user account Alternatively you can download a compatible torrent client for your PC or Mac from http support netgear hipserv com support torrents download The Torrent Terms of Service screen displays 3 Read the terms of service and click Agree If you click Cancel...

Страница 146: ...ave a torrent URL on hand 2 Click the Torrents icon on the Stora home screen A log in screen displays 3 Enter the credentials you created when you enabled torrents and click the OK button 4 A torrents screen displays 5 Click the Open button The Upload Torrent Files dialog box displays 6 Browse to the torrent link you previously downloaded or enter the URL for the torrent file and click the Upload ...

Страница 147: ...ter has UPnP enabled Note On Premium subscriptions FTP and FTPS access are linked If you disable FTP access you also disable FTPS access If you enable FTP access you also enable FTPS access To enable FTPS 1 Select Go To Preferences Server Preferences Network Services 2 Set Enable FTP access to your local LAN and Enable FTP access to the Internet to Yes To connect locally using FTPS Browse to ftps ...

Страница 148: ... RSS reader The RSS reader shows the album s name description of the album and images which are sorted by name Each image shows its name caption and when it was added to the album The RSS reader automatically receives new images as they are added to the album and deletes them as they are removed Album RSS feeds can be bookmarked in any RSS reader including browsers Vista and Google gadgets and dig...

Страница 149: ...ays 5 Click the Flickr icon A browser window displays prompting you to authorize Flickr to use Stora If necessary enter your Flickr user name and password 6 Click OK I ll Authorize It This allows Stora to link to your Flickr account 7 Close the browser window 8 Click Authorization complete 9 Select the default photostream or an existing set or create a new set by entering its name and optional des...

Страница 150: ...3D flying wall To use Cooliris 1 Download and install the Cooliris plug in for your browser Plug ins are available at the Cooliris website at www cooliris com 2 Double click an album The album s photos display in thumbnail view 3 From the Viewing as drop down menu select Cooliris The Cooliris flying wall slideshow displays ...

Страница 151: ...ormat Image JPEG Audio MP3 Video MPEG 2 To view Stora files on a TiVo device 1 Ensure that the Stora files that you want to view on a TiVo device have sharing with digital media adapters DMAs enabled For more information about how to share files with DMAs see Share Files with DMAs on page 115 2 View Stora files from the TiVo device Videos display on the TiVo device s My Shows or Now Playing menu d...

Страница 152: ...nly Any product changes or modifications will invalidate all applicable regulatory certifications and approvals This device complies with Part 15 of the FCC Rules Operation is subject to the following two conditions 1 This device may not cause harmful interference and 2 this device must accept any interference received including interference that may cause undesired operation FCC Guidelines for Hu...

Страница 153: ...to correct the interference by one or more of the following methods Reorient or relocate the receiving antenna Increase the separation between the equipment and the receiver Connect the equipment into an electrical outlet on a circuit different from that which the radio receiver is connected Consult the dealer or an experienced radio TV technician for help Modifications made to the product unless ...

Страница 154: ...uters backup 112 configuration 21 configuration wizard 26 configure Desktop Mirror 120 connect to network 21 Contacts setting up 90 working with 90 Cooliris 150 D data backup 137 date 103 date and time set 102 deleting folders 69 desktop applications 28 Desktop Mirror help menu 132 initial configuration 120 open 46 overview 119 remove folders from backup 125 restore files 127 129 set backup schedu...

Страница 155: ...n 107 format disk 108 FTP 115 enable internet 101 enable LAN 101 FTPS 147 G Gateway 102 H help 132 history 141 I Images accessing files 89 downloading a file 61 rotate 89 view 89 working with 88 information icon 63 install a disk 16 iTunes 9 116 J JBOD 109 job history 141 L LAN 101 LAN access 35 LED disks 15 Ethernet port 15 power cable socket 15 power status 15 reset button 15 USB 15 logging in 4...

Страница 156: ... 59 server netmask box 101 Server Preferences 98 setup software 22 setup initial 20 show jobs 140 slideshows 61 sorting files 59 spin down 15 111 standard features 8 Stora about 7 132 access 35 agent 41 application open 46 configuring 21 folders 45 registration 23 setup 22 Stora agent 41 about 48 exit 48 Stora Application 53 home screen 56 menu bar 58 Stora application home page 57 landing page 56...

Страница 157: ...157 NETGEAR Stora V version find 57 view details 74 85 W Windows Backup 32 wipe button 113 Workgroup 98 ...

Отзывы: