NETGEAR ReadyNAS RR4360S Скачать руководство пользователя страница 6

6

Install Cable Management

The cable management hardware folds when the unit is pushed toward the back of the rack, 
and straightens as the unit moves forward. If you attach the cables to the cable management 
hardware, the cables also fold or straighten as the unit is moved in the rack, which eliminates 
the tugging by the cables on the connectors on the unit.

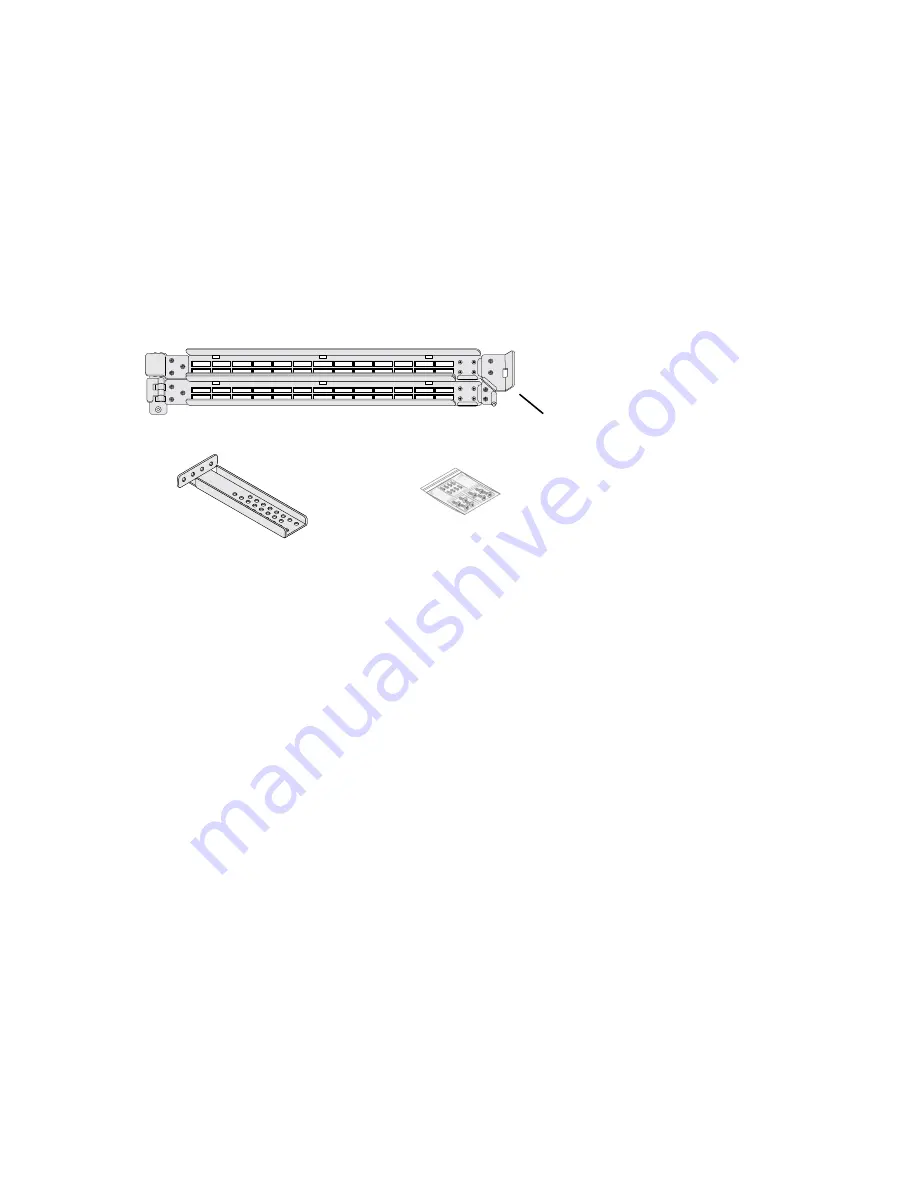
The cable management kit consists of the cable management arm assembly with attached 
chassis bracket and rack bracket, and the parts kit.


¾

To install the cable management hardware:

1.  Attach the rack bracket to the arm assembly using three bolts.
2.  Attach the chassis bracket to the bracket on the left rear of the RR4360 chassis using two 

bolts.

3.  Attach the rack bracket to the left rear post of the rack using two bolts. Align the rack 

bracket so that the lower bolt is 9 rack positions above the rail attachments.
On some racks, a screw driver with a shaft longer than the rack bracket can make this step 
easier. Alternatively, you can place the bracket on the outside of the rack rail and a second 
person can drive the screws from inside the rack.

After fully cabling the ReadyNAS server, use cable ties to attach the cables to the arm assembly.

arm assembly

Parts kit

rack bracket

chassis bracket

Содержание ReadyNAS RR4360S

Страница 1: ...Installation and Quick Start ReadyNAS RR4360S RR4360X...

Страница 2: ...kage Contents 3 Prepare the Installation Site 3 Install the System in a Rack 4 Precautions 4 Rack Installation 5 Install Cable Management 6 Install Disks 7 Basic Setup 9 Reformat Disks 10 Additional I...

Страница 3: ...ng Mount the equipment into a rack so that a hazardous condition does not arise due to uneven mechanical loading Circuit overloading Consider the equipment s connection to the power supply circuitry a...

Страница 4: ...ions Ensure that the leveling jacks on the bottom of the rack are fully extended to the floor with the full weight of the rack resting on them In single rack installations attach stabilizers to the ra...

Страница 5: ...e chassis insert the hooks in the front surface of the outer rail into holes in the front of the rack and press the rail down to fasten it to the rack 8 Repeat with the right rail and right side of th...

Страница 6: ...t hardware 1 Attach the rack bracket to the arm assembly using three bolts 2 Attach the chassis bracket to the bracket on the left rear of the RR4360 chassis using two bolts 3 Attach the rack bracket...

Страница 7: ...imal RAID mode and level are automatically selected for you based on the number of disks that are installed If desired you can later change the RAID settings manually For information about RAID settin...

Страница 8: ...es in your drive Note The following figure illustrates how disk numbers are assigned based on their position in the chassis When you reinsert the drive and tray into a slot the weight of the drive sea...

Страница 9: ...supplies 4 Use an Ethernet cable to connect an Ethernet port on the storage system to your network 5 If necessary press the Power button to turn on the system 6 Wait for the Power LED to turn solid bl...

Страница 10: ...manual for your system 3 Press and hold the Reset button 4 Press the Power button The system powers on 5 Continue pressing the Reset button for about five seconds until the system enters the boot menu...

Страница 11: ...cefully power off your storage system 1 Press the Power button on the front panel of the system The Power LED blinks prompting you to confirm the shutdown 2 Press the Power button again The system shu...

Страница 12: ...er manuals and join our community We recommend that you use only official NETGEAR support resources Trademarks NETGEAR Inc NETGEAR and the NETGEAR Logo are trademarks of NETGEAR Inc Any non NETGEAR tr...

Отзывы: