


Mount the Switch to a Pole or Another Surface
You can use an off-the-shelf 75 mm VESA standard mount to secure the switch to a pole or another surface.
The bottom panel of the switch provides four mount holes that are VESA-compliant.
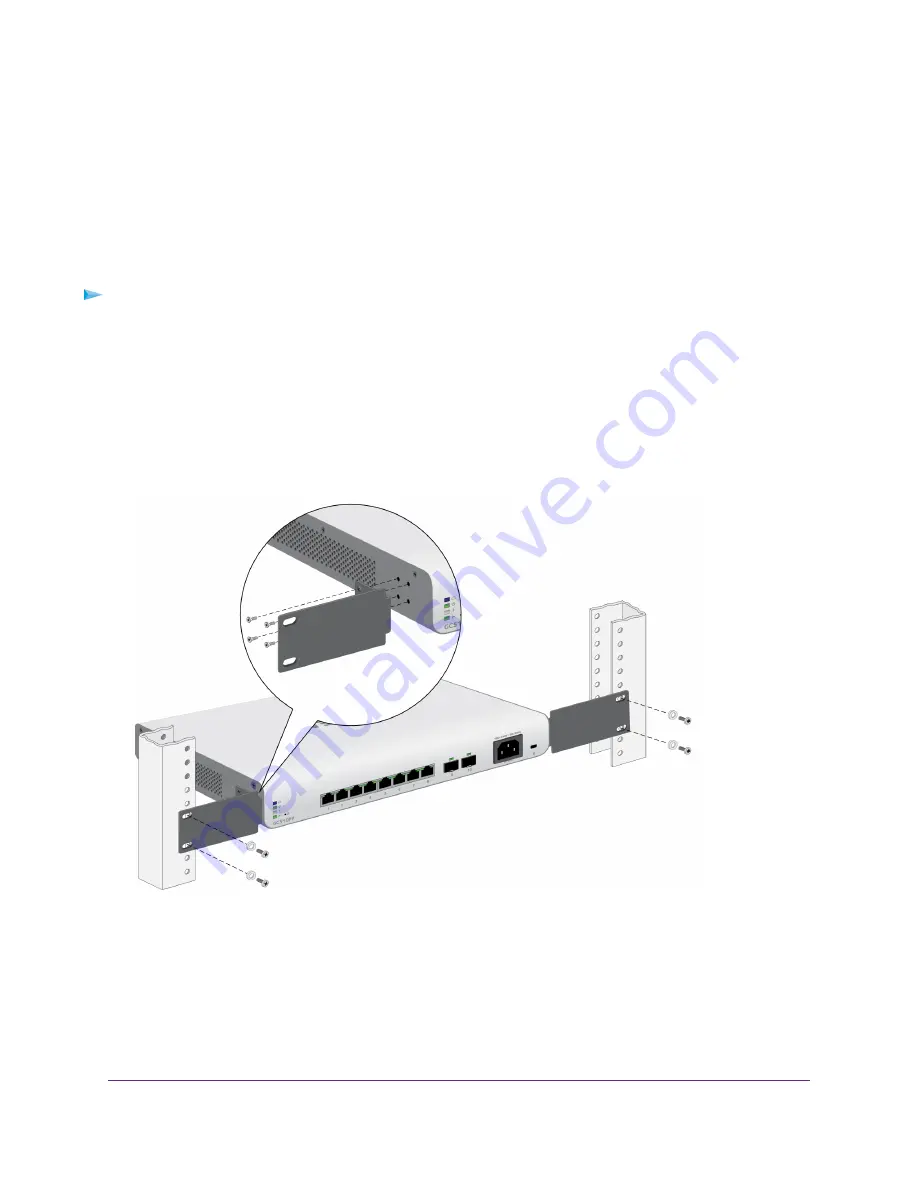
Install the Switch in a Rack
To install the switch in a rack, you need the 19-inch rack-mount kit supplied with the switch.
To install the switch in a rack:
1.
Attach the supplied mounting brackets to the side of the switch.
2.
Insert the screws provided in the product package through each bracket and into the bracket mounting
holes in the switch.
3.
Tighten the screws with a No. 2 Phillips screwdriver to secure each bracket.
4.
Align the mounting holes in the brackets with the holes in the rack, and insert two pan-head screws with
nylon washers through each bracket and into the rack.
5.
Tighten the screws with a No. 2 Phillips screwdriver to secure mounting brackets to the rack.
Optional Step 5: Install SFP Transceiver Modules
The following optional procedure describes how to install an optional SFP transceiver module into one of
the SFP ports of the switch.
Installation
31
Insight Managed 8-Port Gigabit Ethernet PoE+ Smart Cloud Switch with 2 SFP Fiber Ports


