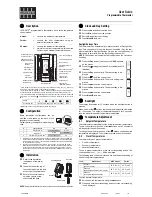
Finalisation de l’installation et configuration
8. Fixer l’écran d’affichage
Appuyez sur l’écran du thermostat jusqu’à ce que vous
entendiez un clic . Rétablissez le courant . La configuration
du thermostat Nest s’exécute .
ou
P
ro
cé
du
re d
’in
st
al
la
ti
on p
as
-à-
pa
s •
Ins
ta
ller
le
T
her
m
os
ta
t
FR
39
Содержание Learning thermostat
Страница 2: ......
Страница 3: ...English 5 Français 27 Nederlands 49 Italiano 71 Español 93 Deutsch 115 ...
Страница 7: ...Base Display Heat Link Trim plate Screws In the box Installation step by step EN EN 7 ...
Страница 51: ...In de verpakking Basis Scherm Heat Link Afwerkingsplaat Schroeven Stap voor stap installeren NL 51 51 ...
Страница 73: ...Contenuto della scatola Base Display Heat Link Piastra di rivestimento Viti Installazione passo passo IT 73 73 ...
Страница 95: ...Contenido de la caja Base Pantalla Heat Link Placa de montaje Tornillos Instalación paso a paso ES 95 95 ...
Страница 117: ...Packungsinhalt Basis Display Heat Link Dekoplatte Schrauben Schrittweise Installation DE 117 117 ...
Страница 142: ......
Страница 143: ......
Страница 144: ...064 00198 EX A ...


