Administrator’s Guide and Operating Instructions
48
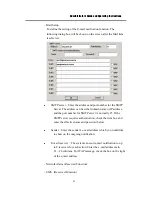
Select HDD & Range – To select the playback Hard Disk and the
playback range in that Hard Disk. Click on it, and the Select HDD &
Range dialog box will be shown on the screen as described in the next
paragraph.
Play Saved Video – To preview the retrieved images in the DVD
RAM, ZIP disk (PC format), etc.
Stop – To stop playing the video. If the user plays the video again,
it will start from the beginning.
Play – To play the selected video.
Step Forward – The next single image corresponds to one of the
selected playback cameras will be played and displayed on its
corresponding video window.
Reverse Play – To reverse play the selected video.
Step Backward – The previous single image corresponding to one
of the selected playback cameras will be played on its corresponding
video window.
Pause – To pause playing the video. Click on Play icon to resume
playing.
Archive Video – Toggle button to enable/disable retrieving playback
video to CD-RW, DVD RAM, ZIP disk, etc. When the video is playing
back and Archive is enabled (button at DOWN position), the Retrieval
Device and Camera dialog box will be shown, please follow the
instructions to retrieve the video. (Note.1, 2)
Replay – To repeat playing the selected video over and over again
when the button is at DOWN position.
Audio – To enable or disable the audio during the video playback.
The recorded can only be played under x1 playback speed. There will be
no sound if it was set as other types of playback speed.
Playback/Live Switch – To switch all the view windows between live
and playback mode.
Speed – The playing speed, ranging from 1/6 (slowest) through 5
(fastest). For speed 1/6 – 2, each image for the selected playback
cameras will be displayed in its respective video window. For speed
3/4/5/6, each image out of 2/3/4/5 images will be displayed. Click on the
button to select the desired playback speed. The default value is 1.


