background image

temperature is between 32˚ F - 113˚ F (  0˚C- 45˚C ) ,
ensuring a long battery service life.

3.

When you are ready to use the battery, pull it vertically out of
the charger.

Inserting a Battery into the Rotary Hammer

Before inserting the battery, always check to see that the switch

trigger actuates properly and returns to the "OFF" position when
released.

Caution: To minimize the risk of accidental activation,
always ensure the tool is switched off before
performing any maintenance work on the rotary
hammer, as well as during transportation and storage.

1.

Ensure the 3-prong connector is in alignment with the 3 holes on

top of the battery .

2.

Insert the battery into the bottom of the rotary hammer base.

3.

Close the two plastic clips on the side to secure the rotary

hammer into position .

Caution: Use only a Li-ion battery from the original
factory with the voltage listed on the nameplate of your
rotary hammer. Using other batteries not suitable for
the rotary hammer can lead to malfunctions, cause
damage to the power tool, and pose a fire hazard.

Removing a Battery from the Rotary Hammer

1.

Unfasten the two plastic clips on the side.

2.

Pull the battery pack down.

Fitting the Rotary Hammer Handle

The handle enables you to hold the rotary hammer securely.

1.

Ensure the On/Off trigger is in the Off position.

8

Содержание RH-22-6Li-50

Страница 1: ......

Страница 2: ...ditions and on dry land This tool is a valuable asset to any professional who works in and around water Packing List Your Nemo Rotary Hammer is packaged together with the following accessories Two rechargeable Lithium ion Li ion battery packs Hand pump Battery charger Carrying case Two drill bits 6mm and 10mm 1 ...

Страница 3: ...mum in steel diameter 1 8 1 2 in 3 13mm Maximum in wood diameter 1 8 1 in 3 26mm Maximum in concrete diameter 1 8 7 8 in 3 20mm Working temperature 32 140 F 0 60 C Submersible up to 164 ft 50m Battery Charger Model XVE 2520300 Approximate charging time 50 minutes Charging output voltage 25 2V Charging input voltage 100V 240V Caution You must pressurize the Rotary Hammer before you can use it under...

Страница 4: ...ou when operating the tool Personal Safety Stay alert and use common sense when operating power tools Do not use power tools when you are tired or under the influence of drugs alcohol or medication Use personal protective equipment It is recommended to always wear eye protection as well as a P2 filter class respirator Dust from materials such as lead containing coating some wood types minerals and...

Страница 5: ...delines before operating a power tool Switch off the power immediately if the tool bit jams Be prepared for high reaction torque that can cause kickback The tool bit can jam when the power tool is subject to overload or if it becomes wedged in the workpiece Hold the power tool with a firm grip High reaction torque can briefly occur while driving in and loosening screws Work only on secured stable ...

Страница 6: ...to contact with adjacent components Use only original batteries with the voltage listed on the nameplate of your power tool When using other batteries such as imitations reconditioned batteries or other brands there is danger of injury as well as property damage through exploding batteries Use only the battery charger provided with the power tool to recharge the batteries Only this battery charger...

Страница 7: ...tary hammer before using the rotary hammer for the first time Caution Only use the battery charger provided with the rotary hammer Only this battery charger is matched to the Li ion batteries supplied with your power tool Danger Ensure that the voltage of the power supply corresponds with the data given on the nameplate of the battery charger Danger Only use the charger in a dry environment The ch...

Страница 8: ...not damage the battery 1 Connect the mains plug of the battery charger to an electrical outlet A steady green light on the battery charger indicates that the charger is ready for operation 2 Press the battery charger s connector into the socket on the top of the battery pack There is only one way to insert the connector into the battery socket The battery begins charging as soon as it is connected...

Страница 9: ...e the 3 prong connector is in alignment with the 3 holes on top of the battery 2 Insert the battery into the bottom of the rotary hammer base 3 Close the two plastic clips on the side to secure the rotary hammer into position Caution Use only a Li ion battery from the original factory with the voltage listed on the nameplate of your rotary hammer Using other batteries not suitable for the rotary h...

Страница 10: ...metal ring over the chuck Tighten the bottom of the handle to the right to secure the front safety handle in place Pressurizing the Rotary Hammer for Underwater Use Your rotary hammer can be used in any wet conditions and can be submerged and used underwater at depths of up to 164ft 50m Before submerging the rotary hammer to any depth it must be pressurized 1 Remove the red cap from the pressure v...

Страница 11: ...t as follows Depth in meters Depth in feet Pressure Up to 5m 16 feet Minimum 15 psi 1 Bar Up to 10m 33 feet Minimum 29 psi 2 Bars Up to 20m 66 feet Minimum 44 psi 3 Bars Up to 30m 98 feet Minimum 58 psi 4 Bars Up to 40m 131 feet Minimum 73 psi 5 Bars Up to 50m 164 feet Maximum 87psi 6 Bar 10 ...

Страница 12: ... a replacement relief valve After pressurizing the battery replace the red cap on the Schrader valve Best Practices for Underwater Operation Your Nemo Submersible Rotary Hammer is designed to be waterproof so that it can be used both on land and underwater To obtain the maximum serviceable life of your rotary hammer adhere to the following best practices when using the rotary hammer underwater You...

Страница 13: ...nnection may corrode the terminals Use compressed air to flush out any remaining water trapped in the 3 large holes on the battery connection Operating the Rotary Hammer Switching the Rotary Hammer On or Off Press the On Off trigger and keep it pressed You can increase the speed of the rotary hammer by increasing the pressure on the switch To switch off the rotary hammer release the On Off trigger...

Страница 14: ...4 Test the tool by pulling it straight out to make sure it remains securely in place Removing Tools Pull the fastening sleeve back hold it in place and remove the tool 13 ...

Страница 15: ... function The rotary hammer comes with three separate functions rotation and hammering rotation only hammering only To switch to your chosen mode hold down the push button and move the lever to the desired mode Choose the rotation and hammering function to rotary hammer 14 ...

Страница 16: ... pressure especially at lower speeds will cause the hammer to stall Utilizing too little pressure or uneven pressure can cause the bit to skip and slide over the surface and or prevent it from cutting through the work surface Wipe the shanks of the bits clean prior to installation and immediately after removing them from the rotary hammer Maintenance Rotary Hammer Care When working in cold weather...

Страница 17: ...ost dive maintenance Water trapped inside the female battery connection may corrode the terminals Use compressed air to flush out any remaining water trapped in the 3 large holes on the battery connection Servicing the Rotary Hammer If your rotary hammer is damaged or faulty have it repaired by an authorized service technician Caution Under no circumstances should the rotary hammer be opened for r...

Страница 18: ...nternational regulations pertaining to dangerous mediums either as individual components or when inserted into a power tool However the regulations governing dangerous goods may be relevant when transporting several batteries In this case it might be necessary to comply with special conditions such as those governing packaging Disposing of the Rotary Hammer At the end of its lifecycle the rotary h...

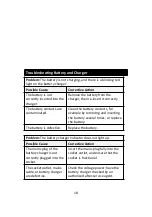
Страница 19: ...r example by removing and inserting the battery several times or replace the battery The battery is defective Replace the battery Problem The battery charger indicator does not light up Possible Cause Corrective Action The mains plug of the battery charger is not correctly plugged into the socket Insert the mains plug fully into the socket outlet and ensure that the socket is functional The socket...

Страница 20: ...ger is warm to the touch Possible Cause Corrective Action Continuous or repetitive charging cycles without a break may cause the charger to warm up No corrective action is required as this does not indicate a fault with the battery charger Problem The battery operation time is significantly reduced even after the battery is fully charged Possible Cause Corrective Action The battery is defective or...

Страница 21: ... a battery that has gone into its SAFE mode A battery that has experienced an excessive current draw from a short circuit or a high current draw when the tool was under an excessive load may shut down prematurely This is a built in safety feature If the battery contacts are not damaged recharging the battery for a short period even a few minutes will reset the battery s electronics and restore the...

Страница 22: ...Disclaimer Nemo Power Tools Ltd reserves the right to change the contents of this manual at any time without prior notice Nemo Power Tools Ltd www nemopowertools com ...

Отзывы: