background image

en

    Sabbath mode

20

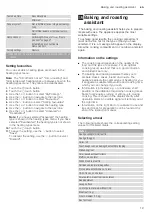
Setting the food

You will be guided through the entire setting process for 

your chosen food.

1.

Touch the 

#

 touch button to switch on the 

appliance.

2.

Touch the 

0

 touch button.

3.

Use the 

(

 or 

)

 button to select the "Baking and 

roasting assistant".

4.

Use the 

 button to navigate to the next line.

5.

Use the 

(

 or 

)

 button to select the required category.

6.

Use the 

 button to navigate to the next line.

7.

Use the 

(

 or 

)

 button to select the required meal.

8.

Use the 

 button to navigate to the next line.

The recommended settings appear on the display.

Note: 

For some meals, you can also display notes, 

e.g. on the shelf height and cookware. Touch the 

)


button to do this.  To return to the recommended 

settings, touch the 

(

 button.

9.

If required, you can change the recommended 

settings. Touch the 

&

 button to do this.

Use the 

&

 or 

%

 button to navigate to the required 

setting.

Use the 

(

 or 

)

 button to adjust the setting.

10.

Touch the 

#

 touch button to start the appliance 

operation.

As soon as the cooking time has elapsed, an audible 

signal sounds and the appliance ends the operation 

automatically. Touch the 

0

 touch button to end the 

audible signal.

Some recommended settings offer you the opportunity 

to continue cooking your dish.
When you are happy with the cooking result, use the 

 button to select "End".
If you are not happy with the cooking result, you can 

continue cooking your dish.

Continue cooking

1.

Use the 

 button to select "Continue cooking".

2.

If necessary, use the 

(

 or 

)

 button to change the 

recommended setting.

3.

Touch the 

#

 touch button to start "Continue 

cooking".

Cancelling

Press and hold the 

#

 touch button until the appliance 

operation is cancelled.

Switching off the appliance

Touch the 

#

 touch button to switch off the appliance.

F

Sabbath mode

Sabbath mode

You can set a time of up to 74 hours using Sabbath 

mode. The food in the cooking compartment remains 

warm, without you having to switch the appliance on or 

off.

Starting Sabbath mode

Before you can use Sabbath mode, you must activate it 

under "Favourites" in the basic settings. 
Once the Sabbath mode has been activated, you can 

select it under the menu for the types of heating.
The appliance heats up with top/bottom heating.The 

temperature can be set between 85 °C and 140 °C.

1.

Touch the 

#

 touch button.

2.

Use the 

(

 or 

)

 button to select "Sabbath mode".

3.

Use the 

&

 button to navigate to the next line.

4.

Use the 

(

 or 

)

 button to select the temperature.

5.

Use the 

&

 button to navigate to the next line.

6.

Use the 

(

 or 

)

 button to select the cooking time.

7.

Touch the 

#

 touch button.

The appliance starts the operation. 

Notes

Once Sabbath mode has started, you can no longer 

change any settings or cancel the operation using 

the 

#

 touch button.

The operation is not interrupted if you open the 

appliance door.

Once the Sabbath mode duration has elapsed, a signal 

sounds. The appliance stops heating. Use the 

#

 touch 

button to switch off the appliance.

Cancelling Sabbath mode

Touch the 

#

 touch button to cancel Sabbath mode.

Leg of lamb, boned
Chicken, whole
Chicken legs
Goose, whole (3-4 kg)

Dishes

Содержание B57CS24H0

Страница 1: ...en INSTRUCTION MANUAL BUILT IN OVEN B57CS24H0...

Страница 2: ......

Страница 3: ...16 Setting the cooking time 17 Start delay Ready at 17 Checking changing or deleting settings 17 A Childproof lock 17 Automatic childproof lock 17 One time childproof lock 18 Q Basic settings 18 Chan...

Страница 4: ...not connect the appliance if it has been damaged in transport Only a licensed professional may connect appliances without plugs Damage caused by incorrect connection is not covered under warranty This...

Страница 5: ...Never touch the hot parts Keep children at a safe distance Risk of scalding When you open the appliance door hot steam can escape Steam may not be visible depending on its temperature When opening do...

Страница 6: ...rub or remove the seal Never operate the appliance if the seal is damaged or missing Warning Risk of serious damage to health The appliance will become very hot during the cleaning function The non st...

Страница 7: ...y leave the cooking compartment to dry with the door open if a lot of moisture was produced whilst the oven was operating Fruit juice when baking particularly juicy fruit pies do not pack the baking t...

Страница 8: ...ger cooking times you can switch the appliance off 10 minutes before the end of the cooking time and use the residual heat to finish cooking Environmentally friendly disposal Dispose of packaging in a...

Страница 9: ...e the button you stop scrolling through the values quickly LUFR7KHUP Display 0 Touch buttons 8 ShiftControl control element Touch button Use On off Switches the appliance on or off Switching the appli...

Страница 10: ...e grill element and the fan switch on and off alternately The fan circulates the hot air around the food Pizza setting 50 275 C For cooking pizza and dishes that require a lot of heat from underneath...

Страница 11: ...continues to run in the basic settings Basic settings on page 18 _Accessories AccessoriesYour appliance is accompanied by a range of accessories Here you can find an overview of the accessories inclu...

Страница 12: ...essories into the cooking compartment the right way round Always insert the accessories fully into the cooking compartment so that they do not touch the appliance door Locking function The accessories...

Страница 13: ...select the current minute 5 Press the button repeatedly until Time appears 6 Use the button to select the next setting Setting the date 1 Use the button to navigate to the bottom line 2 Use the or bu...

Страница 14: ...mode Switching the appliance on and off To switch the appliance on or off touch the touch button After the appliance has switched off the display shows whether the residual heat in the cooking compar...

Страница 15: ...utton to start the changed operation Notes The cooling fan may continue to run while an operation is interrupted After a temperature change the paused running time continues to count After a change in...

Страница 16: ...r hide the time setting options touch the 0 touch button Note After a particular length of time the time setting options that are shown are automatically hidden If you have already set a cooking time...

Страница 17: ...essary change the setting using the or button Set 00 00 to delete a time function The setting is applied automatically AChildproof lock ChildprooflockYour appliance is equipped with a childproof lock...

Страница 18: ...next line 5 Use the or button to select the setting 6 Use the button to navigate to the selection 7 Use the or button to select the setting 8 Touch the 0 touch button 9 To save the setting use the bu...

Страница 19: ...type of cookware For an optimal cooking result use food that is in good condition and chilled meat only The baking and roasting assistant helps you to prepare classic cakes bread and roasts The appli...

Страница 20: ...o select Continue cooking 2 If necessary use the or button to change the recommended setting 3 Touch the touch button to start Continue cooking Cancelling Press and hold the touch button until the app...

Страница 21: ...the app to make the settings The app must be open in order to perform the setup process Automatic registration in the home network Notes You need a router that has WPS functionality You can start the...

Страница 22: ...ated When you start the oven using the controls on the appliance itself remote start is automatically activated You can now make changes or start a new programme from your mobile device Home Connect s...

Страница 23: ...ote control is automatically activated when remote start is activated 1 Touch the touch button to switch on the appliance 2 Touch the 0 touch button The main menu appears 3 Use the or button to select...

Страница 24: ...while it is hot Wash new sponge cloths thoroughly before use Tip Highly recommended cleaning and care products can be purchased through the after sales service Observe the respective manufacturer s in...

Страница 25: ...will not be able to be removed Appliance interior Enamelled sur faces Hot soapy water or a vinegar solution Clean with a dish cloth and then dry with a soft cloth Soften baked on food remnants with a...

Страница 26: ...efore starting the cleaning function remove coarse dirt from the cooking compartment and from the accessories Risk of fire The appliance will become very hot on the outside during the cleaning functio...

Страница 27: ...cloth 3 If you have left an accessory inside the cooking compartment to be cleaned remove it and wipe it down with a damp cloth 4 Lift the accessory support up at the front and remove it Rails on page...

Страница 28: ...ton 3 Start CircoTherm hot air at 50 C 4 After five minutes switch off the appliance and close the appliance door Removing heavy deposits of dirt You have several options for removing particularly stu...

Страница 29: ...also rests against the cooking compartment wall here and press it downwards figure qAppliance door AppliancedoorWith good care and cleaning your appliance will retain its appearance and remain fully...

Страница 30: ...ay break off Do not carry the appliance door by the door handle To carry or remove the appliance door take hold of it with both hands one on the left and one on the right 5 Take hold of the appliance...

Страница 31: ...Components inside the appliance door may have sharp edges Wear protective gloves Removal Note Lay the glass panels you have removed on an even surface that is soft and clean 1 Remove the appliance doo...

Страница 32: ...eals and spacers The arrow on the intermediate panel must line up with the arrow on the frame Fig 4 Insert the second intermediate panel without the seals and spacers and push it in the direction of t...

Страница 33: ...d Then switch the appliance on again and set the required operation Fault Possible cause Notes remedy The appliance does not work The plug is not plugged into the mains Connect the appliance to the po...

Страница 34: ...Glass cover If the glass cover of the halogen bulb is damaged it must be replaced You can obtain a new glass cover from the after sales service Please specify the E number and FD number of your appli...

Страница 35: ...evels Use CircoTherm Baked items that are placed into the oven on trays or in baking tins dishes at the same time will not necessarily be ready at the same time Baking on two levels Universal pan Leve...

Страница 36: ...delicate Ring tin cake tin 2 150 170 60 80 Fruit flan made from sponge mixture delicate Ring springform cake tin 2 160 180 40 60 Fruit flan made from sponge mixture delicate Ring springform cake tin...

Страница 37: ...pan baking tray 3 1 150 25 35 Small cakes 3 levels Baking trays universal pan 4 3 1 140 35 45 Muffins Muffin tray 3 160 180 15 25 Muffins Muffin tray 3 170 190 15 20 Muffins 2 levels Muffin trays 3 1...

Страница 38: ...temperature 10 C higher and shorten the baking time The cake is generally too light in col our If the shelf position and the cookware are correct then you should increase the temperature if necessary...

Страница 39: ...not use frozen products that are heavily frosted Remove any ice on the food Some frozen products may be unevenly pre baked Uneven browning may remain even after baking Recommended setting values The...

Страница 40: ...25 35 Multigrain bread 1 5 kg Universal pan or cake tin 2 210 220 10 15 180 190 40 50 Multigrain bread 1 5 kg Universal pan or cake tin 2 230 240 10 15 200 210 40 50 Wholemeal bread 1 kg Universal pan...

Страница 41: ...ve any ice on the food Some frozen products may be unevenly pre baked Uneven browning may remain even after baking Recommended setting values The table lists the optimal heating type for various types...

Страница 42: ...ell cooked a bake is will depend on the size of the cookware and the depth of the bake Settings ranges are indicated for this reason Try using the lower values at first A lower temperature results in...

Страница 43: ...a higher temperature Grilling Keep the appliance door closed when using the grill Never grill with the appliance door open Place the food to be grilled on the wire rack In addition slide the universa...

Страница 44: ...e lean meat with fat as required or cover it with strips of bacon Score the rind crosswise If you turn the joint when cooking ensure that the rind is underneath at first When the joint is ready turn o...

Страница 45: ...so use a roasting dish with a glass lid and set a higher temperature Grilling Keep the appliance door closed when using the grill Never grill with the appliance door open Place the food to be grilled...

Страница 46: ...amb on the bone Wire rack 2 180 190 40 50 Lamb cutlet Wire rack 4 290 14 18 Sausages Grilled sausages Wire rack 4 290 10 15 Meat dishes Meat loaf 1 kg Cookware uncovered 2 170 180 60 70 Preheat Slide...

Страница 47: ...g time Observe the manufacturer s instructions for your roasting cookware Uncovered cookware To cook a whole fish it is best to use a deep roasting tin dish Place the tin dish onto the wire rack If yo...

Страница 48: ...ou can find the ideal heating types for various dishes The temperature and cooking time depend on the amount and composition of the food Setting ranges are indicated for this reason Try using the lowe...

Страница 49: ...m eco select a temperature of between 125 and 200 C and for Top bottom heating eco select a temperature of between 150 and 250 C Always keep the appliance door closed when cooking Only cook on one lev...

Страница 50: ...n a tin Ring tin cake tin 2 140 160 60 80 Sponge flan base Flan base tin 2 150 170 20 30 Sponge base 2 eggs Flan base tin 2 150 170 20 30 Sponge flan 3 eggs Springform cake tin diameter 26 cm 2 160 17...

Страница 51: ...ace the uncovered cookware onto the wire rack at level 2 You can find additional information in the tips on slow cooking attached to the settings table Your appliance features the heating type Slow co...

Страница 52: ...the more aromatic the dried food will remain Setting ranges are indicated for this reason Dish Cookware Shelf posi tion Heating function Searing time in mins Tempera ture in C Cooking time in mins Pou...

Страница 53: ...erving process Fruit After a short while small bubbles will form at short intervals Switch off the appliance once all preserving jars are bubbling Remove the jars from the cooking compartment after th...

Страница 54: ...re only meant to be average values Type of heating used Dough proving Defrosting The defrost setting is suitable for defrosting frozen fruit vegetables and baked items Poultry meat and fish should ide...

Страница 55: ...o each other Apple pie on two levels position dark coloured springform cake tins above each other so that they are offset Cakes in tinplate springform cake tins bake on one level with top bottom heati...

Страница 56: ...70 30 40 Fatless sponge cake 2 levels Springform cake tin diameter 26 cm 3 1 150 170 30 50 Apple pie 2 x black plate tins diameter 20 cm 2 170 180 60 80 Apple pie 2 x black plate tins diameter 20 cm 2...

Страница 57: ...6...

Страница 58: ...6...

Страница 59: ...6...

Страница 60: ...9001416290 9001416290 980904 en...

Отзывы: