background image

Fan Inverter

8 Display

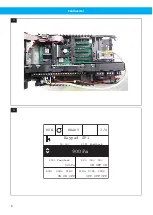
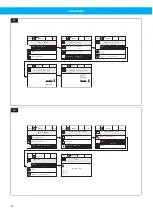
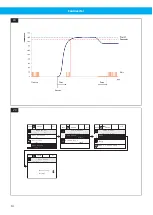
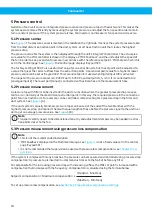
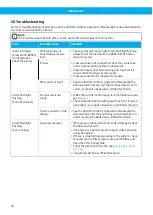
The default view for the display is the ‘Multimonitor’ page displaying 9 parameters, see 

Figure 7

.

8.1 Access the main menu

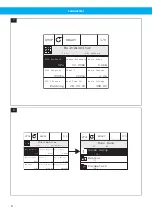
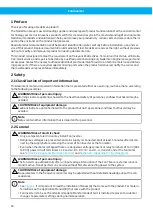
• From the ‘Multimonitor’ page, press the BACK/RESET button to access ‘Main Menu’. See 

Figure 6

 and 

Figure 8

.

Note 
• Each menu has a number of submenus shown by the number in parentheses.
• If no button is pushed, the display returns to the ‘Multimonitor’ page after one minute.
• See the VACON 100 HVAC Application Manual for a definition of the parameters, such as P1 or P19.

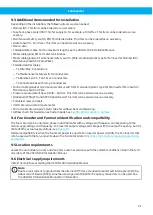
‘Main Menu’ has the following menus:
1

Quick Setup

2

Monitor

3

Parameters

4

Diagnostics

5

I/O and Hardware

6

User Settings

7

Favourites

8

User Levels

8.2 Access the control page

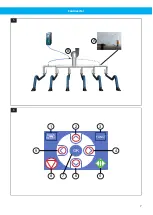
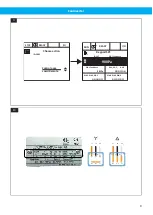
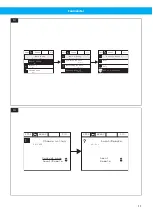
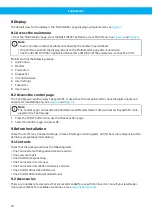
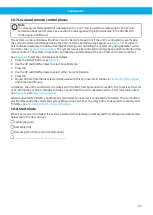
The ‘Control page’, which displays ‘Keypad SP1’, is used to set the set point and to check the digital inputs and
outputs for troubleshooting. See 

Figure 6

 and 

Figure 9

.

Note 
The ‘Control page’ can be edited in both Normal and Monitor mode. If DI3 is activated, ‘Keypad SP2’ is dis-
played in the ‘Control page’.

1

Press the FUNCT button to access the ‘Choose action’ page.

2

Select the ‘Control page’ and press OK.

9 Before installation

Check the unit for any transport damage. In case of damage or missing parts, notify the carrier and your local Ne-
derman representative immediately.

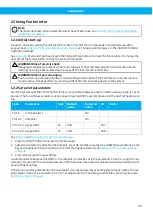
9.1 Contents

Check that the package contains the following items:
• One Fan Inverter with keypad and pressure sensor
• One pressure tap kit
• One VACON Accessories bag
• One Fan Inverter User manual
• One Fan Inverter Installation and service manual
• One VACON 100 Installation Manual
• One VACON 100 HVAC Application Manual

9.2 Accessories

There are a number of accessories that are recommended for use with Fan Inverter. Consult your local Neder-
man representative for available accessories, or see 

www.nederman.com

.

20

Содержание Fan Inverter

Страница 1: ...Installation and service manual Accessories control equipment Fan Inverter Original installation and service manual EN INSTALLATION AND SERVICE MANUAL 2022 06 20 144837 04 ...

Страница 2: ...Fan Inverter Trace back information Workspace Main version a1 Checked in 2022 06 20 Skribenta version 5 5 022 ...

Страница 3: ...tallation 21 9 4 Fan Inverter and Fan motor identification and compatibility 21 9 5 Location requirements 21 9 6 Electrical supply requirements 21 10 Installation 22 10 1 Electrical installation 22 10 2 Programming 22 10 2 1 Quick setup and programming parameters 22 10 2 2 Protections 24 10 3 Change display language 24 10 4 Change real time clock 24 10 5 Commissioning 24 10 6 Favourites 24 10 7 Lo...

Страница 4: ...tion 38 22 Appendix 39 22 1 Appendix A Reading operating data 39 22 2 Appendix B Installation chart 40 22 3 Appendix C Airflow 41 22 3 1 C1 Airflow measurement 41 22 3 2 C2 Airflow charts Original 42 22 3 3 C2 Airflow charts NEX and NEX HD 43 22 4 Appendix D Circuit diagrams 44 22 4 1 D1 Mains circuit 380 500V 44 22 4 2 D2 Mains circuit 400V 45 22 4 3 D3 Control general Fan Timer start 47 22 4 4 D...

Страница 5: ...X OPTION BOARD SAFETY MANUAL A B C 1 2 1 0 0 6 0 5 0 2 0 4 0 8 0 6 0 5 0 2 0 4 0 8 10 20 30 40 50 60 70 80 Pf Pn Working range Frequency Hz dpf dpn Qf Qn Constant pressure fan curve Working range Pf Pn 0 6 0 0 4 0 3 0 1 0 2 0 5 0 8 0 7 0 9 0 0 2 0 4 0 6 0 8 1 f 20 Hz f 30 Hz f 40 Hz f 50 Hz A B 2 5 ...

Страница 6: ...Fan Inverter 3 PID1 Feedback ID 167 900Pa PID1 Feedback 901Pa DIN1 DIN2 DIN3 DIN4 DIN5 DIN6 ON ON OFF Keypad SP1 ON OFF ON OFF OFF OFF RUN READY I O DO1 DO2 DO3 4 6 ...

Страница 7: ...Fan Inverter B A 5 OK FUNCT BACK RESET 2 3 1 8 6 7 9 4 5 5 6 7 ...

Страница 8: ...Clo 08 00 00 Motor Power 0 6kW Motor Current 2 2A Motor Voltage 398 8V 7 STOP READY I O PID1 Feedback PID1 Feedback ID 21 0Pa PID1 Setpoint 900Pa Run Time 0a0d Output Frequency 0 00Hz Multimonitor Timer 1 0s Real Time Clock 08 00 00 Motor Power 0 00kW Motor Current 0 00A Energy counter 0 000kWh M1 ID Quick Setup Main Menu 7 STOP READY I O 20 Monitor 16 ParametersC 8 8 ...

Страница 9: ...EADY I O Control page Local Remote PID1 Feedback ID 167 900Pa PID1 Feedback 901Pa DIN1 DIN2 DIN3 DIN4 DIN5 DIN6 ON ON OFF Keypad SP1 ON OFF ON OFF OFF OFF RUN READY I O DO1 DO2 DO3 9 L1 L2 L3 W2 W2 V3 U1 V1 W1 W2 W2 V3 L1 L2 L3 U1 V1 W1 10 9 ...

Страница 10: ...1 19 Startup Wizard STOP READY I O Activate Inactive M1 ID Quick Setup Main Menu 7 STOP READY I O 20 Monitor 16 ParametersC 11 ID 2201 Time STOP READY I O 00 00 00 Max Min P 5 5 2 ID 2201 Time RealTimeClock STOP READY I O Batterystate DateC M 5 1 0 ID Slot E I O and Hardware STOP READY I O 0 2 1 1 00 10 11 Slot D 5 RealTimeClock M1 ID I O and hardware Main Menu 7 STOP READY I O 8 Diagnostics 17 Pa...

Страница 11: ...tive Inactive Inactive ID 1171 Startup Wizard Quick Setup STOP READY I O Multipump Wizard PID Mini Wizard M1 ID Quick Setup Main Menu 7 STOP READY I O 20 Monitor 16 ParametersC 13 ID 1805 Choose action STOP READY I O Control page Local Remote ID 211 Local Remote STOP READY I O Local Remote 14 11 ...

Страница 12: ...Fan Inverter 15 16 12 ...

Страница 13: ...Fan Inverter Maximum compensation PID1 Setpoint Pa Kepad SP e g 900 Pa MinFreq Hz FreqOut Hz MaxFreq Hz 17 Frequency Airflow 18 13 ...

Страница 14: ...EADY I O HelpC Add to favoritesC i ID 1194 User Level STOP READY I O Monitoring Normal P8 1 P8 1 ID 1194 User Level User Levels 00000 STOP READY I O Normal Access CodeC STOP READY I O M8 ID Main Menu User Settings 0 4 FavouritesC 2 User Levels 20 14 ...

Страница 15: ...in 0 Max 9 P8 2 P8 1 ID 1194 User Level User Levels 00000 STOP READY I O Normal Access Code STOP READY I O M8 ID Main Menu User Settings 0 4 FavouritesC 2 User Levels 21 M 5 1 ID I O and Hardware STOP READY I O 15 Basic IO M1 ID I O and hardware Main Menu 7 STOP READY I O 8 Diagnostics 17 Parameters 0 Slot D 0 Slot E 22 15 ...

Страница 16: ...ARNING Risk of personal injury Warnings indicate a potential hazard to the health and safety of personnel and how that hazard may be avoided CAUTION Risk of equipment damage Cautions indicate a potential hazard to the product but not to personnel and how that hazard may be avoided Note Notes contain other information that is important for personnel 2 2 General WARNING Risk of electric shock Only a...

Страница 17: ...on the number of extraction devices in use at the same time The benefit of using Nederman Fan Inverter is that it reduces running costs heat loss to the atmosphere and noise levels It conserves energy and improves performance by regulating the system s power usage as the de mand from extraction devices increases or decreases 4 Frequency controlled fan When a fan is frequency controlled by Nederman...

Страница 18: ... to the measurement hose 5 2 Pressure measurement A pressure tap with filter is to be inserted in the duct at a location where the greatest pressure drop is expec ted to occur normally at the most distant extraction point In this way the required pressure in the connection point for an extraction arm for example can be controlled compensating for a pressure drop in the filter and duct system See F...

Страница 19: ...fferent Keypad buttons described in Figure 6 Note that certain buttons have more than one function The keypad and menu for Fan Inverter are also described in the VACON 100 HVAC Application Manual see Figure 1 B Button Name Function Button Name Function 1 BACK RESET Move backwards in the menu Exit Edit mode Reset faults with a long press Go to Main menu 6 DOWN Scroll down in the menu Decrease a set...

Страница 20: ...al inputs and outputs for troubleshooting See Figure 6 and Figure 9 Note The Control page can be edited in both Normal and Monitor mode If DI3 is activated Keypad SP2 is dis played in the Control page 1 Press the FUNCT button to access the Choose action page 2 Select the Control page and press OK 9 Before installation Check the unit for any transport damage In case of damage or missing parts notif...

Страница 21: ...an be ordered as an accessory Suitable screws and tools Volt meter and clamp Ampere meter Micro manometer and pitot static tube for airflow check and balancing Airflow charts for Nederman extractor hoods See Section 22 3 Appendix C Airflow 9 4 Fan Inverter and Fan motor identification and compatibility The fan motor is to be a normal 3 phase induction motor with a voltage and frequency correspondi...

Страница 22: ... start and will also not report Ready on relay RO1 Due to the Radio Frequency In terference RFI emission risk the switch has to be RFI EMC protected and the cable shield must be connected properly Note When the main and maintenance safety switch is used as an emergency stop its handle needs to be red with a yellow background CAUTION Risk of equipment damage Use an EMC cable gland at the motor for ...

Страница 23: ... Do not change P1 11 Preset frequency 1 Hz 25 105 Used at constant speed P1 12 Preset frequency 2 Hz 15 106 Not used P1 13 Acceleration time 1 s 10 15 30 103 Do not change P1 14 Deceleration time 1 s 10 104 Not used P1 15 Remote control place I O Control NA 172 Do not change P1 16 Automatic reset Disabled NA 731 Do not change P1 17 Thermistor fault Fault Coast NA 732 Do not change P1 18 PID Mini W...

Страница 24: ...me If daylight savings is selected during daylight savings time set the clock one hour earlier than the present time When the OK button is pushed to change the time the clock will jump one hour ahead See Figure 12 Change the real time clock as follows 1 Press the BACK RESET button to go to Main menu see Figure 6 Select Quick Setup and press the OK but ton 2 Select Startup Wizard and press the OK b...

Страница 25: ...utton see Figure 6 2 Use the UP and DOWN arrows to select Local Remote 3 Press OK 4 Use the UP and DOWN arrows to select either Local or Remote 5 Press OK 6 Mark which start method is selected to be used with this Fan Inverter in the box in Section 10 8 Start mode and in the User Manual At delivery the unit is wired to start remotely with the Fan Timer by means of relay RO3 The timer is set to sta...

Страница 26: ...mple Fan Inverter is to be turned off during lunch or if it is to be turned off earlier on Fridays See the following example Interval 1 Start 07 00 Stop 12 00 Monday to Friday Interval 2 Start 12 30 Stop 16 00 Monday to Thursday Interval 3 Start 12 30 Stop 15 00 Friday to Friday Note Used Intervals must be assigned to Time Channel 1 To change the real time clock see Sec tion 10 4 Change real time ...

Страница 27: ...P3 11 3 5 Assign To Channel Not Used 1478 Change to TimeCh1 P3 11 4 Interval 4 P3 11 4 1 ON Time 1479 P3 11 4 2 OFF Time 1480 P3 11 4 3 From Day 1481 P3 11 4 4 To Day 1482 P3 11 4 5 Assign To Channel Not Used 1483 Change to TimeCh1 P3 11 5 Interval 5 P3 11 5 1 ON Time 1484 P3 11 5 2 OFF Time 1485 P3 11 5 3 From Day 1486 P3 11 5 4 To Day 1487 P3 11 5 5 Assign To Channel Not Used 1488 Change to Time...

Страница 28: ...nfigured Mark the following table for starting and stopping times Mark also the same table in the User Manual Monday Tuesday Wednesday Thursday Friday Saturday Sunday 06 00 07 00 08 00 09 00 10 00 11 00 12 00 13 00 14 00 15 00 16 00 17 00 18 00 19 00 20 00 28 ...

Страница 29: ...art the system with the START button If there is any damper between the fan and the pressure tap it has to be open The fan will now accelerate up to a speed creating 900 Pa system pressure in the duct at the pressure tap Code Parameter Unit Default value Selected value ID Note P3 12 PID Controller 1 NA P3 12 2 Setpoints NA P3 12 2 1 Keypad SP 1 Pa 900 167 P3 12 2 2 Keypad SP 2 Pa 500 168 See Figur...

Страница 30: ... compensation for set point 1 0 Disabled 1 Enabled P3 12 6 2 Setpoint 1 max compens ation Pa 0 1190 Value added proportion ally to the frequency Setpoint compensa tion Max compens ation FreqOut Min Freq MaxFreq Min Freq P3 12 6 3 Enable setpoint 2 Disabled 1191 See P3 12 6 1 P3 12 6 4 Setpoint 2 max com pensation Pa 0 1192 See P3 12 6 2 12 4 Balancing the general ventilation The local exhaust vent...

Страница 31: ...ace below and in the Fan Inverter User Manual ________________ Pa Supervision level Note If the alarm flashlight continues to flash for approximately 30 seconds after Fan Inverter is started or if it flashes continually during operation there is a problem see Chapter 16 Troubleshooting To see if the alarm flashlight is functional stop and restart Fan Inverter If the alarm flashlight is connected t...

Страница 32: ...al with full access After installation and commissioning it is recommended that Fan Inverter is set to user level Monitor with restricted access It is also possible to set an access code The setpoint can still be adjusted in the Control page Note For more information about user levels refer to User levels in the VACON 100 HVAC Application Manual 15 1 Change user level with default access code Note...

Страница 33: ...ccess code ________________ 15 3 Change user level with customer set access code Note The user level can be edited in both Normal and Monitor mode See Figure 21 Change the user level as follows 1 Press the BACK RESET button to go to Main menu see Figure 6 2 Select User Levels from the Main menu and press the OK button 3 Select User Level and press the OK button 4 Select Edit and press the OK butto...

Страница 34: ...n Manual and the documentation for any unit that is connected to Fan In verter or consult a Nederman certified technician Fan Inverter is not ready DIN2 status in the Control page is set to ON when ready see Figure 4 Check and switch on the safety switch at fan if it can be done safely or consult a Nederman certified technician Alarm flashlight flashing Fan not started There is an alarm in the dis...

Страница 35: ...t signal DIN1 status in the Control page is set to OFF when the start signal is present Fan Inverter does not stop the fan Fan Inverter is set to Local mode Stop system with STOP button Adjust to correct the control place or consult a Nederman certified technician Fan Inverter does not reach set point Low pressure level If the pressure hose is disconnected or damaged check the hose and repair it I...

Страница 36: ... name of the spare part see w w w n e d e r m a n c o m e n s e r v i c e s p a r e p a r t s e a r c h Quantity of the parts required 18 Recycling The product has been designed for component materials to be recycled Different material types must be handled according to relevant local regulations Contact the distributor or N e d e r m a n if uncertainties arise when scrapping the product at the en...

Страница 37: ...patibility GFI Ground Fault Interrupter LEV Local Exhaust Ventilation PID Proportional Integral Derivative Pressure controller PTC Positive temperature coefficient Thermistor in motor RCD Residual Current Device RFI Radio Frequency Interference STO Safe Torque Off 37 ...

Страница 38: ...lation manu als Yes No Comments Mains cable Motor cable Control cables Second protective con ductor Type Size Comply with installation manu als Yes No Comments Supply fuse Main switch Safety switch at motor EMC type EMC cable gland at motor PTC in motor IP 54 Signature 38 ...

Страница 39: ... Temperature are found under Main menu Monitor Basic Energy Counter and Run Time are found on the Multimonitor or under Main menu Diagnostics Total Counters Code Name Operating data notes Date Conditions V2 2 1 Ouptput Frequency Hz V2 2 2 Freq Reference Hz V2 2 3 Motor Speed rpm V2 2 4 Motor current A V2 2 5 Motor Torque V2 2 7 Motor Shaft Power V2 2 8 Motor Shaft Power kW hp V2 2 9 Motor voltage ...

Страница 40: ...Fan Inverter 22 2 Appendix B Installation chart EMC EMC EMC EMC min 200mm min 300mm min 200mm min 300mm 230V 1 ph 400V 380 500 3 ph N PE 90º Only for 400 V TN S and up to 22 kW 40 ...

Страница 41: ...er 22 3 Appendix C Airflow 22 3 1 C1 Airflow measurement Note The Airflow Indicator is a simple device that indicates when the airflow is adequate in a Nederman ex traction arm It is available as an accessory 41 ...

Страница 42: ...ginal 0 100 200 300 400 500 600 700 800 0 50 100 150 200 250 300 350 400 450 500 550 600 650 700 750 800 0 100 200 300 400 500 600 700 800 900 1000 1100 1200 1300 1400 1500 1600 Pressure reading Pa With light grill Q 49 5dp 0 5 Without light grill Q 53dp 0 5 300 Pa Long probe along hood and tip toward support ring Probe of 6mm Cu tube 225mm 110 mm Take 5 readings exclude Maximum and Minimum Take t...

Страница 43: ...ib from right down Probe of 6mm Cu tube 225mm 110 mm Damper fully opened Q 115dp 0 5 Preassure reading Pa Air Flow m3 h 0 50 100 150 200 250 300 350 400 450 500 0 50 100 150 200 250 300 350 400 450 500 0 100 200 300 400 500 600 700 800 900 1000 1100 1200 1300 1400 1500 1600 200 Pa Damper fully opened Probe of 6mm Cu tube 225mm 110 mm Q 72dp 0 5 Pressure reading Pa Short probe toward 2nd ring Air F...

Страница 44: ...D Circuit diagrams 22 4 1 D1 Mains circuit 380 500V Safety switch S UE1 Inverter Vacon 100 Switch disconnector Main fuse Power supply F1 3 L1 L3 L2 U T1 W T3 V T2 L1 L2 L3 PE QA SA M1 GND PE PTC QA PE 3 PE 380 500V 50 60Hz GND 44 ...

Страница 45: ...Fan Inverter 22 4 2 D2 Mains circuit 400V Fuse 6A F2 N 230V 0 100V 120V JP 3 PE DFC 08M 230V 1 PE 4 N 3 120V 2 230V N 5 PE 6 L 4 45 ...

Страница 46: ...Fan Inverter Safety switch UE1 Inverter Vacon 100 Switch disconnector Main fuse Power supply F1 3 L1 L3 L2 U T1 W T3 V T2 L1 L2 L3 N PE QA SA M1 GND PE PTC QA PE 3 N PE TN S AC 400 230V 50 60 Hz GND 46 ...

Страница 47: ...Fan Inverter 22 4 3 D3 Control general Fan Timer start Ventilation duct 3 M1 GND PTC Safety Switch 13 14 OFF AUTO 2h Remote switch Fan Timer 1 2 3 47 ...

Страница 48: ... Output 32 33 24V In 30 External input 24 V DC RS485 A RS485 B Relay output Orange RO3 1 CM RO3 2 NO Pressure OK Pressure Low Fan Timer Green Brown White Constant freq Disable Reset Timer Setpoint 2 Overtime 2h 1 2 Analog Input 2 Analog Input 2 Remove Link 6 9 if Safety Switch control signal is connected RO1 25 RO2 26 TI1 28 TI1 29 PTC Input Galvanic isolated Optional STO and ATEX PTC board OPTBJ ...

Страница 49: ...nnection box with relay 24VAC Ctrl 0V A B 0V 24VAC A B 0V 24VAC Connection box with relay 24VAC Ctrl 0V A B 0V 24VAC A B 0V 24VAC 1 2 Light kit on hood Light kit on hood Options Voltage separation Motor damper 24VAC Ctrl 0V A B A B 2 J 2 J Connection box with relay 24VAC Ctrl 0V A B 0V 24VAC A B 0V 24VAC Micro switch in Exhaust hose reel Micro switch in Exhaust hose reel 49 ...

Страница 50: ...essure Low Fan Timer PTC Input Galvanic isolated Green Brown White Constant freq Disable Reset Timer Setpoint 2 Overtime 2h 2 3 1 2 1 Safety Switch 1 2 Optional STO and ATEX PTC board OPTBJ Remove original orange link 8 32 when start control from external contact is used Connect external contact to terminal 32 for a serial connection with Fan Timer Or to terminal 33 if Fan Timer shall not be used ...

Страница 51: ...th relay 24VAC Ctrl 0V A B 0V 24VAC A B 0V 24VAC Connection box with relay 24VAC Ctrl 0V A B 0V 24VAC A B 0V 24VAC 1 2 Light kit on hood Light kit on hood Options Voltage separation Motor damper 24VAC Ctrl 0V A B A B 2 J 2 J Connection box with relay 24VAC Ctrl 0V A B 0V 24VAC A B 0V 24VAC Micro switch in Exhaust hose reel Micro switch in Exhaust hose reel 51 ...

Страница 52: ...d Green Brown White Constant freq Disable Reset Timer Setpoint 2 Overtime 2h Start input Delayed off 2 1 Safety Switch 1 2 Optional STO and ATEX PTC board OPTBJ In this configuration with external start signal connected to terminal 16 DI6 the relay RO3 will provide the actual start signal to terminal 8 DI1 This will be a delayed off function with the time set in parameter P3 11 6 1 Duration in sec...

Страница 53: ...Alarm 7 Start 8 Start 9 CM 10 CM 11 JP6 Alarm Flashlight 24V ACDC 2W ALARM LEV System Black Red 1 2 JP1 2 1 6 5 4 3 Connection box with relay 24VAC Ctrl 0V A B 0V 24VAC A B 0V 24VAC Connection box with relay 24VAC Ctrl 0V A B 0V 24VAC A B 0V 24VAC 1 2 Light kit on hood Light kit on hood Voltage separation Motor damper 24VAC Ctrl 0V A B A B 2 J 2 J Connection box with relay 24VAC Ctrl 0V A B 0V 24V...

Страница 54: ... Timer Setpoint 2 Overtime 2h 2 3 1 Safety Switch Remove Link 6 9 if Safety Switch control signal is connected 1 2 3 4 5 6 Remove original links 8 32 and 9 33 when connected to FilterMax Analog Input 1 Analog Input 2 Analog Input 2 13 14 2 1 2 Remove link 25 32 if start control from external contact is used Connect external contact to terminal 32 for a serial connection with Fan Timer or to termin...

Страница 55: ...nnect FilterMax C25 Ventilation duct OFF AUTO 2h Remote switch Fan Timer 1 2 3 Switch disconnector Main fuse Power supply F1 L1 L2 L3 PE QA SA PE 3 PE 380 500V 50 60Hz FilterMax C25 X1 1 2 3 4 5 5 21 22 13 14 1 2 3 4 5 Q1 C1 55 ...

Страница 56: ...t DI 1 DI 6 I O GND Aux volt output 24 V DC Max 250mA Analog Output 0 10V 0 max freq Hz Analog Output 32 33 24V In 30 External input 24 V DC RS485 A RS485 B Relay output RO3 1 CM RO3 2 NO Pressure OK Pressure Low Fan Timer Green Brown White Constant freq Disable Reset Timer Setpoint 2 Overtime 2h Analog Input 2 Analog Input 2 Pressure sensor 0 2000Pa or 0 5000Pa 0 5 4 5V U I AI1 U I AI2 U I AO OFF...

Страница 57: ... hood Options Voltage separation Motor damper 24VAC Ctrl 0V A B A B 2 J 2 J Connection box with relay 24VAC Ctrl 0V A B 0V 24VAC A B 0V 24VAC Micro switch in Exhaust hose reel Micro switch in Exhaust hose reel FMK C Filter DFC 08M Start 10 Start 11 1 2 COM 6 NO 5 NC 7 1 2 Reprogram Start function DI1 DI4 and RO3 P 3 5 1 1 Ctrl Signal 1 A DigIN SlotA 1 If DI1 shall be used Time Channel 1 If Fan Tim...

Страница 58: ...rnal input 24 V DC RS485 A RS485 B Relay output PTC RO1 25 RO2 26 TI1 28 TI1 29 RO3 1 CM RO3 2 NO Pressure OK Pressure Low Run PTC Input Galvanic isolated Green Brown White External Fault Open Disable Reset Timer Setpoint 2 Overtime 2h 2 3 1 2 1 Safety Switch 1 2 Optional STO and ATEX PTC board OPTBJ Remove orange link 8 32 and brown 9 33 2 Analog Input 2 Analog Input 2 13 14 Diagnostic Pressure s...

Страница 59: ...tion Motor damper 24VAC Ctrl 0V A B A B 2 J 2 J Connection box with relay 24VAC Ctrl 0V A B 0V 24VAC A B 0V 24VAC Micro switch in Exhaust hose reel Micro switch in Exhaust hose reel MJC mini RM BV4 Start 8 Start 7 1 2 COM 5 NO 4 NC 6 1 2 Reprogram Start function DI1 DI4 and RO3 P 3 5 1 1 Ctrl Signal 1 A DigIN SlotA 1 If DI1 shall be used Time Channel 1 If Fan Timer shall be used P 3 5 1 8 Ext Faul...

Страница 60: ...rnal input 24 V DC RS485 A RS485 B Relay output PTC RO1 25 RO2 26 TI1 28 TI1 29 RO3 1 CM RO3 2 NO Pressure OK Pressure Low Run PTC Input Galvanic isolated Green Brown White External Fault Open Disable Reset Timer Setpoint 2 Overtime 2h 2 3 1 2 1 Safety Switch 1 2 Optional STO and ATEX PTC board OPTBJ Remove orange link 8 32 and brown 9 33 2 Analog Input 2 Analog Input 2 13 14 Diagnostic Pressure s...

Страница 61: ...www nederman com ...

Отзывы: