5
5
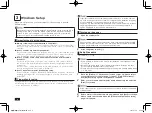
After checking the contents, check [I accept the license terms] and
click [Next] to continue.
If you do not accept the license terms, setup cannot continue.
6
When the [Help protect your computer and improve Windows
automatically] page is displayed, please select either [Use recommended
settings], [Install important updates only], or [Ask me later].
7
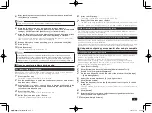
When the [Review your time and date settings] page is displayed, please
select your time zone date, and time, and click [Next] to continue.
The screen should change several times during this process, and it may
take some time before the desktop is displayed.
8
When a dialog box comes up asking you to shut down, click [OK].
9
Click [Start].
10
Click [Shutdown].
The computer power will then turn off.
After Windows setup has completed, Windows Experience Index measurements
are performed once your computer continues to be in an idle state for around 15
minutes. While these measurements are in progress, the power plan will change to
"High performance". At this time, you may notice the power to the display cutting out.
If you encounter problems during setup
The setup screen is not displayed.
When [Press <F2> to Enter BIOS Setup] is displayed on the screen when you
turn the power on, please carry out the following procedure.
1
Press the <F2> key.
The BIOS setup utility will then be displayed.
2
Use the number keys to enter the current hour (24 hour time format)
and then press <Enter>.
3
Use the <Tab>, <
>, and <
> keys to move to desired position and in the
same manner, set the rest of the time and date in the order of minutes,
seconds, month, day, and year.
4
Press the <F9> key.
The setup confirmation screen should come up.
5
Select [Yes] and then press <Enter>.
The BIOS setup utility will then be displayed.
6
Press the <F10> key.
The setup confirmation screen should come up.
7
Select [Yes] and then press <Enter>.
The BIOS setup utility should now be finished and Windows will automatically restart.
After this, please see "Setup Procedure" on p.4 and continue on with the process.
If you accidentally turn off the power during setup
The setup process will not be successfully completed and Windows system
files or the registry may be corrupted.
In this case, either perform Windows recovery or consult your place of purchase.
The computer is unresponsive or shows an error message during setup.
Make a note of the error message and hold down the power switch for at least four
seconds to perform a forced shutdown.
Please wait for at least five seconds before turning the power switch back on. After
that, please see the above "If you accidentally turn off the power during setup".
Using and configuring your computer after setup is complete
Creating multiple hard disk partitions
As a default setting, the first internal hard disk has only one useable partition
(volume), designated as the C: drive.
However, it is possible to divide the C: drive into multiple partitions.
Please refer to the following steps if you would like to change the factory
default settings and reduce the size of the C: drive in order to create a new
partition from the resulting unassigned space.
1
Open [Control Panel].
2
Click [System and Security] and then [Administrative Tools].
3
Double click [Computer Management].
4
On the tree displayed on the left side of the window, click [Storage]
[Disk Management].
5
Select the volume marked as (C:) and right click it.
6
Click [Shrink Volume].
7
Enter the desired size into the [Enter the amount of space to shrink
in MB:] box.
The size entered here will become the maximum size of the newly created
partition.
8
Click [Shrink].
9
After shrinking is complete, select the unassigned space that has
been reserved, and right click it.
10
Click [New Simple Volume].
取扱説明書-853810602418A.indd 5
2011/11/14 9:38:02


