NEC VersaPro VX Скачать руководство пользователя страница 17

17

•  To abort battery refresh, click [Stop], and follow the instructions on the screen. 

Also, if battery refresh is aborted, performance diagnostics will not be 

performed.

•  If the battery state is "Deteriorative", the battery pack should be replaced.

•  If the battery state is "Warning", replace the battery pack. Also, the battery 

pack cannot be charged or refreshed for safety reasons.

Uninstall

Go to the [Control Panel], click [Programs] 

 [Uninstall a program], then select 

[Battery tool] and click [Uninstall].

Follow the instructions on the screen for the procedure. 

Reinstall

When reinstalling the uninstalled Battery tools, perform the following steps.

Insert the Application Disc into the optical drive. 

Click [Start] and then [All Programs] 


[Accessories] 


[Run]. 

Enter "D:\NECBATT\Setup.exe" in the [Open] dialog and then click 

[OK].

  If the optical drive is not specified as "D", change the "D" to the appropriate 

drive specification.

When [Welcome to the Battery tool Setup Wizard] is displayed, click 

[Next]. 

If the [Battery tool Files in Use] screen is displayed, click [NEC 

Battery Refresh Utility-Scheduler (Process Id: XXXX)], and then click 

[Continue]. 

When the [Installation Complete] screen is displayed, click [Close].

When the restart prompt is displayed, remove the Application Disc 

from the optical drive, follow the instructions on the screen and 

restart the computer.

If the prompt is not displayed, remove the Application Disc from the optical 

drive and restart Windows.

Following the above steps will complete the reinstallation of Battery tools.

Deleting Data from the Hard Disk

About Deleting Data from the Hard Disk

Data can be deleted from the computer's hard disk.

Data written to the hard disk can be removed using the [Recycle Bin] or by 

formatting the computer to the original state.

Selecting this menu will remove hard disk data that cannot be removed by hard 

disk formatting of operation system standard, and the removed data will not be 

easily recovered with recovery tools.

Format the hard disk before transferring or disposing of the computer.

Before deleting the hard disk data, return the BIOS Setup Utility setting to the 

factory setting values.

Data can be deleted from the computer in the following 3 ways.

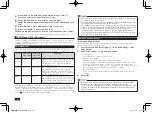
• Simple mode (1 time erasure)

Overwrites "00" data entirely from the hard disk.

• NSA-introduced mode (3 time erasure)

Deletes data from the hard disk in a method compliant to the U.S. Department 

of Defense NSA Standard.

The data is deleted effectively by writing random data 1, then random data 

2, then "00" data 3 times in order and then deleting it 3 times. However, since 

the data is written 3 times, it takes 3 times longer than simple mode for 

deletion to be completed.

• DoD-introduced mode (3 time e Verify)

Deletes data from the hard disk in a method compliant to the U.S. Department 

of Defense Standard.

"00", "FF", and random data is written in order, and verifies that the final random data 

is written correctly. Effective deletion is performed by deleting 3 times.

By using this method it is not guaranteed that the data cannot be completely 

recovered.

How to Delete Data from the Hard Disk

Remove peripheral devices (excluding the optical drive), return to the state at 

the time of purchase.

Turn on the power of the computer.

If the power lamp lights, quickly insert the Application Disc into the optical drive.

When [Press any key to boot from CD or DVD...] is displayed, press <Enter>.

When the Windows Reinstall screen is displayed, select [Erase data 

on the hard disk], and press <Enter>.

取扱説明書-853810602418A.indd   17

2011/11/14   9:38:07

Содержание VersaPro VX

Страница 1: ...fers to genuine Windows 7 Professional 32 bit with Service Pack 1 installed System configuration and software installation should be conducted by a user who has administrator privileges If a User Acco...

Страница 2: ...warranty period we shall provide repairs based on the conditions specified in the warranty For repairs after the warranty period has expired please consult the place of purchase or one of our specifi...

Страница 3: ...nect the power cord to the AC adapter 3 Insert the other end of the power cord into a wall outlet When the AC adapter is connected the battery will start to recharge and the battery recharge indicator...

Страница 4: ...er the name of the person who will be using the computer user name as well as the computer name Please choose these names in advance If two byte characters environment dependent characters or certain...

Страница 5: ...confirmation screen should come up 7 Select Yes and then press Enter The BIOS setup utility should now be finished and Windows will automatically restart After this please see Setup Procedure on p 4 a...

Страница 6: ...h as corrupted files cause Windows to not load correctly even after running in safe mode or the last known good configuration For more information about creating and using a system repair disc please...

Страница 7: ...ks the battery pack in place to prevent it from falling out It must be unlocked in order to remove the battery 18 Battery unlock This is used when you want to remove the battery pack Please use it aft...

Страница 8: ...currently accessing data Off The hard disk or optical drive is not currently accessing data Caps Lock indicator LED LED state Computer State On Green Caps Lock is on All text input is in capital lette...

Страница 9: ...tton Touchpad Mouse buttons The role of each part can be shown as follows Name Role Touchpad Moving your finger over this pad allows you to control the mouse pointer Mouse buttons There are both left...

Страница 10: ...indows help The following step allows you to change settings such as the computer name Setting the computer name and network to connect to Selecting the name of your computer to be displayed on the ne...

Страница 11: ...ted and then press Enter These setting values are saved the BIOS setup utility will finish and your computer will restart Configuration is now complete How to configure your computer to allow Remote p...

Страница 12: ...your networking settings A list of network names SSID should come up 3 Click on the network name SSID of the wireless network that you would like to connect to 4 Click Connect after confirming that t...

Страница 13: ...ss WiFi Advanced Statistics 2 Click Advanced Statistics Help in the Help menu Please see the following steps if you would like to enable wireless management for Cisco infrastructure 1 Go to the Contro...

Страница 14: ...rews into the bottom of the unit Your new memory should now be ready to use Please refer to the following diagram when removing memory 10 System Configuration The BIOS setup utility Do not turn your c...

Страница 15: ...ted and then press Enter These setting values are saved the BIOS setup utility will finish and your computer will restart Configuration is now complete ME BIOS Extension VB model Before using the ME B...

Страница 16: ...Tool To start the Battery tool perform the following steps 1 Click Start and then All Programs Battery tool Battery tool 2 When a general explanation screen for battery refresh and performance diagno...

Страница 17: ...e hard disk can be removed using the Recycle Bin or by formatting the computer to the original state Selecting this menu will remove hard disk data that cannot be removed by hard disk formatting of op...

Страница 18: ...ough the modes The current mode can be confirmed by ECO button lamp color or by the displayed icon shown by clicking on the in the notification area of the Task Bar The icons in the table are the fact...

Страница 19: ...nstallation Complete screen is displayed remove the Application Disc from the optical drive and then click Close 5 When the restart prompt is displayed click Yes Windows will automatically be restarte...

Страница 20: ...Region and Language setting perform the following steps 1 In the Control Panel and click Clock Language and Region and then Region and Language 2 Click on the Administrative tab If the Current langua...

Страница 21: ...d on the recovery screen Missing a step pressing a key other than the indicated key or changing the procedure may result in improper recovery One of the advanced recovery method under the Recovery in...

Страница 22: ...rom CD or DVD is displayed press Enter 4 When the Windows Recovery screen is displayed select Start to restore your computer with Recovery Disc and press Enter 5 When Windows 7 32 bit Recovery is disp...

Страница 23: ...ithium ion 10 8 VDC Typ 6700 mAh 49 Battery pack included and AC Adapter to adapt itself to your region s specifications AC Adapter itself is safely rated for input current of up to 240 VAC However th...

Страница 24: ...ROM and hard disk drive are for the use with this product only 7 Distribution and copying all or part of the software without permission of the copyright owner is copyright infringement 8 The content...

Отзывы: