background image

English-10

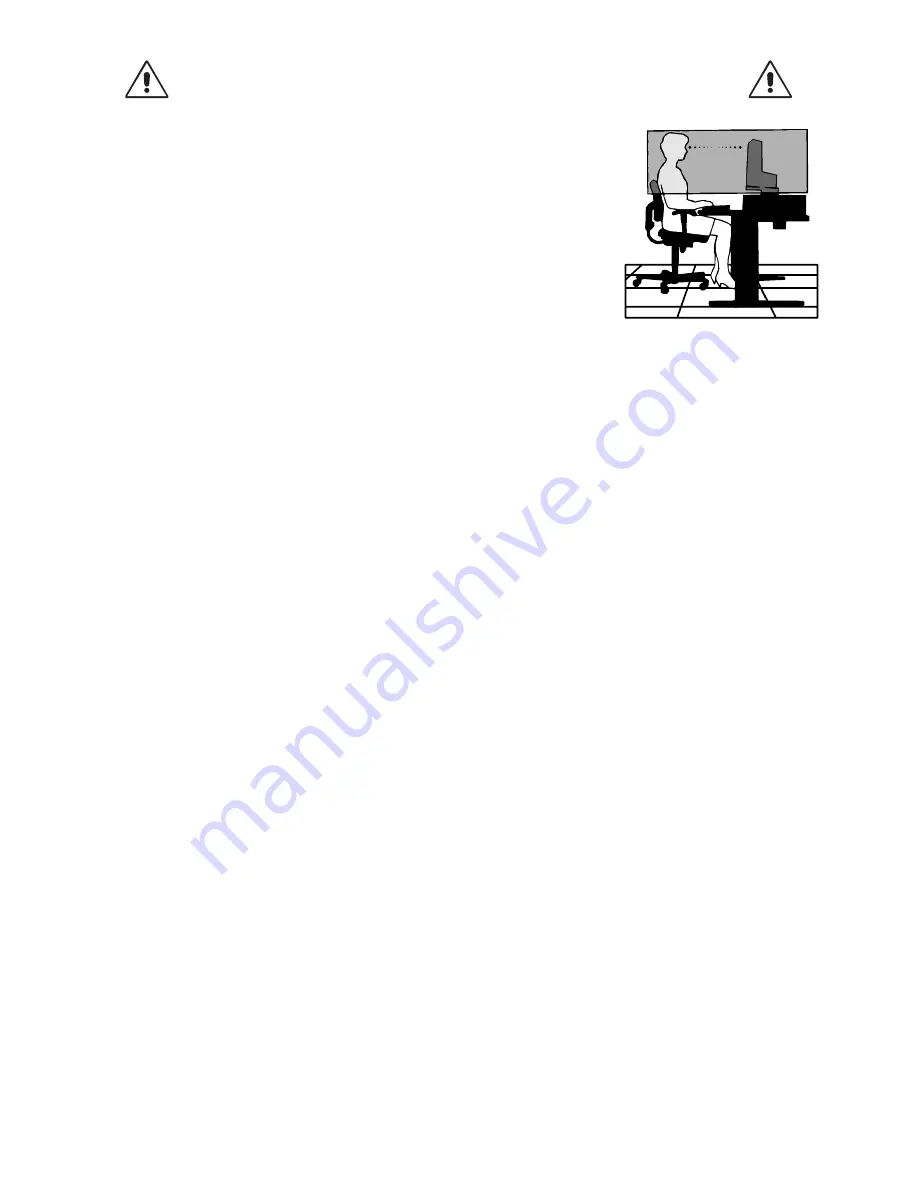
CORRECT PLACEMENT AND ADJUSTMENT OF THE MONITOR CAN

REDUCE EYE, SHOULDER AND NECK FATIGUE. CHECK THE

FOLLOWING WHEN YOU POSITION THE MONITOR:

For optimum performance, allow 20 minutes for warm-up.

Adjust the monitor height so that the top of the screen is at or slightly below eye level.
Your eyes should look slightly downward when viewing the middle of the screen.

Position your monitor no closer than 40 cm and no further away than 70 cm from your
eyes. The optimal distance is 50 cm.

Rest your eyes periodically by focusing on an object at least 20 feet away. Blink often.

Position the monitor at a 90° angle to windows and other light sources to minimize
glare and reflections. Adjust the monitor tilt so that ceiling lights do not reflect on your
screen.

If reflected light makes it hard for you to see your screen, use an anti-glare filter.

Adjust the monitor’s brightness and contrast controls to enhance readability.

Use a document holder placed close to the screen.

Position whatever you are looking at most of the time (the screen or reference material) directly in front of you to minimize
turning your head while you are typing.

Avoid displaying fixed patterns on the monitor for long periods of time to avoid image persistence (after-image effects).

Get regular eye checkups.

Ergonomics

To realize the maximum ergonomics benefits, we recommend the following:

Adjust the Brightness until the background raster disappears.

Do not position the Contrast control to its maximum setting.

Use the preset Size and Position controls with standard signals.

Use the preset Colour Setting.

Use non-interlaced signals with a vertical refresh rate between 60-75 Hz.

Do not use primary colour blue on a dark background, as it is difficult to see and may produce eye fatigue to insufficient
contrast.

Cleaning the LCD Panel

When the liquid crystal panel is stained with dust or dirt, please wipe with soft cloth gently.

Please do not rub the LCD panel with hard material.

Please do not apply pressure to the LCD surface.

Please do not use OA cleaner it will cause deterioration or discolor on the LCD surface.

Cleaning the Cabinet

Unplug the power supply

Gently wipe the cabinet with a soft cloth

To clean the cabinet, dampen the cloth with a neutral detergent and water, wipe the cabinet and follow with a dry cloth.

NOTE:

Many plastics are used on the surface of the cabinet. DO NOT clean with benzene, thinner, alkaline detergent,
alcoholic system detergent, glass cleaner, wax, polish cleaner, soap powder, or insecticide. Do not touch rubber or
vinyl to the cabinet for a long time. These types of fluids and fabrics can cause the paint to deteriorate, crack or
peel.

Содержание V221W

Страница 1: ...V191W V221W User s Manual...

Страница 2: ...tents English 3 Quick Start English 3 Controls English 6 Recommended use English 9 Specifications V191W English 11 Specifications V221W English 12 Features English 13 Troubleshooting English 14 TCO 03...

Страница 3: ...COMPONENTS INSIDE REFER SERVICING TO QUALIFIED SERVICE PERSONNEL Declaration of the Manufacturer We hereby certify that the colour monitors V191W TFT185W80PS V221W TFT22W90PS are in compliance with Co...

Страница 4: ...aration between the equipment and receiver Connect the equipment into an outlet on a circuit different from that to which the receiver is connected Consult your dealer or an experienced radio TV techn...

Страница 5: ...rn off the power to your computer 2 For the PC with Analog output Connect the 15 pin mini D SUB signal cable connected with the monitor to the connector of the display card in your system Figure A 1 T...

Страница 6: ...scription of these OSD controls NOTE If you have any problem please refer to the Troubleshooting section of this User s Manual Tilt Grasp both sides of the monitor screen with your hands and adjust th...

Страница 7: ...Arm This LCD monitor is designed for use with a flexible arm Please use the screws 4pcs as shown in the picture when installing To meet the safety requirements the monitor must be mounted to an arm w...

Страница 8: ...selection stage Go to Adjustment stage Cursor goes to left Cursor goes to right At OSD showing Adjustment stage Go to Icon selection stage Adjust value decrease or Cursor for adjust goes to left Adju...

Страница 9: ...300 7500 sRGB USER NATIVE select the desired colour setting COLOUR RED Increase or decreases Red The change will appear on screen COLOUR GREEN Increase or decreases Green The change will appear on scr...

Страница 10: ...and serial numbers of your monitor CARBON SAVING Show saving value of Carbon foot print Carbon meter value is updated each 5 min INPUT RESOLUTION V191W Select resolution s priority of input signal to...

Страница 11: ...service personnel under the following conditions If the monitor is used in this condition the monitor may cause fall fire and electric shock If the monitor stand has been cracked or peeled If the mon...

Страница 12: ...image persistence after image effects Get regular eye checkups Ergonomics To realize the maximum ergonomics benefits we recommend the following Adjust the Brightness until the background raster disapp...

Страница 13: ...70 Hz to 75 Hz 1280 x 960 1 60 Hz 1280 x 1024 1 60 Hz 1360 x 768 1 60 Hz Recommended resolution is 60 Hz for 1366 x 768 1 60 Hz optimal display performance Active Display Area Horizontal 409 8 mm Vert...

Страница 14: ...o 75 Hz 1360 x 786 1 60 Hz 1366 x 786 1 60 Hz 1440 x 900 1 60 Hz 1400 x 1050 1 60 Hz 1600 x 1200 1 60 Hz Recommended resolution is 60 Hz for 1680 x 1050 1 60 Hz optimal display performance 1920 x 1080...

Страница 15: ...omatically optimizing display performance IPM Intelligent Power Manager System Provides innovative power saving methods that allow the monitor to shift to a lower power consumption level when on but n...

Страница 16: ...dual image remains the monitor should be turned off for one hour to erase the image NOTE As with all personal display devices NEC DISPLAY SOLUTIONS recommends using a screen saver at regular intervals...

Страница 17: ...rgy Energy saving mode after a certain time beneficial both for the user and the environment Electrical safety Emissions Electromagnetic fields Noise emissions Ecology The product must be prepared for...

Страница 18: ...ing This monitor features an advanced energy saving capability When a VESA Display Power Management Signalling DPMS Standard signal is sent to the monitor the Energy Saving mode is activated The monit...

Отзывы: