


5-8 Desktop Repair
3.
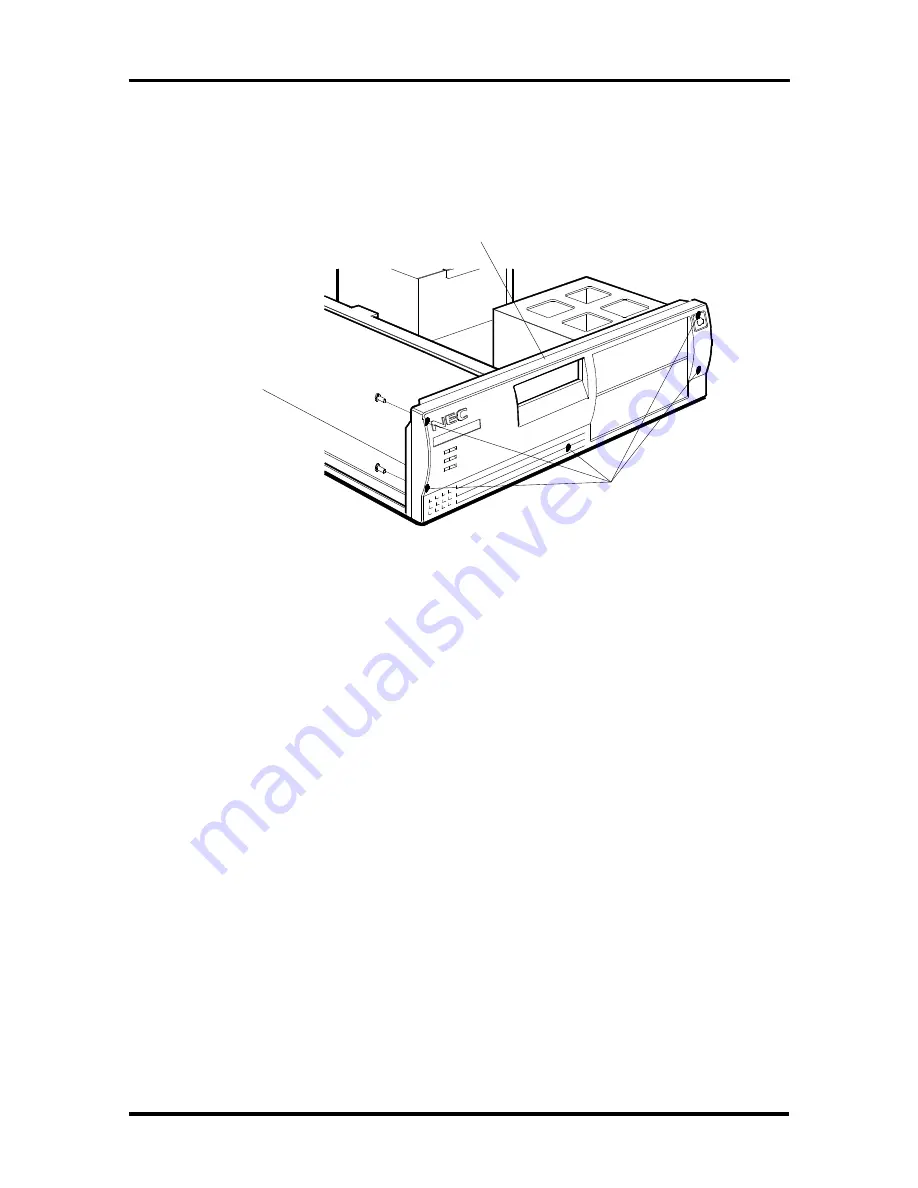
Remove the five front panel screws (see Figure Section 5-13).
4.
Feed the two lamp and reset cables through the hole in the front of system unit
chassis when removing the front panel assembly.
Figure Section 5-13 Indicator Panel Connectors
5.
Separate the lamps and reset button from the front panel assembly by pulling them
out from their socket in the panel assembly.
Front Panel
Five Screws
(behind front panel)
Lamp and
Reset Button
Connectors
(not shown)
Содержание POWERMATE P60D - SERVICE
Страница 129: ......
Страница 148: ...Minitower Repair 6 17 ...


