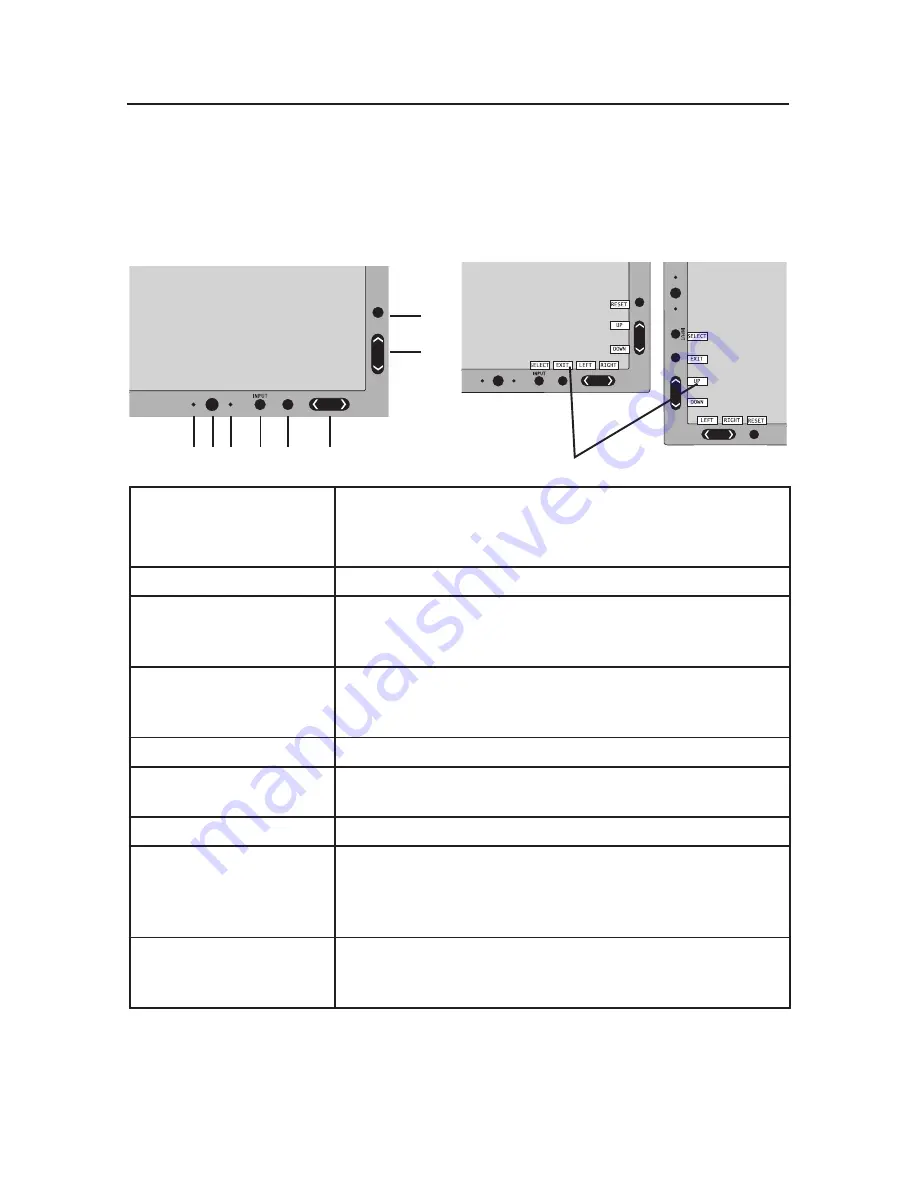
9
*The “LEFT/RIGHT” and “UP/DOWN” buttons functionality is interchangeable
depending on the orientation (landscape/portrait) of the OSM.
Controls
1 AMBIBRIGHT SENSOR Detects the level of ambient lighting allowing the monitor
to make adjustments to various settings resulting in a more
comfortable viewing experience. Do not cover this sensor.
2 POWER
Turns the monitor on and off.
3 LED
Indicates that the power is on.
Can be changed between blue and green in the Advanced
OSM Control menu.
4 INPUT/SELECT
Enters the OSM Control menu. Enters OSM sub menus.
Changes the input source when not in the OSM Control
menu.
5 EXIT
Exits the OSM sub menu. Exits OSM Control menu.
6 LEFT/RIGHT
Navigates to the left or right through the OSM Control
menu.
7 UP/DOWN
Navigates up or down through the OSM Control menu.
8 RESET/ROTATE OSM
Resets the OSM back to factory settings.
Pressing when the OSM is not showing rotates the OSM
Control menu between portrait and landscape mode.*
See page 24 Tag9 OSM ROTATION
.
9 KEY GUIDE
The Key Guide appears on screen when the OSM control
menu is accessed. The Key Guide will rotate when the
OSM control menu is rotated.
OSM
®
(On-Screen Manager) control buttons, located on the front
of the monitor, function as follows:
To access OSM menu, press any of the following control buttons: EXIT, LEFT, RIGHT,
UP, or DOWN.
To change the input source signal when the OSM is closed, press the SELECT button.
1 2 3 4 5
6
7
8
9
Portrait
Landscape


