English
English-5
Insert Top First
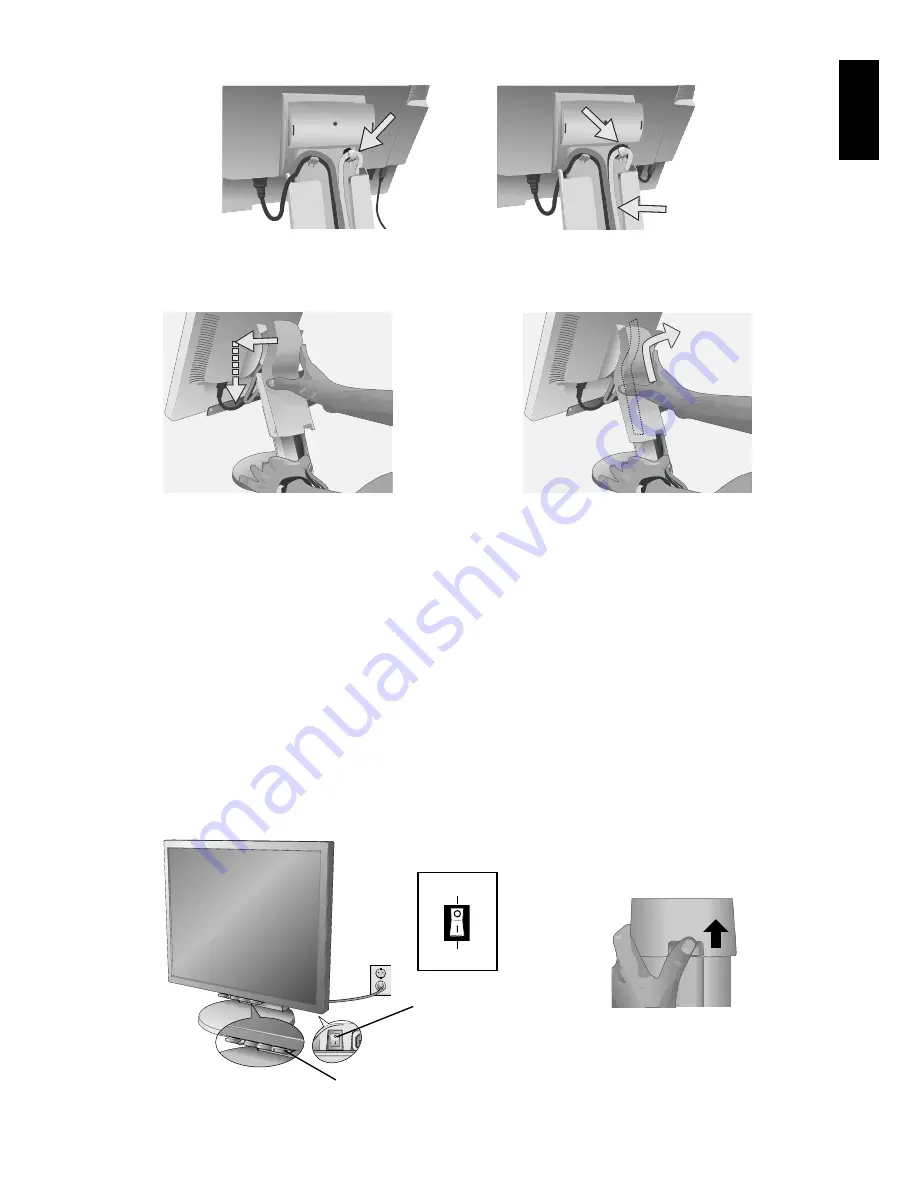
8. Make sure all cables are resting flat against the stand (
Figure C.3
).
10. Connect the power cord to the power outlet (
Figure E.1
).
NOTE:
If you have difficulty removing the cable cover, please push the lower opening upward to remove it, as show in
Figure E.2
.
NOTE:
Please refer to
Caution
section of this manual for proper selection of AC power cord.
11. The vacation switch on the back side of the monitor must be turned on (
Figure E.1
). Turn on the monitor with the front
power button and the computer.
NOTE:
The vacation switch is a true on/off switch. If this switch is on the OFF position, the monitor cannot be turned on
using the front button. DO NOT switch on/off repeatedly.
12. No-Touch Auto Adjust automatically adjusts the monitor to optimal settings upon initial setup for most timings.
For further adjustments, use the following OSM controls:
• Auto Adjust Contrast (Analog input only)
• Auto Adjust (Analog input only)
Refer to the
Controls
section of this User’s Manual for a full description of these OSM controls.
NOTE:
If you have any problems, please refer to the
Troubleshooting
section of this User’s Manual.
Figure D.1
Figure D.2
USB Cable
(NX model only)
Flat
Figure C.3 (Picture: LCD2070NX model)
Figure E.1
ON Position
OFF Position
Power Button
Vacation Switch
9. Hold the all cables firmly and place the cable cover onto the stand (
Figure D.1
). To remove the cable cover, lift the cover
off as shown in
Figure D.2
.
D-Sub Cable
Figure E.2


