


1. Installing Internal Optional Devices
Express5800/R120e-1M User’s Guide
92
Chapter 2 Preparations
1.13.5
Installing RAID Controller
This section describes how to install an optional RAID Controller to the slot dedicated to RAID Controller.
(1)
When using the optional RAID controller (N8103-172/173/174)
For details, see the manual that comes with optional RAID Controller (N8103-172/173/174).
Important
•
You must avoid static electricity to work with the procedure below. For
details, see Chapter 2 (1.2 Anti-static Measures).
•
Do not change the mode to hibernate while building a RAID System.
Note
•
When installing an optional RAID Controller, start the BIOS Setup utility, select
PCI Configuration
from the
Advanced
menu, and then make sure that the
parameter of
PCI Slot xx ROM
(
xx
is PCI slot number) is set to
Enabled
.
•
When connecting a RAID Controller, set the boot priority to 8th or higher in the
Boot menu of the BIOS Setup utility. If the setting is 9th or lower, the
configuration menu for RAID Controllers cannot be launched.
Take the following procedure to install RAID Controller (N8103-172/173/174).
1.
See steps 1 to 6 in
Chapter 2 (1.3 Overview of Installation and Removal)
for preparations.
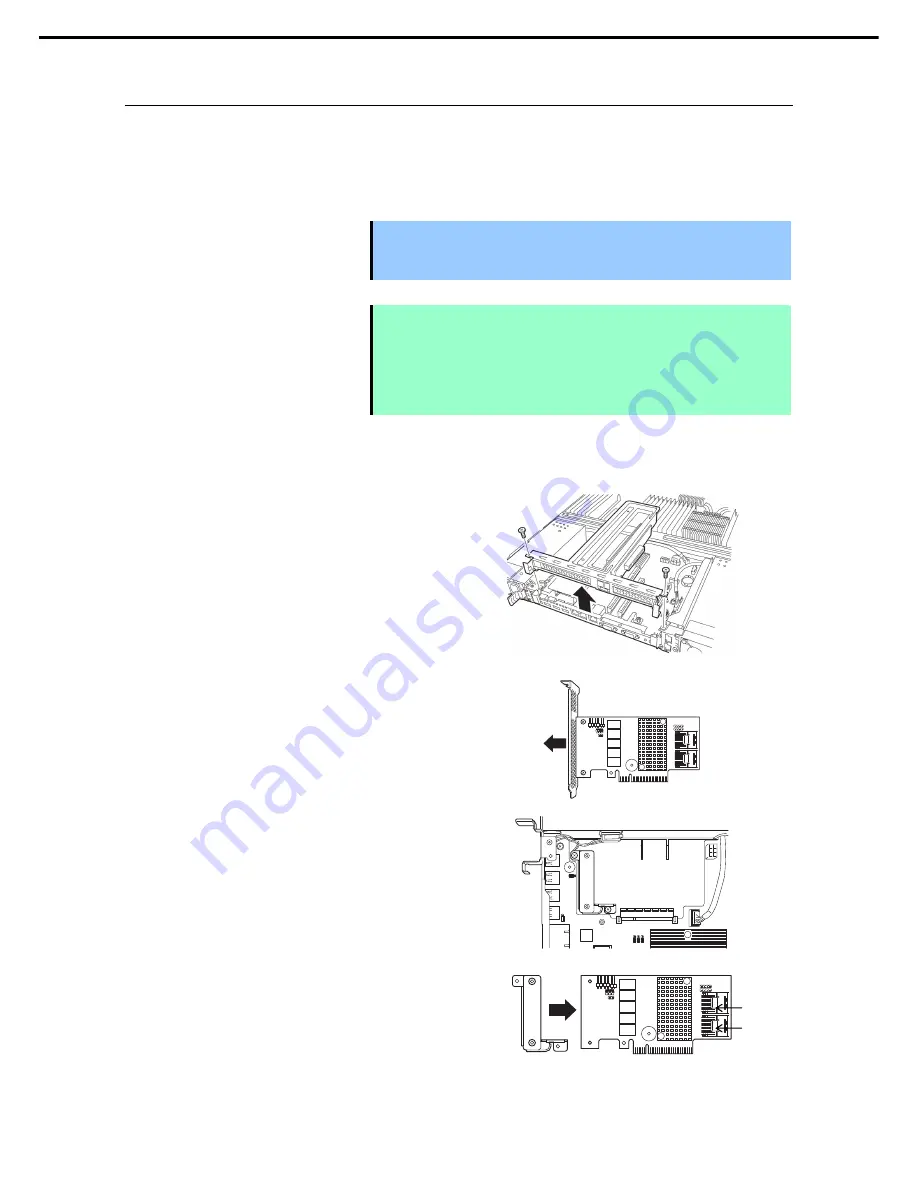
2.
Remove the two screws and remove PCI
riser card.
3.
Remove the support bar.
4.
Remove the two screws from RAID
Controller, and remove PCI bracket.
5.
Remove the two screws from server
chassis, and remove RAID Controller
bracket.
6.
Attach the RAID Controller bracket to
RAID Controller with two screws you
have removed in Step 4.
7.
Insert RAID Controller into the slot dedicated to RAID Controller.
Ports 4-7
Ports 0-3


