5
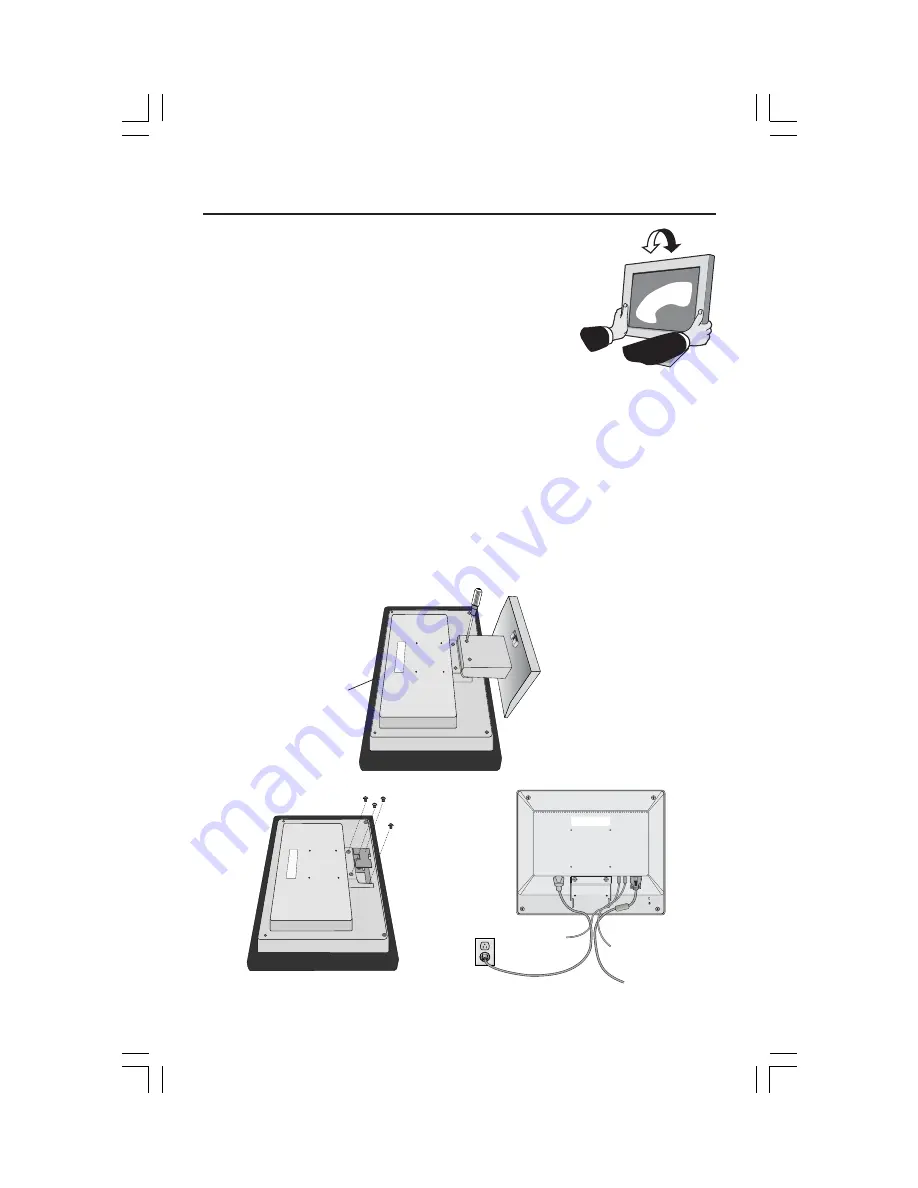
Tilt
Grasp both sides of the monitor screen with your hands
and adjust the tilt as desired (
Figure TS.1
)
.
Remove Monitor Stand for Mounting
To prepare the monitor for alternate mounting purposes:
1. Disconnect all cables.
2. Place monitor face down on a nonabrasive surface
(Figure R.1)
.
3. Remove the 2 screws on the stand and lift off the stand
(Figure R.1)
.
4. Remove the 4 screws connecting the monitor to the stand and remove the
metal plate
(Figure R.2)
.
The monitor is now ready for mounting in an alternate manner.
5. Connect the AC cord and signal cable to the back of the monitor
(Figure R.3)
.
6. Reverse this process to reattach stand.
NOTE: Use only VESA-compatible alternative mounting method.
NOTE: Handle with care when removing monitor stand.
Quick Start
–continued
Figure TS.1
Figure R.2
Figure R.1
non-abrasive
surface
Figure R.3
AS5171VMManual042403.p65
5/6/03, 10:06 AM
5
Содержание ACCUSYNC LCD5171VM
Страница 1: ...AccuSync TM LCD51VM LCD71VM ...


