


Italiano
Italiano-3
AUDIO
Controlla il volume degli altoparlanti o delle cuffie. Per disattivare
l’uscita degli altoparlanti, premere il pulsante “AUTO/RESET”.
LUMINOSITÀ
Regola la luminosità dell’immagine e dello schermo.
CONTRASTO
Regola la luminosità dell’immagine in relazione allo sfondo.
AUTO-CONTRASTO
Regola l’immagine visualizzata per input video non standard.
REGOLAZIONE AUTOM.
Regola automaticamente la posizione immagine, la
dimensione orizzontale e la regolazione di precisione.
SIN./DEST.
Controlla la posizione orizzontale dell’immagine all’interno
dell’area di visualizzazione dell’LCD.
GIÙ/SU
Controlla la posizione verticale dell’immagine all’interno
dell’area di visualizzazione dell’LCD.
DIMENSIONE ORIZZ.
Regola la dimensione orizzontale aumentando o diminuendo
questa impostazione.
FINE
Migliora messa a fuoco, nitidezza e stabilità dell’immagine,
aumentando o diminuendo questa impostazione.
SISTEMI DI CONTROLLO COLORE
L’impostazione di colore desiderata può essere selezionata
tra cinque impostazioni predefinite di colore (9300/7500/
sRGB/UTENTE/NATIVO).
COLORE ROSSO
Aumenta o diminuisce il rosso. La modifica comparirà sullo
schermata.
COLORE VERDE
Aumenta o diminuisce il verde. La modifica comparirà sullo
schermata.
COLORE BLU
Aumenta o diminuisce il blu. La modifica comparirà sullo schermata.
STRUMENTO
Selezionando STRUMENTO è possibile ottenere il sottomenu.
CONFIG. DI FABBRICA
Selezionando Config. di fabbrica è possibile resettare tutte le
impostazioni dei controlli OSD riportandole alle configurazioni di
fabbrica. Il pulsante RESET deve essere tenuto premuto per
diversi secondi per avere effetto. È possibile resettare
impostazioni individuali selezionando il relativo comando e
premendo il pulsante RESET.
EXIT
Selezionando EXIT è possibile uscire dal menu/sottomenu OSD.
LINGUA
I menu di controllo OSD sono disponibili in nove lingue.
DISABILITAZIONE OSD
Il menu di controllo OSD rimane attivo per il tempo che è in
uso. Nel sottomenu Disabilitazione OSD, è possibile
selezionare l’intervallo di tempo dopo il quale, nel caso non
venga premuto nessun tasto, il menu di controllo OSD si
chiude. Le scelte preimpostate sono 10 - 120 secondi
intervallati da 5 secondi.
BLOCCO OSD
Questo comando blocca l’accesso a tutte le funzioni di
comando OSD ad eccezione di Luminosità e Contrasto. Se si
tenta di attivare i controlli OSD in modalità Blocco OSD ,
apparirà una schermata che informa del fatto che i controlli
OSD sono bloccati. Per attivare la funzione Blocco OSD,
premere il tasto “AUTO/ RESET”, quindi il tasto “+” e tenerli
premuti contemporaneamente. Per disattivare la funzione
Blocco OSD, premere il tasto “AUTO/ RESET”, quindi il tasto
“+” e tenerli premuti contemporaneamente.
NOTIF. RISOLUZIONE
Se è selezionato ON, dopo 45 secondi appare sulla schermata
un messaggio che indica che la risoluzione non è ottimale.
ESPANSIONE
Seleziona la modalità zoom.
INTERO:
L’immagine viene espansa a 1440 x 900
(LCD193WM) o a 1680 x 1050 (LCD203WM/LCD223WM),
indipendentemente dalla risoluzione.
PROP.:
L’immagine viene espansa senza cambiare il
rapporto proporzionale.
DDC/CI
ATTIVA o DISATTIVA la comunicazione bidirezionale e il
controllo del monitor.
MONITOR INFO
Indica il modello e i numeri di serie del monitor.
Avvertenza OSD
I menu di avvertenza OSD scompaiono quando si preme il
pulsante SELECT.
NESSUN SEGNALE:
Questa funzione avverte in caso non vi
sia nessun segnale presente. Dopo l’accensione o quando vi
è un cambiamento del segnale di input o il video è inattivo,
apparirà la finestra
Nessun Segnale
.
NOTIF. RISOLUZIONE:
Questa funzione consiglia l’utilizzo di
una risoluzione ottimizzata. Dopo l’accensione o quando vi è
un cambiamento del segnale di ingresso o il segnale video
non ha la risoluzione opportuna, si apre la finestra
Notif.
Risoluzione
. Questa funzione può essere disattivata nel
menu STRUMENTI.
FUORI PORTATA:
Questa funzione suggerisce la risoluzione
e la frequenza di rinfresco ottimali. Dopo aver attivato
l’alimentazione, in caso di modifica del segnale di ingresso o
se il segnale video non ha una temporizzazione adatta,
apparirà il menu
Fuori tolleranza
.
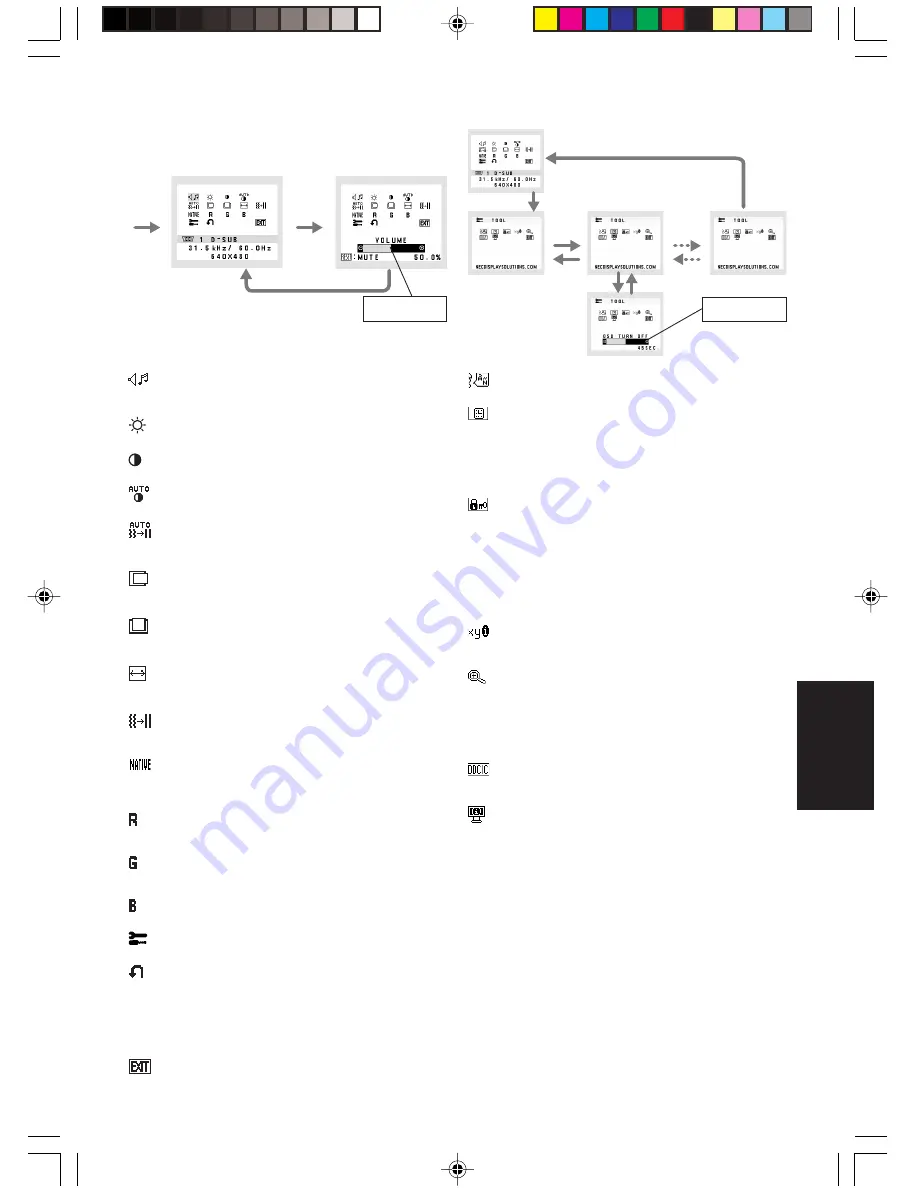
2. Struttura OSD
Sottomenu
(icona Seleziona)
Sottomenu (Regolazione)
Premere il tasto “SELEZIONA”
Strumento di esempio:
Premere il tasto “SELEZIONA”
Premere il tasto “SELEZIONA”
Regolazione
utilizzando “–” o “+”
Premere
“–” o “+”
Premere
“–” o “+”
Menu principale
(icona Seleziona)
Menu principale
(Regolazione)
Premere il tasto “SELEZIONA”
Regolazione
utilizzando “–” o “+”
Premere
il tasto
“SELEZIONA”
Premere
il tasto
“SELEZIONA”
05_Italian
16/2/07, 8:02 AM
3


