Connecting the Drive to the Network with Windows NT Terminal Server
Floppy Disk Drive Installation
5
3. To disconnect a network drive, click on the
Disconnect
network drive icon
or select
Tools
Disconnect Network Drive . . .
In the dialog box that
appears, select the drive to be disconnected and click
OK
.
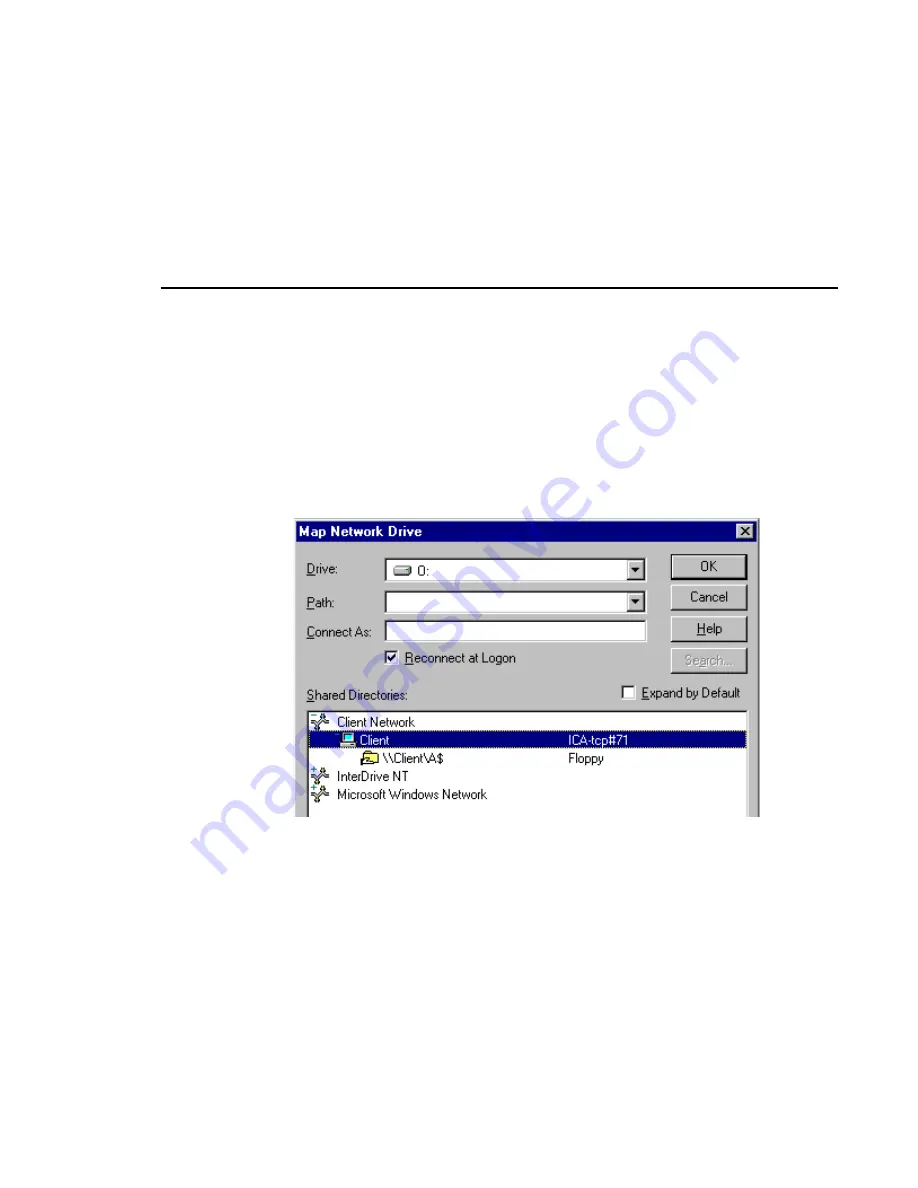
4. Select a drive designation in the Drive field (see Figure 4). The letter that
appears in the block is the next available unused drive designation. You can
use this letter or select a different one by pulling down on the button in the
block or at the end of the block.
Figure 4. Connect Network Drive Dialog Box
5. Enter
\\Client\A$
in the Path field. To do this: select the A drive in the Shared
Directories (double-click on
Client Network
, then on
Client
, then click on
A:
),
or pull down on the button at the end of the Path field and select \\Client\A$ .
6. Click on the
OK
button to make the connection.
The drive, which appears as a drive icon in the
Windows Explorer
window, is
ready for use. You can use the
Windows Explorer
to move files to or from the
floppy drive just as you would any other drive.
Содержание NC200
Страница 1: ...Floppy Disk Drive Installation Guide Version 1 1 NC200 NC400 and NC900...
Страница 12: ...Floppy Disk Drive Installation 8 Floppy Disk Drive Installation Figure 7 Disk Formatting Menu...
Страница 14: ...Floppy Disk Drive Installation 10 Floppy Disk Drive Installation Figure 8 Local Floppy Manager Client...
Страница 16: ...Floppy Disk Drive Installation 12 Floppy Disk Drive Installation...
Страница 17: ......
Страница 18: ...Network Computing Devices Inc 301 Ravendale Drive Mountain View CA 94043 5207 9300948 Rev A...


