


4-2
Selecting Screen Resolution
3. When you are in the Boot Monitor (> prompt), press the Setup key or type
se <CR>
. The Main menu appears. (See Figure 4-1.)
4. Use the right arrow key to select
Monitor
. The screen now displays the
available monitor resolution settings. (See Figure 4-2 for the Explora 400 or
Figure 4-3 on page 4-3 for the Explora 450.)
Help
Keyboard
Monitor
Network
Boot
Done
Help
Use the arrow keys to navigate through the menus
listed across the top of the screen:
Left, Right
Go to previous or next menus.
Up, Down
Go to previous or next field
within the current menu.
Control-U
Delete to beginninbg of line.
Escape
Restore previous value.
Help for each field within a menu is shown along the
bottom of the screen.
Exit via the Done menu at the right of the screen.
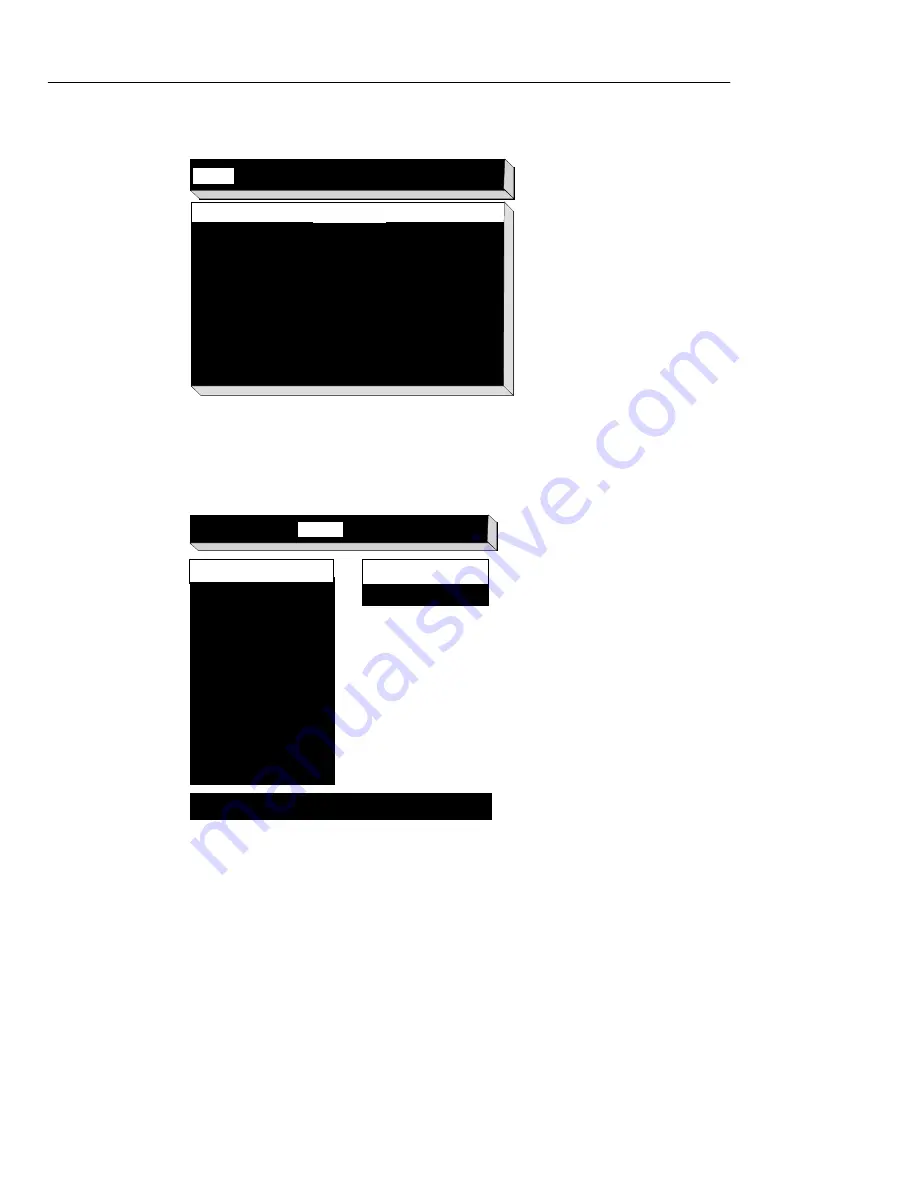
Figure 4-1 Boot Monitor Main Menu
Help
Keyboard
Monitor
Network
Boot
Done
Dots Per Inch
XX
Press Shift-T to test new monitor parameters, Esc to stop test
Automatic Detection (DDC)
640 x 480 60Hz
640 x 480 72Hz
640 x 480 75Hz
640 x 480 85 Hz
800 x 600 60Hz
800 x 600 72Hz
800 x 600 75Hz
800 x 600 85Hz
1024 x 768 60Hz
1024 x 768 70Hz
1024 x 768 75Hz
1024 x 768 85Hz
1152 X 900 66Hz
1152 X 900 76Hz
Monitor Resolution
Figure 4-2 Supported Resolutions for Explora 400
Содержание Explora 400 Series
Страница 6: ......
Страница 14: ...2 2 Explora 400 450 Series Product Line ...
Страница 40: ...Installing the Security Device and Mounting Bracket 5 14 Installing Optional Equipment in the Space Saver Base ...
Страница 62: ...In Case of Trouble 8 4 Troubleshooting ...


