Naxa NID-7000 Скачать руководство пользователя страница 11


10 

7. Security features 

Security features help protect the information on device from being accessed by others. 
You can set up a pattern that you must enter each time you turn on or wake up device. 
Set a pattern: Choose Settings > Security & Location > Set unlock pattern. 
For more information, see “Security & Location” on page 11. 
 

BASIC SETUP 

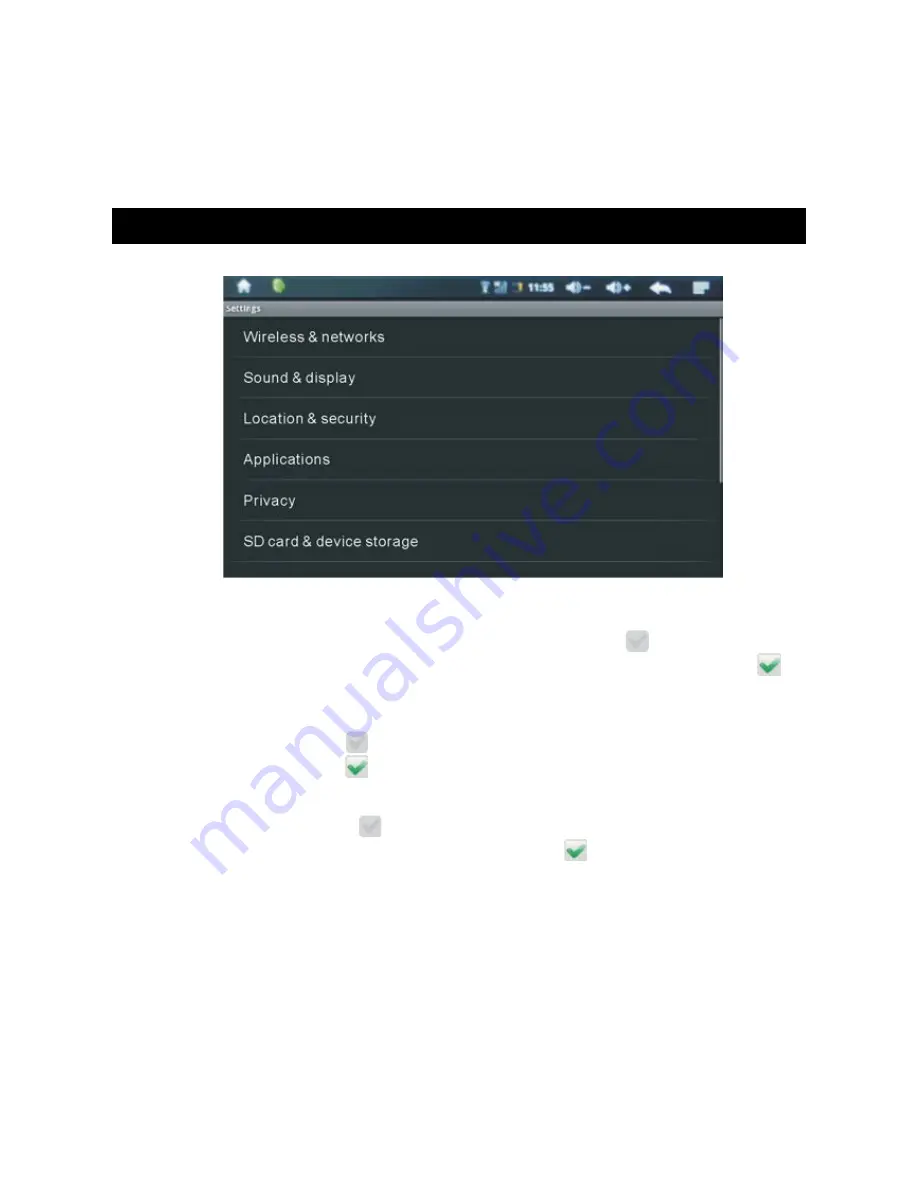
Touch the SETTINGS icon on the main menu to get into the settings interface. 


1. Wireless & networks 

1.1 Wi-Fi: Turn on/off Wi-Fi function 
When getting on the Wi-Fi interface, the icon on the right shows 

  which means Wi-Fi 

is off. Click “Wi-Fi”, it will indicate “Turning on...”, the icon on the right shows 


which means Wi-Fi is on. 


[NOTE]: All the settings of the device, except special explain: 
-the icon on the right shows 

  which means the option is Off.   

-the icon on the right shows 

  which means the option is On. 


1.2 Wi-Fi settings: Set and manage the wireless access point.   
- The network icon shows like 

  which means auto-scan is off.   

- Click once the icon of the network, it would show like 

  which means it is on. The 

device will automatically search any accessible nearby wireless networks. Click the 
network' s name, you can access to it. Once connected, such words like “Connected 
to ......”, will be displayed on the bottom of the network's name.   


- For a once connected router, the device would save it. If you want to connect it again, 
just activate Wi-Fi network, or click the network directly to access. Moreover, when the 
Wi-Fi is on, the device would search the router automatically once connected. 


1.3 Mobile network: Turn on/off mobile network function 
If the Wi-Fi function is on and you want to turn on this function, the screen will appear 

Содержание NID-7000

Страница 1: ...7 Tablet PC with 8GB Built in Memory Powered by Android OS Model NO NID 7001 USER MANUAL English version...

Страница 2: ...ion of the Homepage 6 2 Description of the menu interface 7 3 Description of status bar 7 4 Use the touch screen 8 5 Viewing in portrait or landscape 9 6 Connecting to the internet 9 7 Security featur...

Страница 3: ...de Select 13 11 Update Media Library 13 12 Online Help 13 13 About Device 13 SOFTWARE INSTALLATION MANAGEMENT 14 1 Install 14 2 Manage 15 3 Exit 15 FEATURES SPECIFICATIONS 16 MAINTENANCE 17 PROBLEMS S...

Страница 4: ...usty place Do not fall or crash the device do not shock the TFT screen it may damage the TFT screen Adjust to a suitable volume If you feel tinnitus please turn down or stop using Do not remove the co...

Страница 5: ...ng in a serious accident Do not use the Wireless LAN functionality in an aircraft Radio waves may cause a malfunction of the aircraft s equipment resulting in a serious accident Do not use the Wireles...

Страница 6: ...vice option Power off Suspend and Cancel Click Power off to shut it down 4 2 Turn on off the screen of device to save power Power saving standby In the state of power on press this button to get to sh...

Страница 7: ...e you will not use this device for a long time please power it off NOTE 1 This device has a built in polymer battery when it is charging supplied charger is only available 2 If you do not use this dev...

Страница 8: ...ge Add short cuts Drag the software icon to the Homepage Delete short cuts press and hold the software icon will become then drag the icon into the recycle bin When the icon turns red deletion is done...

Страница 9: ...cription of status bar The left part display some information like screen soft key Micro SD card and USB connecting etc The right part shows muting mode Wi Fi signal mobile network connecting status b...

Страница 10: ...etwork in range then select a network fees may apply to join some Wi Fi networks If necessary enter a password and tap join network that require a password appear with a lock icon When device has a Wi...

Страница 11: ...on the right shows which means the option is Off the icon on the right shows which means the option is On 1 2 Wi Fi settings Set and manage the wireless access point The network icon shows like which...

Страница 12: ...nd Display 2 1 Media volume Adjust the media volume level Adjust it by dragging the volume bar 2 2 Notification ringtone Set the default notification ring 2 3 Audible selection Play sound or not when...

Страница 13: ...ing up your settings and erase all copies on Google servers 5 3 Factory data reset To erase all data on device and reset to factory initial settings 6 SD card device storage Discharge the SD card Chec...

Страница 14: ...pping to the adjust option touch the cross shapped mark on the left up corner right up corner left down corner right down corner and centre of the screen to adjust 10 USB Mode select Choose the USB Mo...

Страница 15: ...ations can be acquired on the internet which can be copied into the SD card or T flash card Click Apk installer option will show up Install Manager Exit 1 Install Click it step into the installation o...

Страница 16: ...website You can scan the latest Android news Android mobile phone Android videos Android games and Android applications etc Click icon to enter the action interface Launch To launch the application E...

Страница 17: ...ttery type Chargeable polymer battery Battery capacity 2300 mAh G sensor Yes I O Interface Mini USB 2 0 T Flash 3 5mm earphone jack Built in mic phone Wireless interface Wi Fi 802 11b g Dimension L W...

Страница 18: ...pletely before turning on the device again When carrying your device in bag keep the device in the protecting case supplied to avoid scratches PROBLEMS SOLUTIONS The device can not power on Check the...

Отзывы: