background image


www.NavePoint.com 

[email protected] 

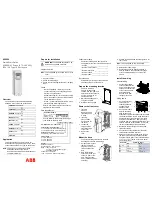
12U Configuration 

Warning:


Do not attempt to mount to wall, when equipment is mounted inside rack. Rack can hold up 

to 150 pounds evenly distributed.   Make sure wall surface can hold weight of rack/equipment.


Insert one end of the Long 

Vertical Mounting Rails (C) 

into the corner of the 

Bottom Panel Frame (A) 

(both panel frames can be 

used as a top or a bottom) 

and secure them with 2 of 

the M5 x 10 mm Hex Head 

Screws (G) on each side 

using Hex Wrench (J).  


Note: The front of the 

Bottom Mounting Panel 

Frame (A) has a front panel 

without wall-mounting 

holes  


Insert and connect the Top 

Panel Frame (A) onto the 

Long Vertical Mounting 

Rails (C) with 2 of the M5 x 

10 mm Hex Head Screws 

(G) on each side using Hex 

Wrench (J). 

Содержание 12U

Страница 1: ...by a qualified installer NavePoint cannot be held responsible for damage to equipment or personal injury resulting from improper use or installation of product Maintenance Check that the product is secure and safe to use at regular intervals at least every three months Limitations of Liability In no event will NavePoint LLC be liable for any damages whether direct or indirect special punitive inci...

Страница 2: ...anel Frame 2 Short Vertical Mounting Rail 2 Long Vertical Mounting Rail 2 Left Right Short Support Beam 2 Left Right Long Support Beam 2 Mounting Rail Tie Plates 2 M5 x 10 mm Hex Head Screws 32 12 24 Mounting Screws 24 Anchors 4 Hex Wrench 1 Zip Ties 8 C A B D E F G H I J K ...

Страница 3: ... of the Bottom Panel Frame A both panel frames can be used as a top or a bottom and secure them with 2 of the M5 x 10 mm Hex Head Screws G on each side using Hex Wrench J Note The front of the Bottom Mounting Panel Frame A has a front panel without wall mounting holes Using one of the Mounting Rail Tie Plates F and four of the M5 x 10 mm Hex Head Screws G connect one set of the Short Vertical Moun...

Страница 4: ...g Hex Wrench J Attach Right and Left Long Support Beams E to the frame by securing 8 of the M5 x 10 mm Hex Head Screws G to the sides of the Top Panel Frame A and Vertical Mounting Rails using Hex Wrench J Attach the Right and Left Short Support Beams D to the frame by securing 8 of the M5 x 10 mm Hex Head Screws G to Vertical Mounting Rails and to the Bottom Panel Frame A using Hex Wrench J ...

Страница 5: ...he Long Vertical Mounting Rails C into the corner of the Bottom Panel Frame A both panel frames can be used as a top or a bottom and secure them with 2 of the M5 x 10 mm Hex Head Screws G on each side using Hex Wrench J Note The front of the Bottom Mounting Panel Frame A has a front panel without wall mounting holes Insert and connect the Top Panel Frame A onto the Long Vertical Mounting Rails C w...

Страница 6: ...stomerservice navepoint com Attach the Right and Left Short Support Beams D to the frame by securing 8 of the M5 x 10 mm Hex Head Screws G to Long Vertical Mounting Rails C and to the Bottom Panel Frame A using Hex Wrench J ...

Страница 7: ...e Short Vertical Mounting Rails B into the corner of the Bottom Panel Frame A both panel frames can be used as a top or a bottom and secure them with 2 of the M5 x 10 mm Hex Head Screws G on each side using Hex Wrench J Note The front of the Bottom Mounting Panel Frame A has a front panel without wall mounting holes Insert and connect the Top Panel Frame A onto the Short Vertical Mounting Rails B ...

Отзывы: