5
TEMPERATURE CONTROLLER FOR R-500P MODEL (HOW TO PROGRAM):
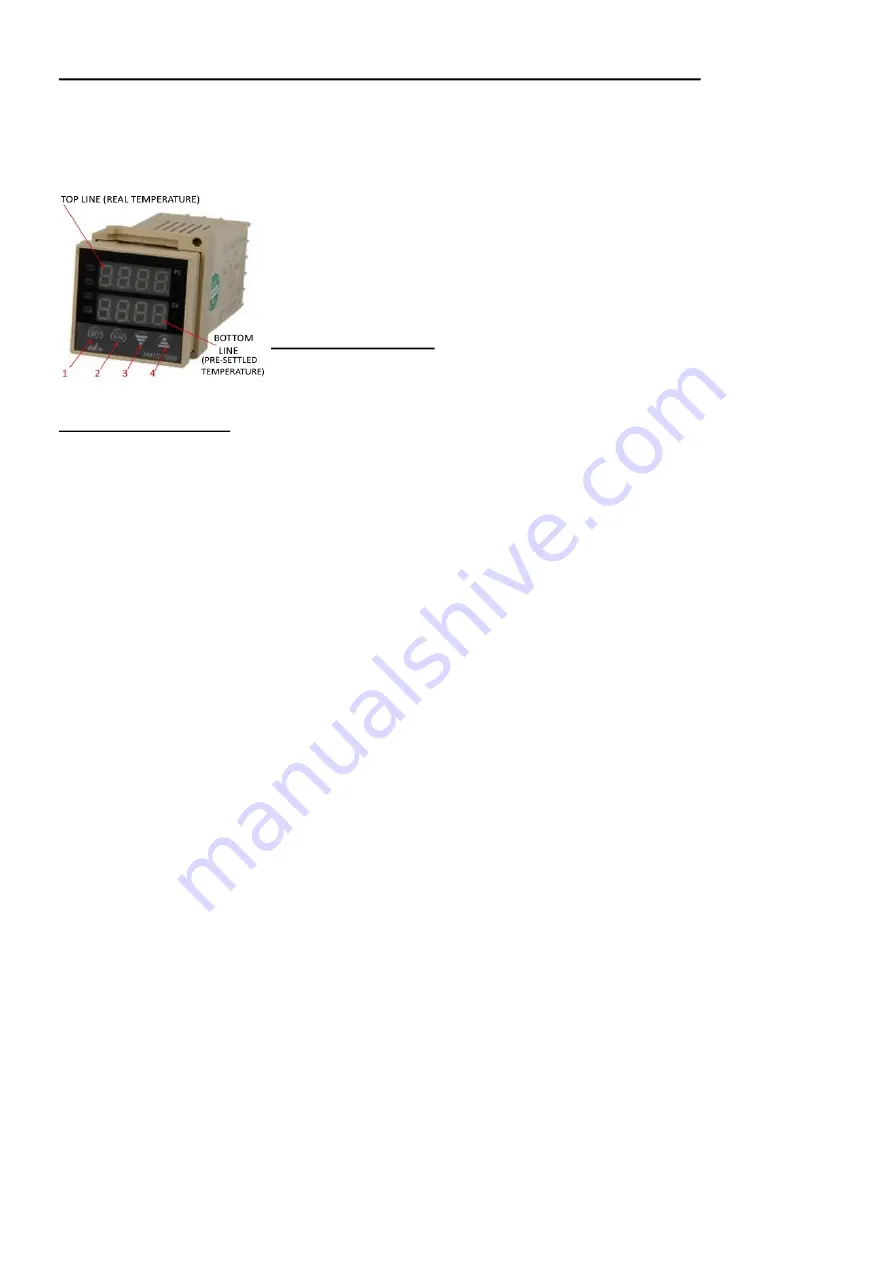
The programmable temperature controller (XMTG-7000) has already been set up for chamber
drying by the manufacturer (if you have not requested a different setting). If you want to re-
program this controller, please refer to the controller’s user manual or contact us for FREE help
on Skype. Below are some useful tips for using this controller:
1. “SET” – setting/confirmation button (used for setting all of the controller’s param-
eters).
2. “Arrow Left” or “A/M” – segment selector (to choose from four segments).
3. “Arrow Down” – decrease (used to set the required temperature).
4. “Arrow Up” – increase (used to set the required temperature).
Example program:
Increase from room temperature up to 450
°
C
within 99 minutes, soak at 450
°
C for 4 minutes and then decrease to
room temperature within 145 minutes.
Example instructions:
1. Open your kiln’s door to trigger the safety-switch mechanism, which will disconnect the power supply
from the heating element(s) and prevent the kiln from heating up while you program the temperature
controller. Alternatively, simply press button 4 for 3 seconds until you see “STOP” on the bottom dis-
play. Now you can start programming your controller.
2. Each of the following steps consists of first setting the temperature and then setting the time period in
which the NEXT temperature should be reached. There are 32 available input slots each consisting of
a pair of temperature and time inputs, i.e. there are a total of 32 temperature inputs alternating with 32
time inputs. To start programming, short-press the ‘SET’ button.
3. After you have pressed the ‘SET’ button, you have to set the kiln’s starting temperature (“C1” on the top
display line). In this case, input the desired temperature (usually 1
°
C), i.e. “0001”, into the BOTTOM
display line using buttons 2, 3 and 4. Now press ‘SET’ to confirm this initial temperature (“Starting
point”) and to proceed to the next input (“
Г1
”). This input is the required TIME to reach the NEXT re-
quired temperature. For this example, insert “0099” (99 minutes) into the BOTTOM display, and then
press ‘SET’ again to set this input and to proceed to the next step.
4. The next step begins by setting the second required temperature (“C2”). To set this, insert “0450” (450
°
C) into the bottom display. Next, press ‘SET’ again to proceed to the next input (“
Г2
”), where you will
set the required time to the NEXT temperature. In this case, this is our soaking time of 4 minutes -
“0004”. Press ‘SET’ again to confirm this time and to proceed to the next step.
5. The next step begins by setting the third required temperature (“C3”), in this case the required soaking
temperature. Enter “0450” (450°C) into the bottom display again. Next press ‘SET’ once more to pro-
ceed to the next time input (“
Г3
”), which in this case will be 145 minutes. Input “0145” into the bottom
display, then press ‘SET’ again.
6. For the next step, set the fourth and final required temperature (“C4”) – “0020” (20
°
C or room temp.).
7. To indicate the end of the program, press the ‘SET’ button again, insert “0000” into the bottom display
and press the ‘SET’ button once more. Your program will automatically finish when it reaches this last
input.
A. When you have finished programming the controller, short-press the ‘SET’ button or simply leave the
controller for about 30 seconds for the new setting to be remembered and for your job to start.
B. Close the kiln door to disconnect the safety-switch mechanism, allowing your kiln to start heating up.
Alternatively, if you pressed button 4 in step 1 above, now press button 3 for 3 seconds until the word
“RUN” appears on the bottom display line.
C. Important: you’ll have about 20 seconds to change EACH temperature/time setting. Please do not wor-
ry if you take too much time and the controller resets and starts displaying the current temperature in-
side the chamber again. Simply restart the programming process by short-pressing the ‘SET’ button
again. If you are a beginner and are having difficulty programming your controller, please feel free to
contact the manufacturer or agent/shop for free help with this matter anytime during the warranty peri-
od.


