


10
clude "No Arming", "Arm/Disarm", "Arm Only".
5.
IO
("Initially Off") - Indicates whether the user is initially "On" or "Off". For example, if a user is
"Off", then this user will always be disabled unless there is a "User On" schedule programmed to
enable him. The default state for each user is "On" (unchecked).
Note:
The remaining options are not used for ACM Programming, and will be grayed-out when a
valid ACM area is selected in the "ACM Area" column.
6.
ACM Area
- Assign a proximity card to an ACM area. Click the drop-down box to display the ar-
eas, and click each area to highlight and select. The proximity card users assigned to the specific
areas will then function (provide access or arm/disarm) only in those selected areas.
Note:
The Area column and the ACM Area column are mutually exclusive--either can be used but
not both with one user.
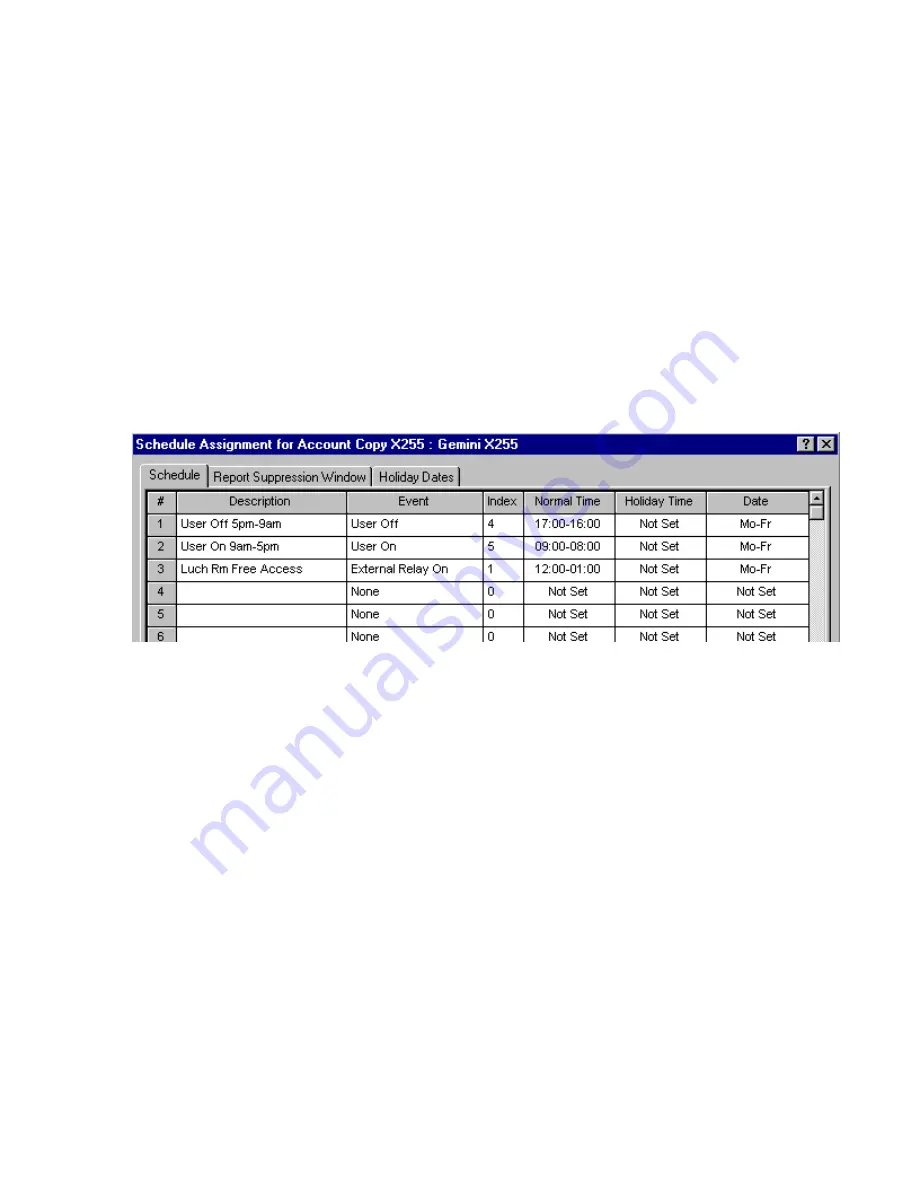
CREATE AN ACM SCHEDULE
To create an access schedule, click the
Schedule Assignment
button and select the
Schedule
tab. Enter a description of the event in the Event column.
The following is a list of events for the GEM-X255 panel associated with access control:
•
External Relay On (RB3000)
•
User On (Enable)
•
User Off (Disable)
Index
- In the Index column, for the access control systems, enter a specific user/access card num-
ber or a specific External Relay number. Also, enter the Normal Time, Holiday Time, and Date as
desired.
Note:
PCD-Windows download software MUST be used to program schedules.
Users are controlled by assigning them to a schedule. By default, all users (i.e. their proximity
cards) are active; with the schedules restricting user card access. For example, if an employee
works 9AM through 5PM, program the schedule to turn off starting at 5PM for the next 16 hours
(until 9AM the next day).
Содержание GEM-ACM1D
Страница 13: ...13 NOTES...
Страница 14: ...14 NOTES...


