ENGLISH
13
16 IR Channel:
The M33 has the capability to operate via alternate IR
channel. This is useful if you have two NAD products that can be
operated by similar remote control commands. With alternate IR
Channel, two different NAD products can be controlled independently
in the same zone by setting each one to a different IR channel.
IR Channel Assignment
The M33 and the HTRM 2 remote control must be set to the same
channel.
To change the Main Zone IR Channel on the M33
•
While at “IR Channel” option, select through IR Channel number
options. The default IR Channel is “IR Channel 0”.
To change the IR Channel on the HTRM 2 remote control
•
Include a channel number before the library code. For HTRM 2,
library code “100” is the default library table for “AMP” device. To
select this “AMP” library table for “IR Channel 0”, retain the library
code “100”.
•
If you want to load the “AMP” library table on “IR Channel 1”, prefix
the library code with “1” to indicate association with “IR Channel 1”.
Load then the “AMP” library table using the code “1100”.
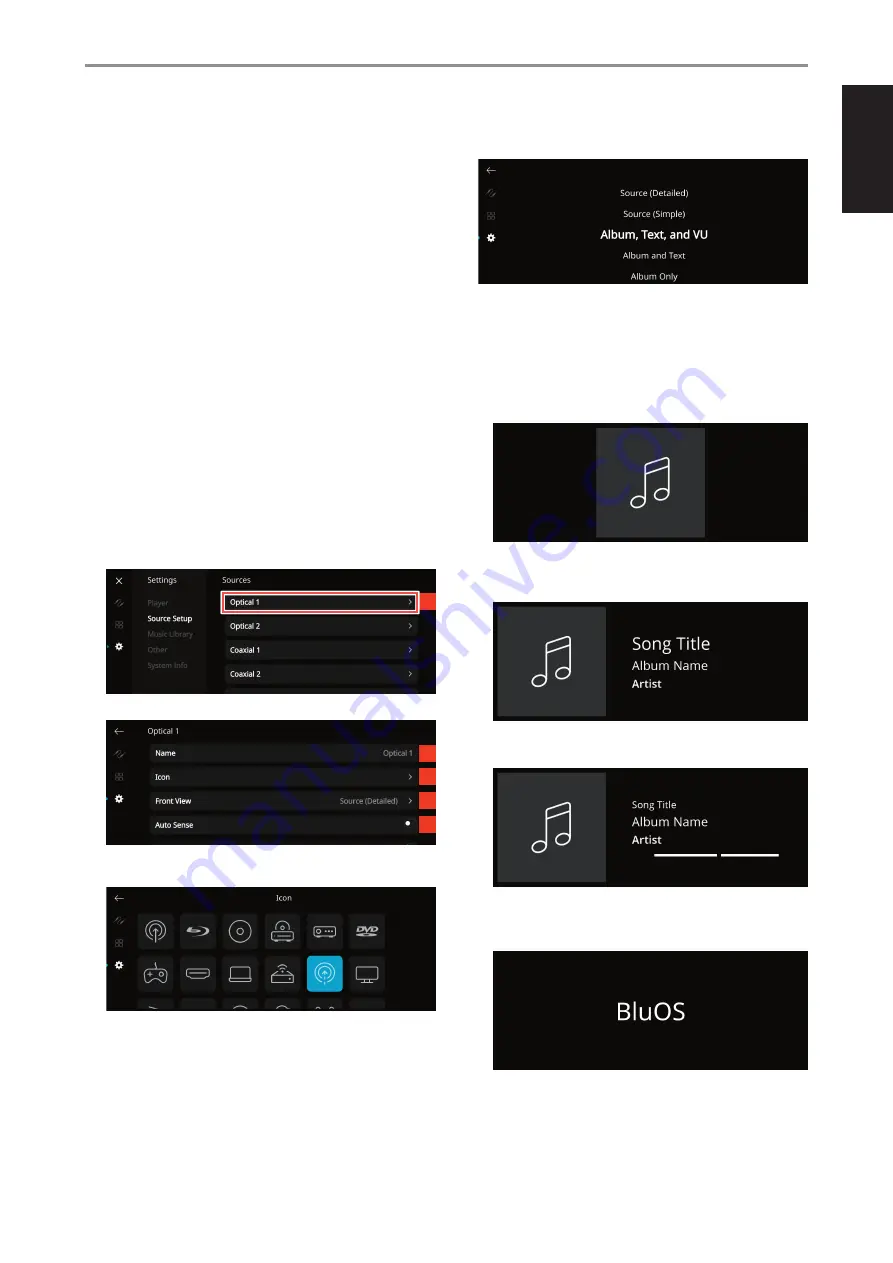
Source Setup
Select and configure Source
1 Sources:
Select Source to configure
2 Name:
Customize the Source’s Name using the pop-up keyboard
3 Icon:
Select and assign icon for the selected Source
4 Front View:
Front display layout and contents can be configured by
selecting the following options
•
Album Only, Album and Text, Album, Text and VU, Text Only
•
Source (Simple), Source (Detailed)
•
Analog VU meter, Digital VU.
A combination of above options is available depending upon the
Source selected.
• Album Only:
display album/title art, station ID symbol or icon only
• Album and Text:
display album/title art, station ID symbol, icon
and other information like album name, song title, artist name, title
of the show, show host, current title of song being played back, etc.
• Album, Text and VU:
display all the information indicated above
for Cover Art and Meta Data plus VU meter*
• Source (Simple):
display Source name only which is “BluOS” or
name of Cloud or Radio Service
OPERATION
USING THE FRONT PANEL DISPLAY
1
2
3
4
5


