background image

- The  MEMORY indicator must be OFF.

2. Enter one of the following types of programs

(see PROGRAMMED DISC PLAY”)

a)  Various tracks on several discs

b)  All of the tracks on one disc

-The MEMORY indicator lights.

3. Press the REPEAT button (10) twice.

- The ONE REPEAT indicator lights.

4. Press the PLAY button (3).

- The PLAY indicator lights

5. Press the “>>I” or I<<” button (7) to select the

programmed disc and track to be repeated.

6. The programmed track selected will play repeat-

edly until the STOP button is pressed.

7. Press the REPEAT button once more to end

repeat play.

Programmed play continues from that point.

8. When the last track has finished playing during

programmed play the CD changer will stop.

- The PLAY indicator goes OFF

- The MEMORY indicator remains ON.

NOTE:

If the STOP button is pressed, repeat play will end.

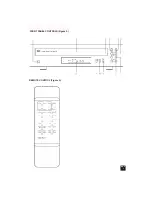
REMOTE CONTROL

The wireless, infrared Remote Control Unit can

operate the compact disc changer from a distance of
up to 30 feet. The hand-held remote control emits an
invisible infrared beam which carries the control sig-
nals to the sensor window on the front panel of the
compact disc changer.  Because the infrared beam
travels in a straight line, the emitter on the remote
control must be pointed towards the infrared sensor
window on the compact disc changer.  Make sure
that there are no objects between the remote control
and the compact disc changer that might obstruct the
beam.  Refer to the “OPERATION OF THE DIGITAL
COMPACT DISC CHANGER” section for detail of
buttons whose function are not described in this sec-
tion. They function the same as buttons of the chang-
er.

Battery Installation

Remove the rear cover of the remote control. Install

two AA (R6 or SUM3) size batteries (included) while
observing the correct polarity (match the (+) and (-)
signs). If the batteries are installed incorrectly, the
remote control will not operate and damage may
result. Replace the rear cover.

CAUTION:

Remove the batteries from the remote control if is

not to be used for a long period of time.  Exhausted
batteries may leak and damage the  remote control.

The Remote Control unit allows extra functions to

be selected in addition to those controls on the front
panel of the player.

Direct Access to a Track

1. Select a disc number using the DISC NO. button.

2. Select a track number using the TRACK NO.

buttons and then press the PLAY button.

NOTE: Track numbers can be designated from “1”

to “99”. When the track number which is not con-
tained in a disc is designated, the last track of the
disc will be played.

Entering A Program

A track number can be entered easily into a pro-

gram by using the TRACK NO. buttons instead of the
MUSIC SKIP buttons.

- When all the programmed tracks are played

through, the player will be set to the programmed
playback stop mode.

- When one of the MUSIC SKIP buttons is pressed

during the random programmed disc play, the track
number will change in the order in which they have
been programmed.

Shuffle Play

1. Press the SHUFFLE button either on the player

or on the remote control.

- The SHUFFLE indicator will light.

2. Press the PLAY button.

- The PLAY indicator will light and shuffle play will

begin.

- When the SHUFFLE button and PLAY button are

pressed during the STOP mode, the CD changer’s
built-in micro computer will select and play disc tracks
at random, until the STOP button is pressed.  If tracks
have been programmed, the programmed tracks will
be played at random.

- When the PLAY button is pressed, shuffle play

will end and normal (or programmed) disc play will
continue from that point.  If a new track number is
selected during normal shuffle (not programmed)
play will end and normal disc play will continue from
that point.

- If a new track number is selected during the shuf-

fle play of programmed tracks and the PLAY button is
pressed, the new track number will be ignored, shuf-
fle play will be cancelled but programmed disc play
will continue as before.

Shuffle Programmed Disc Play

1. Enter the program.

2. Press  the SHUFFLE button.

3. Press the PLAY button.

NOTE:

- If all the tracks on a disc have been entered as

one selection in a program the shuffle play function
will select and play one track, and then move on to
another disc.

- When all of the shuffle programmed tracks have

been played, the CD changer will stop.

- Pressing the “>>I” or I<<” button during the shuffle

programmed play changes track numbers in the pro-
grammed order.

PREVIEW DISC PLAY

Checking the Contents of All Discs

Press the PREVIEW button and PLAY button to

start intro check disc play.  The INTRO and PLAY
indicators will light.

GB

NAD

7

Содержание 517

Страница 1: ...GB F D E I S NAD 517 OWNER S MANUAL MANUEL D INSTALLATION BEDIENUNGSANLEITUNG MANUAL DEL USUARIO MANUALE DELLE ISTRUZIONI BRUKSANVISNINGARNA...

Страница 2: ...1 LASERPLAITE KLASS 1 LASERAPPARAT WARNING INVISIBLE LASER RADIATION WHEN OPEN AND INTERLOCKS DEFEATED AVOID EXPOSURE TO BEAM VORSICHT UNSICHTBARE LASERSTRAHLEN TRITT AUS WENN DECKEL GE FFNET UND WEN...

Страница 3: ...NAD 3 FRONT PANEL CONTROLS Figure 2 REMOTE CONTROL Figure 3...

Страница 4: ...rrors before concluding that your unit requires service Keep this manual in a safe place for future reference NOTE This equipment has been tested and found to comply with the limits for a class B digi...

Страница 5: ...OWER off press the button again and release it Button OUT LOADING A DISC 1 Set the power button 1 to ON button IN The carousel turns clockwise automatically 2 Press the OPEN CLOSE button 4 and the DIS...

Страница 6: ...ndicator lights 4 All of the loaded discs are played repeatedly until the STOP button 5 is pressed 5 Press the REPEAT button 10 twice more to end repeat play Normal play continues from that point 6 Wh...

Страница 7: ...the player Direct Access to a Track 1 Select a disc number using the DISC NO button 2 Select a track number using the TRACK NO buttons and then press the PLAY button NOTE Track numbers can be designa...

Страница 8: ...ess the SHUFFLE button 3 Press the REPEAT Button 4 Press the PLAY button 5 Programmed tracks are played at random repeatedly until the STOP button is pressed Shuffled programmed tracks are played in a...

Страница 9: ...he TRACK NUMBER display will show the tape length 2 Press the remote control s EDIT button The DISC NUMBER and TRACK NUMBER dis plays will show the selected tape length for approxi mately 10 seconds P...

Страница 10: ...changer s power is switched off NAD 10 GB IN CASE OF DIFFICULTY A TROUBLE SHOOTING GUIDE If you have followed the instructions and are still having difficulty operating your compact disc player locat...

Страница 11: ...urs d utilisation les plus courantes avant d arriver la conclusion que votre lecteur a besoin d tre r par Conservez ce manuel dans un lieu s r afin de pou voir le consulter tout moment dans l avenir N...

Страница 12: ...u centre vers l ext rieur du disque N utilisez jamais des produits chimiques tels que les a rosols de nettoyage pour disques les a rosols ou liquides antistatiques la benzine ou les diluants pour nett...

Страница 13: ...emps TIME 9 Appuyez sur le bouton PAUSE 6 pour arr ter temporairement la lecture L indicateur de Lecture PLAY s teint et l indica teur de PAUSE s allume et le son est coup Pour reprendre la lecture ap...

Страница 14: ...ne seule piste 1 num ro de disque et 1 num ro de piste L indicateur de M moire MEMORY s allume 3 Appuyez une fois sur le bouton R p tition REPEAT 10 L indicateur de R p tition Totale ALL REPEAT s allu...

Страница 15: ...me al atoire le num ro de piste en cours change dans l ordre qui correspond la s quence programm e Lecture al atoire 1 Appuyez sur le bouton Al atoire SHUFFLE soit sur le lecteur lui m me soit sur la...

Страница 16: ...o puis sur le bouton N Piste TRACK No 4 Appuyez sur le bouton Lecture PLAY Lecture R p titive Lecture al atoire des pistes programm es 1 Entrez le programme 2 Appuyez sur le bouton Al atoire SHUFFLE 3...

Страница 17: ...nregistrement 7 Appuyez sur le bouton Lecture PLAY L indicateur de PAUSE s teint et l indicateur de Lecture PLAY s allume 8 Appuyez sur le bouton PAUSE pour arr ter tem porairement la lecture Pour rep...

Страница 18: ...reste allum La fen tre d affichage du Temps TIME indique P 01 Exemple Pour lire les pistes 5 2 et 8 sur le disque num ro 3 dans l ordre programm a Entrez la premi re piste 5 du programme et le num ro...

Страница 19: ...Aucun son Les c bles audio n ont pas t branch s Branchez correctement l autochangeur correctement de disques compacts sur l amplificateur r cepteur Mauvais fonctionnement de l amplificateur V rifiez q...

Страница 20: ...eses Ger t wurde gepr ft und entspricht den Grenzwerten gem Teil 15 der FCC Vorschriften eines Digitalger tes der Klasse B Diese Grenzwerte bieten im Privatgebrauch angemessenen St rschutz Hochfrequen...

Страница 21: ...och beschriften BEDIENUNG DES DIGITAL CD WECHSLERS DIE IN KLAMMERN ANGEGEBENEN ZIFFERN BEZIEHEN SICH AUF DIE AN DER BEDIENLEISTE IN ABBILDUNG 2 VORNE IN DIESEM HANDBUCH ABGEBILDETEN BEDIENELEMENTE POW...

Страница 22: ...HINWEIS Das Ger t h lt an wenn der letzte Titel auf CD Nr 5 abgespielt wurde REPEAT DISC PLAY CD WIEDERGABE WIEDERHOLEN 10 Durch Dr cken der Taste REPEAT WIEDER HOLEN die gew nschte CD Wiederholungsar...

Страница 23: ...re Fernbedienung sendet einen unsichtbaren Infrarotstrahl der die Steuersignale an das Sensorfenster am Bedienfeld des CD Wechslers bertr gt Da der Infrarotstrahl geradlinig bertragen wird mu die Fern...

Страница 24: ...beginnt der Einleitungsbetrieb mit dem n chsten Titel Der Einleitungsbetrieb beginnt ab diesem Titel wenn Sie den gleichen Vorgang durchf hren wenn der Titel f r weniger als 10 Sekunden gespielt wurde...

Страница 25: ...SHUFFLE die CDs und Titel in beliebiger Reihenfolge abspielen 2 Zur Aufnahme von Seite A ein Band in das Bandger t einlegen Das Bandger t auf Aufnahmemodus stellen 3 Die Taste PLAY dr cken Die Lampe E...

Страница 26: ...n angezeigt die zur Zeit abspielende Titelnummer blinkt 4 Nach dem Abspielen aller programmierten Titel h lt der CD Wechsler an Die Lampe PLAY erlischt Die Lampe MEMORY leuchtet weiter In der Anzeige...

Страница 27: ...D reinigen Kein Klang Falsche Audiokabelanschl sse Den CD Wechsler vorschriftsm ig an den Verst rker Receiver anschlie en Falscher Verst rker Receiverbetrieb Sicherstellen da der Eingangsw hler an Ihr...

Страница 28: ...equipo se ha comprobado y se ha ver ificado que cumple con los l mites de un dispositivo digital clase B conforme a la parte 15 de las Reglas FCC Estos l mites se han dise ado para proveer una protec...

Страница 29: ...a limpiar los discos com pactos Estos productos qu micos da an permanente la superficie de pl stico del disco Coloque siempre el disco compacto en la bandeja de discos con la etiqueta cara arriba Los...

Страница 30: ...or l 7 para volver al comienzo de la pista que se escucha actualmente Apriete y mantenga apretado el pulsador l 7 para volver a las pistas anteriores BUSQUEDA MANUAL 13 Apriete y mantenga apretado bie...

Страница 31: ...el indicador MEMORY 3 Apriete dos veces el pulsador REPEAT 10 Se enciende el indicador ONE REPEAT 4 Apriete el pulsador PLAY 3 Se enciende el indicador PLAY 5 Apriete el pulsador l o l 7 para selec c...

Страница 32: ...ador PLAY NOTA Si se ha dado entrada a todas las pistas de un disco en forma de una sola selecci n de un programa la funci n de escucha sin orden selecciona y hace que se escuche una sola pista y lueg...

Страница 33: ...r REPEAT se pone en OFF MODOS DE ESCUCHA SELECTA EDIT Se seleccionan las pistas y se escuchan de modo que cuando se graban nicamente se graban las pis tas completas en cada lado de la cinta 1 Apriete...

Страница 34: ...de programa en la memoria de programa 5 Repita las etapas 2 4 para dar entrada a selec ciones adicionales en el programa 6 Para dar entrada a todas las pistas de un disco seleccione el n mero del dis...

Страница 35: ...olver el problema PROBLEMA CAUSA POSIBLE REMEDIO Cuando se pone en Conexi n de enchufe macho de Inserte firmemente el enchufe macho en ON el pulsador POWER alimentaci n el ctric defectuosa o no el enc...

Страница 36: ...a apparecchiatura stata collaudata ed conforme ai parametri prescritti per i dipositivi digitali Categoria B in conformit alla sezione 15 dei Regolamenti FCC Questi limiti sono progettati per fornire...

Страница 37: ...sfilare il disco verso l alto afferrandolo attentamente dai bordi Per evitare di sporcare o rigare i dischi ricordare di rimetterli nella loro custodia subito dopo l impiego Per evitare la distorsion...

Страница 38: ...e STOP 5 per terminare l ascolto normale La spia PLAY si SPEGNE Il display TRACK NUMBER indica 1 NOTA L unit si ferma quando l ultima pista del disco numero 5 terminata RIPETERE LA RIPRODUZIONE 10 Pre...

Страница 39: ...ore del tele comando va puntato verso la finestrella del sensore degli infrarossi sul cambiadischi Assicurarsi che il tragitto tra il cambiadischi e il telecomando non sia ostruito da oggetti che poss...

Страница 40: ...Se si preme il pulsante PLAY durante l esecuzione dell Introduzione il modo di Controllo Introduzione cessa l esecuzione normale del disco continua quindi da tale punto Come selezionare un disco per i...

Страница 41: ...pulsante PLAY La spia EDIT rimane accesa La spia PLAY si accende Si accende la spia EACH Se una met della durata del nastro in minuti fosse pi breve del tempo d ascolto della prima pista inizia allora...

Страница 42: ...te il cambiadischi si arresta La spia PLAY si SPEGNE La spia MEMO RY rimane ACCESA Il display TIME indica P 01 Esempio Per l ascolto della pista 5 della pista 2 e della pista 8 sul disco numero 3 nell...

Страница 43: ...ulire il disco Non vi suono Connessioni non corrette dei cavi Collegare il cambiadischi come audio prescritto all amplificatore ricevitore Funzionamento non corretto Assicurarsi che il selettore di in...

Страница 44: ...gjort alla anslutningar s tter du i n tslad den i ett v ggutag 1 LINJEUTG NGAR Anslut ena nden av signalkabeln som medf ljer till dessa uttag och anslut den andra nden till uttagen m rkta CD DAT AUX...

Страница 45: ...ontrollen en tv eller tre g nger f r att visa f ljande information Om du trycker en g ng visas den terst ende tiden och sp ren p den aktuella skivan Om du trycker tv g nger visas den totala speltiden...

Страница 46: ...slingan Programmerad spelning forts tter fr n den punkten 7 N r det sista lagrade sp ret har slutat spela kommer CD v xlaren att stanna PLAY indikatorn slocknar MEMORY indikatorn r fortfarande upplyst...

Страница 47: ...sig programmerad spelning 1 Programmera nskad sekvens 2 Tryck p SHUFFLE knappen 3 Tryck p PLAY knappen OBS Om alla sp ren p en skiva har valts som en sekvens i ett program kommer shuffle funktionen at...

Страница 48: ...46 OBS Andra bandl ngder kan v ljas Se Att ndra ban dl ngden F r att avbryta redigering trycker du p EDIT en fj rde g ng eller p STOP knappen EDIT indikatorn slocknar 3 Tryck p den DISC NUMBER knapp...

Страница 49: ...1 Tryck p PLAY n r du lagrat programmet 2 Programsekvensen startar fr n b rjan av det f rsta programmerade sp ret 3 N r programmerad spelning startar visas alla lagrade sp rnummer och numret p det sp...

Страница 50: ...Anslut CD v xlaren till f rst rkaren lkablarna korrekt F rst rkaren mottagaren fungerar Se till att ing ngs v ljaren p ej korrekt f rst rkaren r inst lld p CD Ljudet hoppar CD v xlaren uts tts f r vib...

Страница 51: ...igital error correction Digital code output REMOTE CONTROLS PHYSICAL SPECIFICATION Dimensions in mm Width x Height x Depth Net weight Shipping Weight Five discs 120 or 80mm Bitstream converter 8 x ove...

Страница 52: ...NAD ELECTRONICS LTD LONDON 1994 517 I M...

Отзывы: