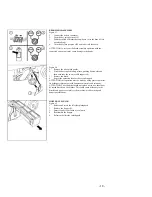
Figure 5
For battery installation:
1.
Lift the base support of the seat.
2.
Lean the seat on to the steering wheel
3.
Rotate back the recovery tank towards the rear until it locks in
place.
4.
Put the batteries into position and connect the battery cables.
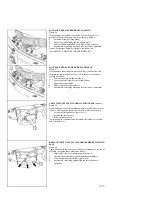
Figure 6
5.
Unfasten the support and put the recovery tank into its working
position
6.
Lower the base support of the seat.
CONNECTION OF THE BATTERY CHARGER
Figure 7
1.
Raise the seat base support.
2.
Disconnect the machine connector from the battery connector.
3.
Connect the battery charger directly to the battery connector.
The coupling connector of the battery charger is delivered in the
bag where this instruction booklet is found and must be
assembled on the battery charger cables following the suitable
instructions (see instruction booklet of the battery charger).
ATTENTION: this operation must be carried out by specialized staff.
A wrong or defective connection of the cables to the connector may
cause serious damages to people or things.
RECHARGE OF THE BATTERIES
Figure 8
Make sure that the battery charger fits the installed batteries either for
capacity or for type (lead/acid or GEL and equivalents).
ATTENTION: never charge a GEL battery with an unsuitable battery
charger. Carefully follow the instructions given by the manufacturer
of batteries and battery charger. To prevent permanent damage to the
batteries, avoid their complete discharge and effect recharging within
a few minutes after that the signal lamp of discharged batteries begins
to blink.
NOTE: Never leave the batteries completely discharged, even if the
machine is not being used. When recharging the batteries, keep the
base support of the seat lifted. After every 20 recharging operations,
- 4 -


