background image

- 21 -

cm

inch

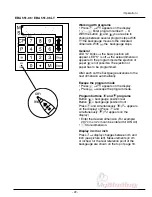
Eject function program

• Set the measurement 

©

 push 

g

 button

and 

r

 simultaneously. 

e

 appears shortly

on


the display. The backgauge will advance

and  eject the paper and finally return to the
position shown on the display.

Programming of multiple cut dimension

p

 Press 

©


P

 appears on the display.

1

 ... 

9

 Enter program number 1 ... 9.

First figure on display = program number.
Second figure = program step.
Enter the cut size on the display 

S

.

g

 Store the dimension.

1

 ... 

9

 Enter multiple cut size.

©

 Press 

T

 button 

E

 and multiple cut size

appears on the display. Press 

T

 button

again 

F

 and second

multiple cut size appears etc.

g

 Store the dimension.

p

 + 

s

 Escape the program mode.

Maximum nine multiple cuts can be entered.
Entering the tenth multiple cut will delete the
multiple cut and the display will show the
actual program step.

Deleting a dimension when programming

Press 

s

 and overwrite the dimension.

Cancel a program

p

 press 

©


P

 appears on the display.

1

... 

9

 Enter program number 1...9.

• Press button 

c

 twice.

Each program has to be cancelled separately.
Only single program steps can be overwritten.

Deleting the last program step

• Enter 

0

.

• Press 

g

.

p

 + 

s

 Escape the program mode.

• Operation •

Содержание EBA 551-06

Страница 1: ...Instruction Manual Provided By http www MyBinding com http www MyBindingBlog com MBM Triumph 5551 06 Hydraulic Paper Cutter...

Страница 2: ...07 2005 pmd B_Muster 550 06LT___03 2006 pmd B_Muster 721 06LT___05 2006 pmd Dieser Text darf nicht sein Guillotines GB Operating Instructions F Mode d emploi NL Gebruiksaanwijzing I Manuale d istruzio...

Страница 3: ...available F Nous vous prions de lire attentivement le mode d emploi avant d utiliser la machine et attirons votre attention sur les consignes de s curit Les instructions d utilisation et les consigne...

Страница 4: ...ar com a m quina GR CHI UAE D Nicht unter das Messer fassen GB Do not reach beneath the blade F Ne pas passer les mains sous la lame NL Niet met de handen onder het mes komen I Non toccare la lama nel...

Страница 5: ...atenci n No desmontar no transportar la cuchilla sin protecci n v rase p g 26 y 28 Advertencia Peligro de hacerse da o S L mna aldrig maskinen obemannad Ta inte ur eller transportera kniven utan skyd...

Страница 6: ...ravujte nuz bez ochrann ho krytu viz strany 26 a 28 Nebezpec Riskujete zranen P Deixar a faca sempre em local seguro N o retirar ou transportar a faca sem protec o Ver p g 26 e 28 Perigo Risco de dano...

Страница 7: ...material som kan splittras FIN Asentakaa laite lasten ulottumattomiin N Ikke kutt hardt metall eller materiale som kan splintre PL Nie ciac twardych material w lub material w kt re moga ulec odprysnie...

Страница 8: ...d size This machine is constructed for one man operation only Disconnect from the mains before starting any service work or before removing the panels Replacement of blade and cutting stick may be per...

Страница 9: ...ponents which could endanger the operator are covered by a guard B Do not operate the machine without the following safety devices Safety beam guard A Panels tightly screwed B The cutting action which...

Страница 10: ...cable against heat oil and sharp edges Standard machines are factory set as follows Voltage 230 V 120 V 1 phase Frequency 50 Hz 60 Hz When not in use for a longer period switch off Main switch to 0 Sa...

Страница 11: ...rs Align the machine as followes Remove cover A Align machine with water level and adjust accordingliy 4 x screws size 19 4 x nuts B Reference area machine table C Replace cover A The machine is deliv...

Страница 12: ...the safety devices are functioning and complete before use All covers have to be mounted A Operation The release for cutting is allowed only if the two hand safety device is operated at the same time...

Страница 13: ...e main switch to I A Blade locking facility B must be pulled out Press S button C Machine will automatically go to the start position The machine is now ready for use The measurement is set either wit...

Страница 14: ...used as cutting line indicator for cutting Pre clamping can be performed using the foot pedal C Only use the optical cutting line indicator and mechanical cutting line indicator when no exact cut is r...

Страница 15: ...ure marks on sensitive material To dismantle Remove the clamp plate A by turning the screwdriver found in tool box in the space between the clamp and clamp plate The remaining cut is 32 mm To mount Th...

Страница 16: ...If a cutting process has been activated the oil pressure can be seen on the oil pressure indicator B The clamp moves automatically when cutting is activated The paper can be pressed in advance with t...

Страница 17: ...is in motion A cut can only be activated when the specified size is approached The LED S on the display must be deleted Release the photo electric beam guard A Press both buttons of the safety two ha...

Страница 18: ...gauge setting H Blade locking I Backgauge J Side lay left and right K Clamp pressure L Clamp pressure adjustment M Display cutting size cm or inch N Select program step up O Select program step down P...

Страница 19: ...s button Press S button dimension is approached LED S disappears Dimensions below 9 cm can only be approached with the S button pressed and held When the S button Qis released the backgauge Imoves to...

Страница 20: ...dvance to the measurement with the S button Push the paper to the backgauge I Press T button the red LED M alight will be on Enter the multiple cut size After each cut the backgauge advances to the ne...

Страница 21: ...at any time These programs remain stored when the machine is off Should you change to another dimension unit all programmed measurements are converted into the new unit cm or inch Entering a program...

Страница 22: ...Press T button E and multiple cut size appears on the display Press T button again F and second multiple cut size appears etc g Store the dimension p s Escape the program mode Maximum nine multiple c...

Страница 23: ...The ejection of paper has to be programmed After each cut the backgauge advances to the next dimension automatically Escape the program mode Press p P appears on the display Press s escape the program...

Страница 24: ...The blade cannot be ground if the blade height is less than 82 mm 3 23 inches A new blade must be used Blades may only be sharpened by a specialist Danger Risk of injury The blade is extremely sharp...

Страница 25: ...et mains switch A to position I Set clamping oil pressure B to min 50 bar Press in blade locking key C Activate cutting blade remains in lowest position Set mains switch to position 0 Remove the left...

Страница 26: ...25 A B Remove both outer screws Mount blade changing tool A Tighten screws B Blade and cutting stick replacement...

Страница 27: ...678 EBA 551 06 EBA 551 06 LT A B Remove remaining two screws A Simultaneously slightly loosen both screws B and remove blade with blade changing tool Weight of blade approx 5 kg Place the blade into t...

Страница 28: ...used side must be near to the blade Turn screw C as far as possible to the right Otherwise the first cut will be too deep Slightly tighten screws A Danger Risk of injury Cutting test after replacing t...

Страница 29: ...ade changing tool D Check if when using the upper threads B the blade E is protected The blade is not protected Use the lower thread C for fixing The screws A may not exceed at the rear side of the bl...

Страница 30: ...29 Screw in middle screws and tighten Remove the blade changing tool Slightly screw in outer screws Blade and cutting stick replacement...

Страница 31: ...23456789012345678 EBA 551 06 EBA 551 06 LT 1 2 1 1 2 Press in blade locking key Set main switch to position I Activate cutting blade remains in the lowest position Set main switch to position 0 Screw...

Страница 32: ...slides onto the cutting stick Push the blade and screw B as far as possible to the left or right and then centralize them The blade must rest on the cutting stick Push in the first screw on the left...

Страница 33: ...012345678 123456789012345678 EBA 551 06 EBA 551 06 LT 2 3 4 5 Tighten the remaining 3 screws beginning from the left Pull out blade locking key blade moves to the top Tighten the screw which is visibl...

Страница 34: ...are not completely cut gradually turn the knob for blade depth adjustment A 1 6 turn to the left until the paper is cut along the entire length Do not set too low as blade will soon become blunt Turn...

Страница 35: ...according to the lubrication diagram after 1000 operating hours or once a year If the machine is subject to excessive load then twice a year The hydraulic oil must be changed every 2000 operating hou...

Страница 36: ...ype of grease Roller bearing grease all types Oil hinges of the foot clamping device at the front area of the machine room Type of oil SAE10 to SAE50 all types Safety test The safety regulations are a...

Страница 37: ...BA 551 06 EBA 551 06 LT B A Machine does not function Is the machine plugged in Main switch to position I A Blade locking facility B must be pulled out Push in the fuses in the back of the machine F1...

Страница 38: ...tton again Measurement below 9 cm Hold the S button until the measurement is achieved Oil pressure set too low Increase oil pressure at rotary control A Hydraulic oil shortage Check hydraulic oil leve...

Страница 39: ...BA 551 06 LT A Does not cut through the last sheet Reset the cutting depth A or turn replace the cutting stick B See page 27 Blade and cutting stick replacement A reduction in the cutting quality indi...

Страница 40: ...r www eba de Service service krug priester com Trouble shooting light beam During normal operation the LED A must iluminate orange and LED B green Display C is permanently on orange when the sender an...

Страница 41: ...123456789012345678 EBA 551 06 EBA 551 06 LT Recommended accessories HSS Blade 4 244 4 036 6 Cutting sticks 4 244 1 209 Blade changing tool 1 3 244 0 024 Paper knock up block 1 9000 521 Side tables le...

Страница 42: ...to DIN 51562 Used oil must be disposed of at the authorised place Ambient operating temperature 10 C 60 C Air humidity not condensating 15 95 The exact technical specifications can be found on the te...

Страница 43: ...42 bersetzungen siehe 550 2006 09 123456789012345678 123456789012345678 123456789012345678 123456789012345678 EBA 551 06 EBA 551 06 LT...

Страница 44: ...mes aux dispositions pertinentes suivantes voldoet aan de eisen van de in het vervolg genoemde bepalingen conforme alle seguenti disposizioni pertinenti satisface las disposiciones pertinentes siguien...

Страница 45: ...6 EBA Krug Priester 72336 Balingen Germany www eba de EBA Made in Germany Aktenvernichter Document Shredders Destructeurs de Documents Papiervernietigers Distruggidocumenti Destructoras de Documentos...

Отзывы: