10
3
Unpack Your Microphone
Begin by examining the contents of your MXL® USB kit.
You should have the following components:
• Protective case
• One MXL® Studio 1 USB microphone
• A 10-foot USB 2.0 high speed cable
• A desktop microphone stand
• Microphone stand mount adapter
• Owners manual
• Microphone applications guide
Getting Familiar With Your Microphone
In addition to speaking or singing into the side of the microphone with the RED
LED facing you, you should also notice the 1/8” stereo headphone jack on the
front. This is a stereo headphone jack for monitoring the microphone’s
signal as well as hearing the audio played back
from your computer. The 1/8” jack accepts
most headphones but the maximum headphone
volume will vary by manufacturer and model so
care should always be exercised when fi rst
plugging in.
Using the Supplied Desktop Microphone Stand
1. Screw the microphone stand mount to the desktop stand.
2. Separate the desktop stand’s legs and place it on a fl at surface.
3. While holding the microphone upright and fi rmly in one hand, secure the
microphone to the desktop stand by screwing the black mounting ring into the
microphone’s base. The microphone should now sit securely in the desktop stand.
4. Adjustments can be made to the angle of the microphone by loosening the
thumbscrew on the side of the stand adapter.
5. At this point, attach the end of the USB cable that matches the microphone’s
connector. The other end of the cable will connect to your computer’s USB port.
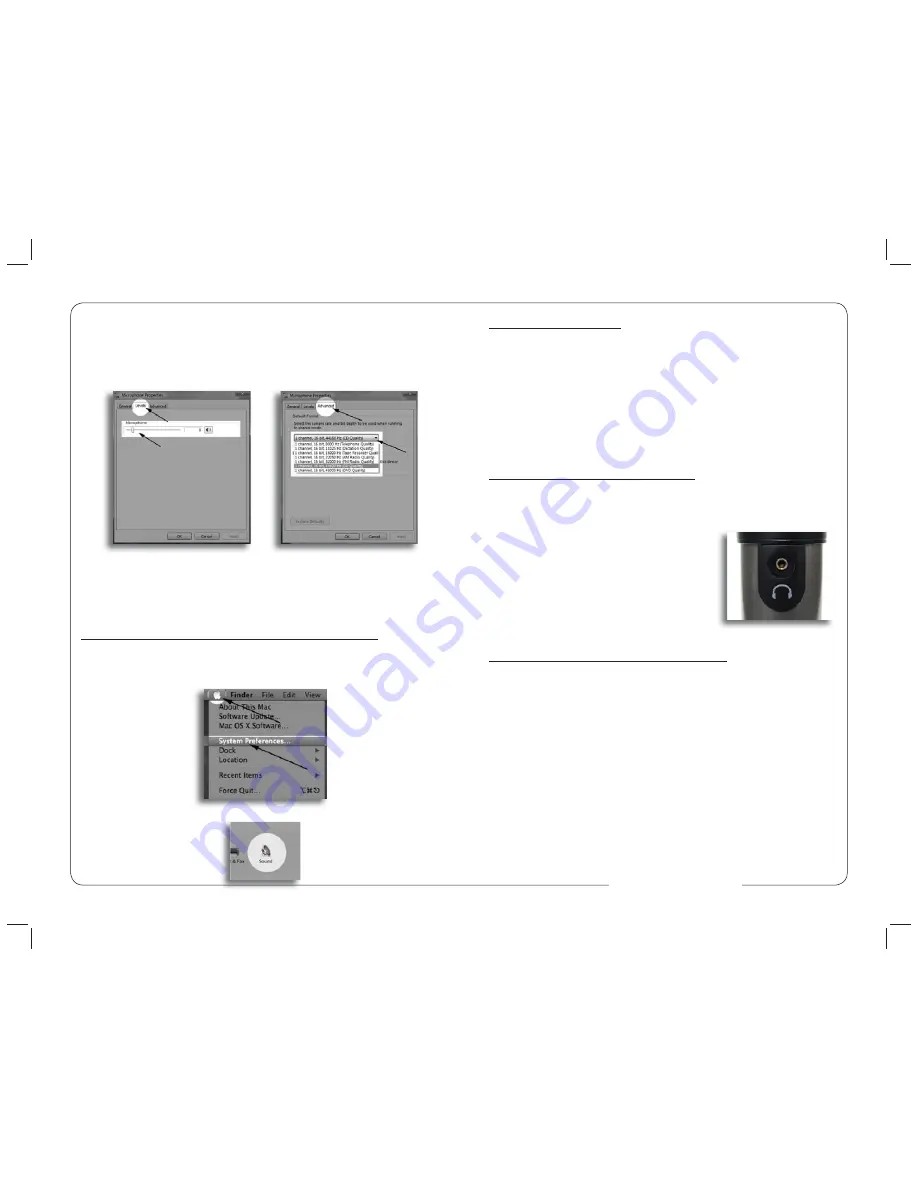
6
. Click on the tab labeled
Levels
and adjust the
Microphone
fader. The gain
of the microphone is very sensitive. For most applications the fader will be set
towards the left.
To make adjustments to the sample rate and bit depth click on the tab labeled
Advanced
and select the appropriate setting in the drop down menu.
Your computer is now setup to use the MXL® Studio 1 USB microphone with
most recording applications. Some applications will require additional settings
to be changed within the program. Please see your recording software’s manual
for proper setup.
Connecting the Microphone to Your Computer (Mac OSX)
1
. To select the Studio 1 USB as the default sound device click on the Apple
icon at the top of the screen then select the
System Preferences...
2
. Click on the
Sound
icon.
www.mxl-usb.com


