


11
Chapter 2 Hardware Installation
Make sure that power to all the devices which will be connected to this device have been turned off. You must
unplug the power cords of any computers which have the
Keyboard Power On
function.
2.1 Install KVM Dongle for Controlled PC
Plug your USB and/or PS/2 type KVM Dongle Unit into Controlled PC.
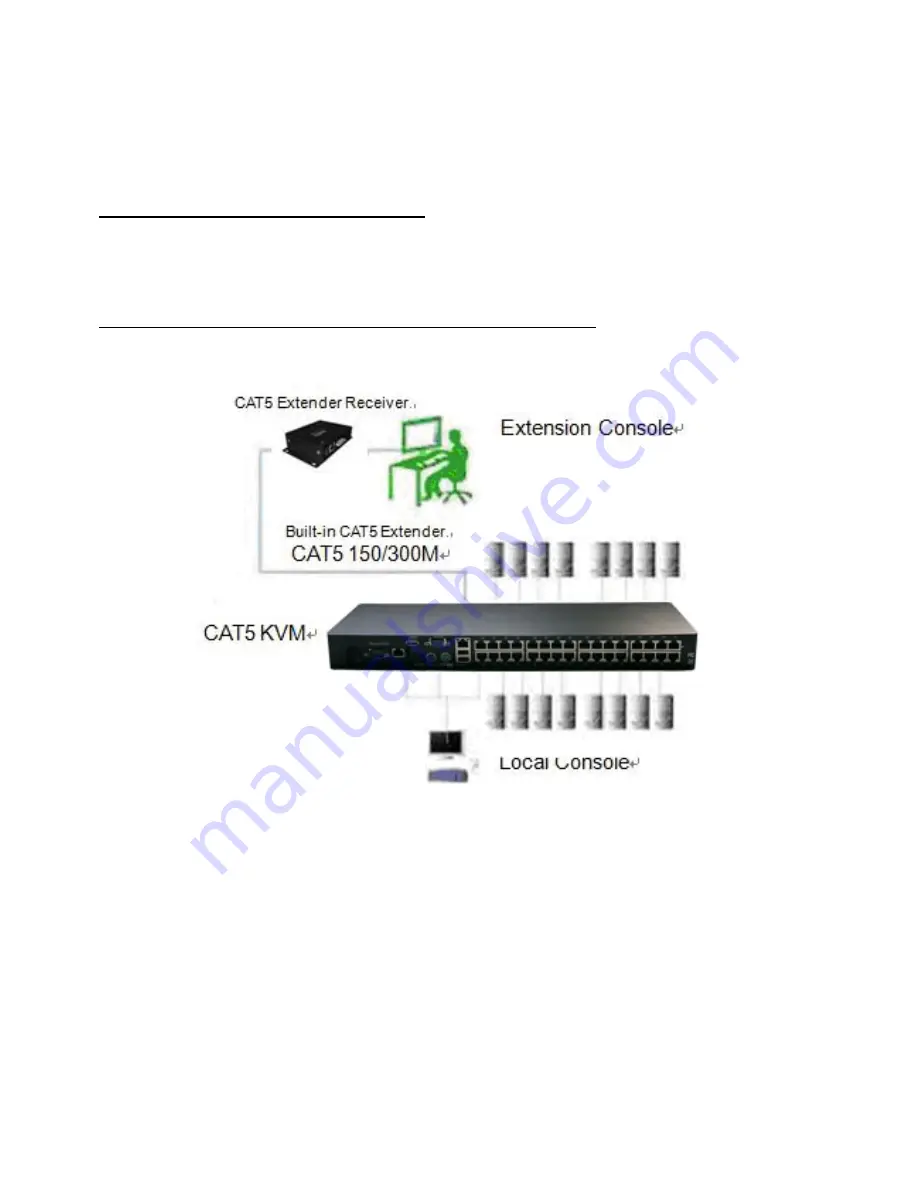
2.2 Single CAT5 KVM Installation – access up to 8 / 16/ 32 PCs
The Single unit of CAT5 KVM installation can access up to 8 / 16 / 32 computers. To install the CAT5 KVM,
please follow the next steps:
1. Connect the local Monitor, keyboard and mouse to the appropriate CAT5 KVM console ports.
2. Connect a CAT5e/6 cable between CAT5 KVM port and the KVM Dongle.
3. Install an Extension Console Unit (Optional)
:
Connect a CAT5e/6 cable between Extension Console Unit
and CAT5 KVM [LINK] port. For image EQ, Gain and RGB Skew adjustment, please refer to the Installation
manual.
For the DDC-2/EDID protocol to function properly, please Power ON all equipments in sequence of:
Power ON the CAT5 KVM local Monitor.
Power ON all controlled computers.
Power ON CAT5 KVM