VJ-2606 INSTALLATION MANUAL
5
VJ2606E-I-01
1
2
1
5mm 5mm
5mm
5mm
2
1
2
1
2
1
1
2
3
4
4
1
2
1
1
2
1
1
1
2
1
2
3
1
2
3
1
2
3
1
2
3
(Cont'd)
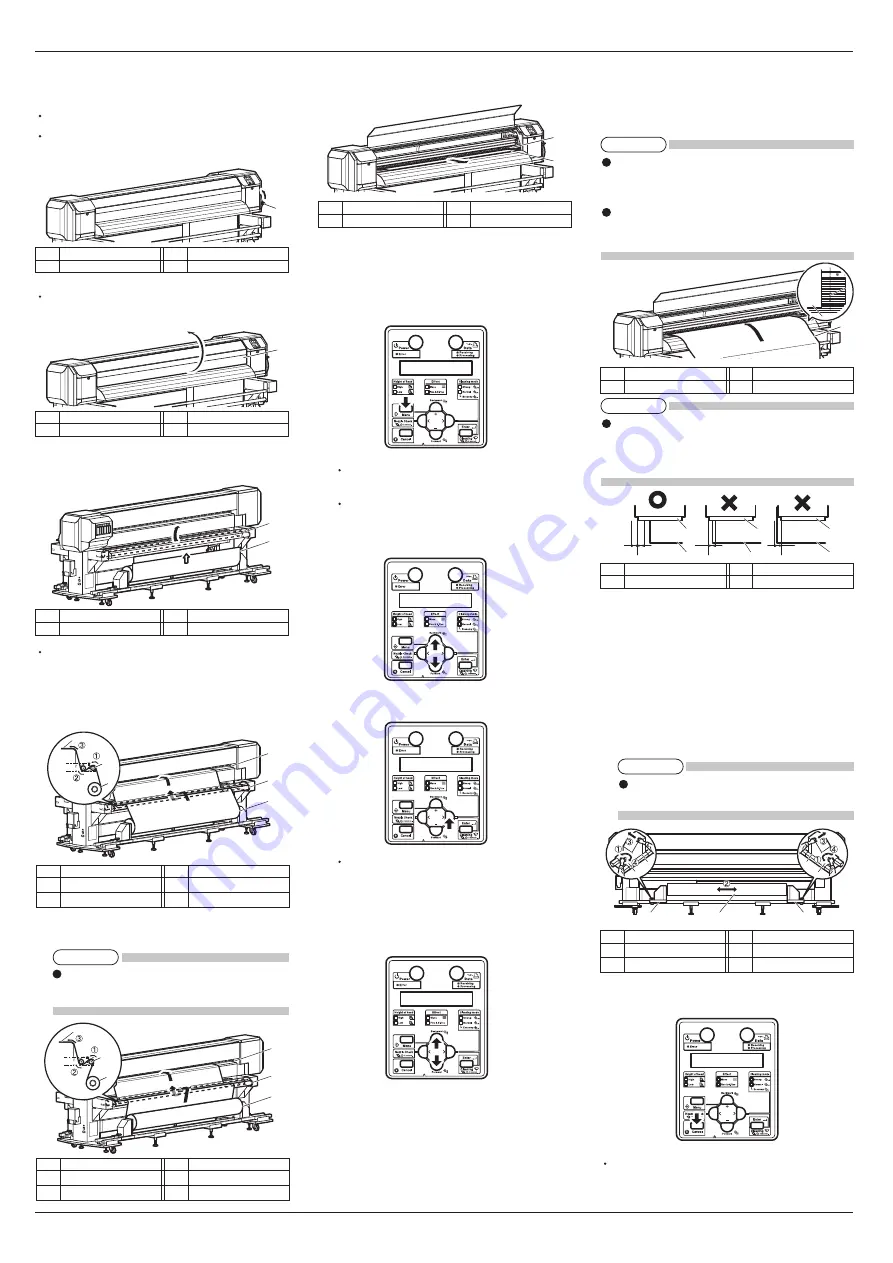
6. Turn the printer ON.
The printer starts initial operation.
"Media End" is displayed on the operation panel.
7. Raise the media loading lever.
"Lever Up" is displayed on the operation panel.
8. Open the front cover.
9. Lift the tension roller on the rear of the printer us-
ing your hands.
The roll media is fed.
10. Pass the roll media through the tension roller first,
and insert it into the media feed slot.
a. When using roll media with the printing side
facing outwards
b. When using roll media with the printing side
facing inwards
Any problems caused by using roll media with
the printing side facing inwards cannot be cov-
ered by the warranty.
11. Pull the roll media approximately 1 m out of the
media feed slot, which is inside the front cover.
12. Display the Manual reel menu on the operation
panel.
a. Press the [Menu] key on the operation panel.
Press the [+] key or [-] key to select "Menu6:
Manual Reel >".
The display enters the Setup menu.
b. Press the [+] key or [-] key to select "Menu6:
Manual Reel >".
c. Press the [>] key on the operation panel.
"<- Order [T-up] Reverse ->" is displayed on
the operation panel.
13. Press the [+] key or [-] key to select "<- Order
[Feed] Reverse ->".
14. While holding the front end of the roll media, wind
the media back for a short distance by pressing the
[>] key on the operation panel so that the media is
not slack or slanted.
If you release your grip on the roll media while it
is being wound, the media may slip off the media
feed slot and fall behind the printer.
Make sure that the right end of the roll media does
not go beyond the media loading mark. It may af-
fect print quality.
When loading roll media, set each side of the media
at least 5 mm away from the edges of the pressurizing
roller. Failing to do so may cause the media to slip
or wrinkle while being printed on.
15. If the distance between the edge of the roll media
and the pressurizing roller is less than 5 mm, follow
the procedure below to adjust the position of the
roll media.
a. Loosen the fixing knobs of the right and left feed
units, and move the roll media to the right or left.
b. After moving the roll media, tighten the fixing
knobs.
Be sure to press the feed units against the print-
er while locking them.
16. Press the [Cancel] key on the operation panel.
The operation panel returns to Normal.
(Continue to next)
No.
Name
1
Roll media
No.
Name
2
Media loading mark
No.
Name
1
Roll media
No.
Name
2
Pressurizing roller
No.
Name
1
Feed unit (Left)
2
Feed unit (Right)
No.
Name
3
Roll media
4
Fixing knob
No.
Name
1
Roll media
No.
Name
2
Media feed slot
No.
Name
1
Media loading lever
No.
Name
1
Front cover
No.
Name
1
Roll media
No.
Name
2
Tension roller
No.
Name
1
Roll media
2
Tension roller
No.
Name
3
Media feed slot
No.
Name
1
Roll media
2
Tension roller
No.
Name
3
Media feed slot
NOTE
NOTE
NOTE
NOTE


