Voice allocation
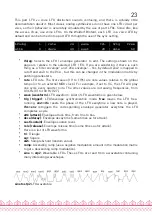
This page, accessible by the
S6
switch, serves two purposes:
•
Selecting the current part.
•
Assigning voices to a part.
Part 1
| chan 1
| low C-
| high G9
voicecard
| [1] [2] [3] 4 5 6
The first knob on the upper row is used to select a part. Notice how the
LP1
...
LP6
LEDs
indicate by a green light which part is active. All settings on all the other pages apply to the
part indicated by this green light.
chan (channel)
sets the MIDI channel the active part responds to. Use
omni
if you want a
part to respond to notes from all MIDI channels. Several parts can share the same MIDI
channel. This is useful for controlling two patches from the same MIDI controller, in split
or dual mode.
low
and
high
set the range of MIDI notes the active part responds to. This can be used to
create keyboard splits: set the range of part 1 to C- .. B3 and the range of part 2 to C4 ..
G9 ; and set both part 1 and part 2 to listen to the same MIDI channel. The result is that
part 1 is played on the lower half of the keyboard and part 2 on the upper half.
The lower part of the screen displays which voices are assigned to the active part. For
example, in the display capture shown above, voices 1, 2 and 3 are assigned to part 1. Use
the second knob on the lower row to assign/deassign voice 1 and 2 to the active part. Use
the third and fourth knobs to assign/deassign voices 3/4 and voices 5/6.
Note that you can assign to a part only voices which are not currently in use by another
part. For example, when Ambika boots, voices 1, 3 and 5 are assigned to part 1 ; and voices
2, 4, 6 are assigned to part 2. You will notice that it is not possible to assign voices 2, 4, 6 to
part 1 before having de-assigned them from part 2. It might not be convenient, but a voice
can only be used by one part, so this constraint has to be enforced!
Assigning/de-assigning a voice causes quite a bit of data shuffling between the processors
running each voicecard, and this causes interruptions/reset notes. Don’t do that during a
live performance!
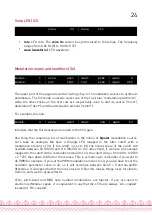
Shortcut:
Hold the
S1
switch while turning the encoder to change
the active part. This works on any page!
11


